
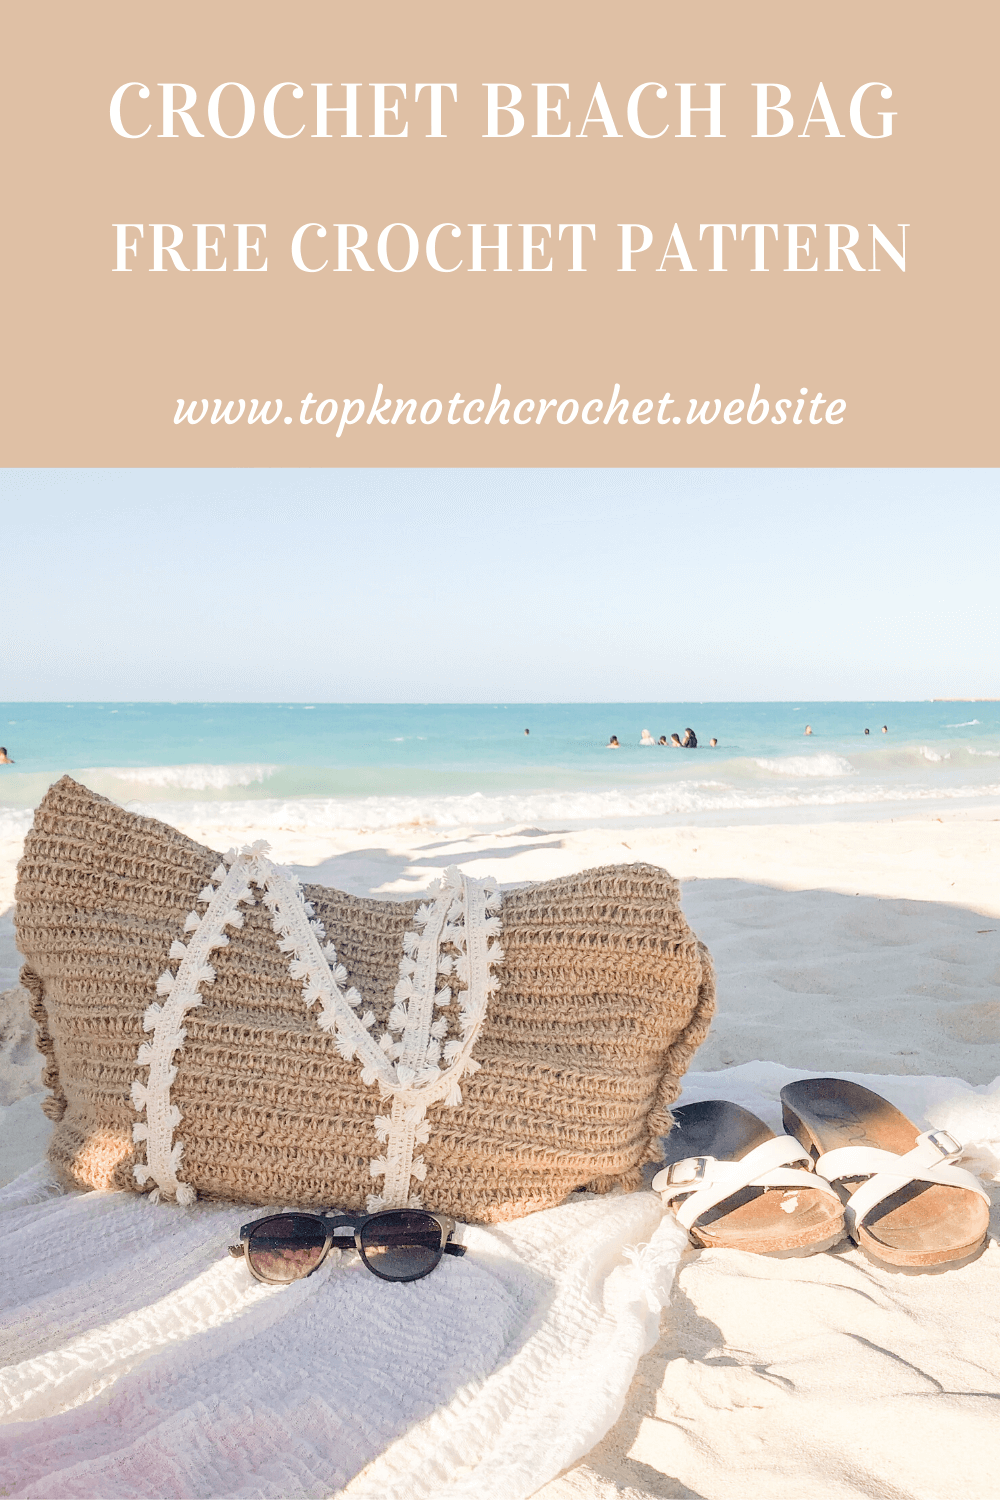
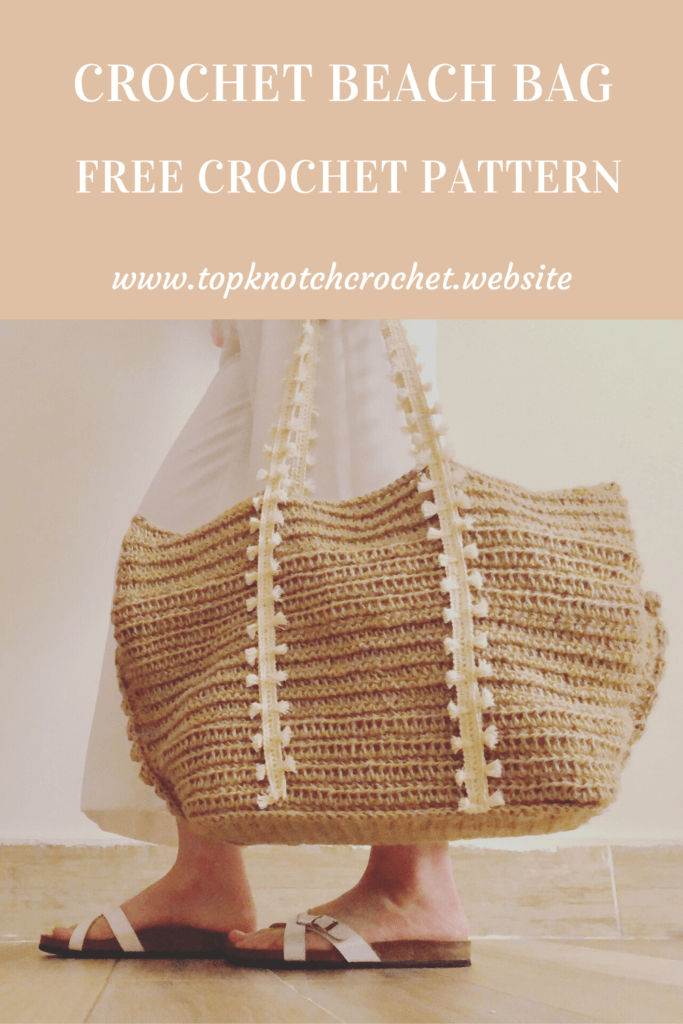
Hello everybody, am so excited to share this pattern with you today!! am in love with my new crochet beach bag and am in love with this yarn. Also I think some how am addicted to this yarn. Am thinking of making another beach bag, a matching hat and a basket to put my plant pot in. Oh wait as am writing this a great idea crossed my mind. I have this ceiling lamp shade that I hate I think if I made myself one with this yarn it would be great!
Now lets talk a little bit about this pattern
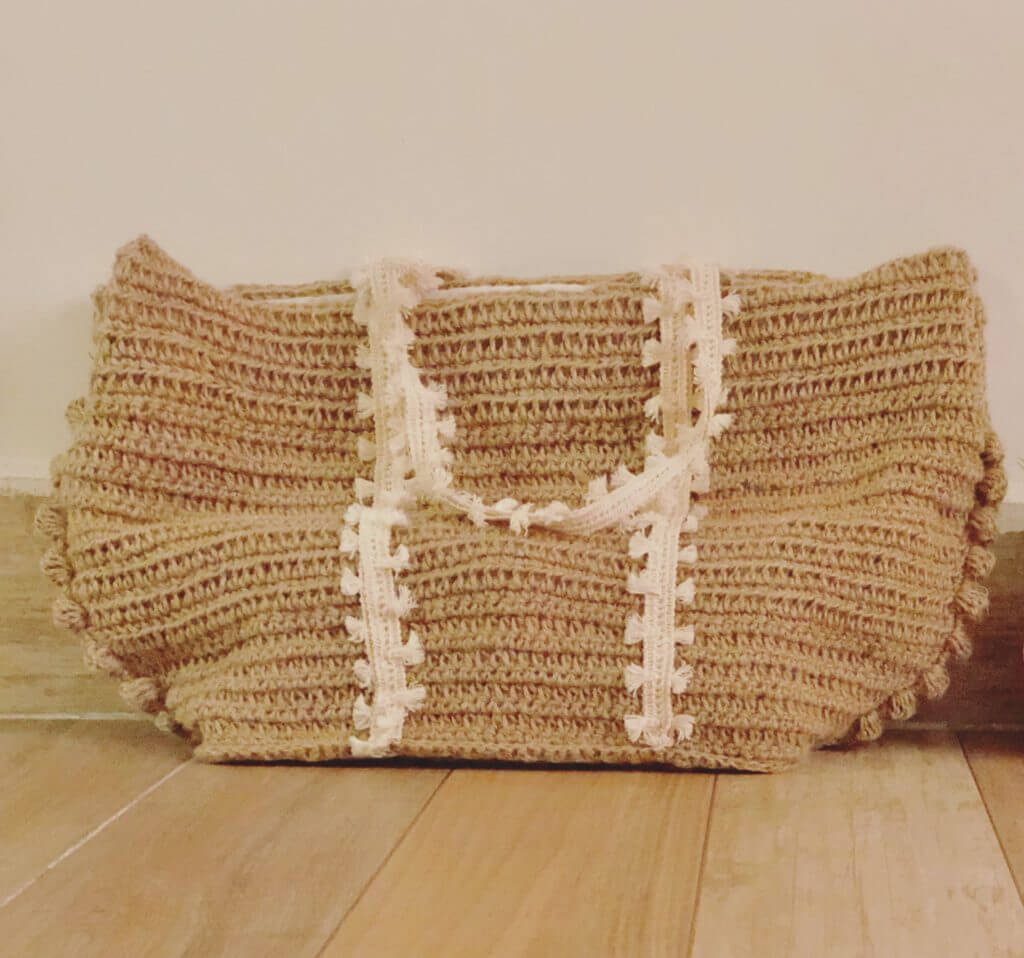
I made this beach bag big enough, so that you can fit all your beach essentials in. Also to add a different texture and color, I made the handles from this lace trim with those cute little tassels!! I hope you like this pattern as am loving it. And wherever you are in the world I also hope that you are enjoying your summer and having lovely experiences and adventures!!
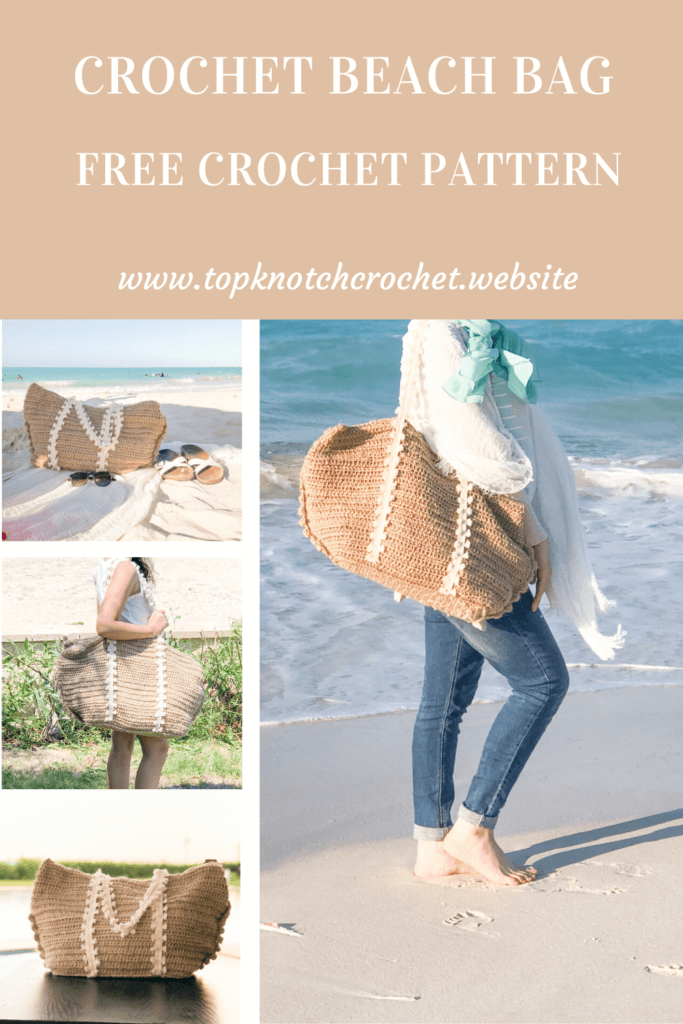
Pin it for later:
The materials you will need for this beach bag pattern are:
Disclaimer: This blog post may contain affiliate links. I may earn a small commission to fund my coffee drinking habit if you use these links to make a purchase. You will not be charged extra, and you’ll keep me supplied in caffeine. It’s a win for everyone, really.
- 4 rolls (actually it took 3 and a half) of natural twine yarn I bought mine from my local crafts store. However I Linked a few options that are very similar to the one I used KINGLAKE 300 Feet Natural Jute Twine , Katzco Heavy Duty All Natural Jute Twine, TIAMALL 300 Feet Natural Jute Twine, Natural Jute Twine 2 Pack
- Roughly 5 meters of lace trims of your choice again mine was from my local store. But I linked you very similar ones that I think would go great with the pattern Hongma Cotton Fringe Tassel Lace Trim, Susuntas 5 Yards 4cm Wide Cotton Lace Trim
- 4.5 mm hookHere is a set with one of my favorite hooks sets along with stitch markers and needles
- Stitch markers, sewing needle and matching thread, yarn needle to weave in ends, measuring tape.
- Optional cloth for the lining
Gauge:
Gauge: 10 cm square= 11 row (alternating between sc and hdc) and 12 stitches
Skill level: Beginner
Abbreviations and Glossary (US Terms):
- ch – chain
- sc – single crochet
- ss – slip stitch
- hdc- half double crochet
- bo – bobble stitch
Special Stitches:
`Bobble stitch
Yarn over, insert hook into the next stitch and pull up a loop. Yarn over, pull through two loops. as if you are doing the first part of a double crochet (DC) (2 loops on the hook); repeat it until you have 5 HDC on your hook and 1 initial loop (total 6 loops on the hook); yarn over and pull through all 6 loops (1 loop on the hook – pull pretty tight, so your bobble really pops up); and sc in the next stitch.
Notes:
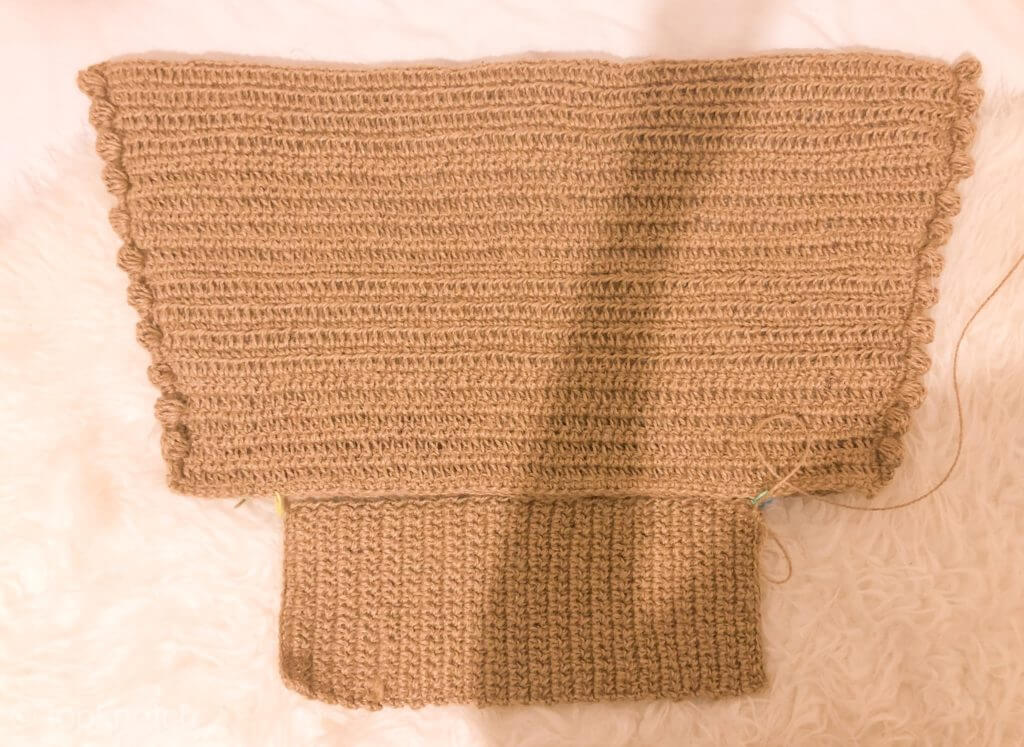
- The front and back panels are worked separately and joined to each other through single crochet then we will work the bobble stitches.
- The base of the bag is then worked. And the handles are then sewed to the bag.
- Chain one is NOT considered as the first stitch throughout this pattern
Some more important notes before starting.
- We will increase two stitches every five rows which means we will do two sc /hdc (according to the row we are working on) in each of the first and the last stitch of the row
- The rows we will increase on are the 5th, 10th, 15th, 20th, 25th, 30th, and 35th
- So we will start with 62 stitches and end with 76 stitches. Total increases are 14 stitches.
- We will alternate between single crochet and half double crochet to create some texture.
- Watch this tutorial and apply it through out the pattern to help you achieve straight edges.
- Finally and most importantly do not panic or get frustrated if you Don’t have the prefect borders or edges or increases you will see in the pictures bellow I didn’t get it it perfect. Even though am the one who wrote the pattern. I was so busy watching Gilmore girls on Netflix 😀 That I didn’t stick to it 100%. Sometimes am guilty of not paying full attention to my crochet. The point here is not to tell you not to pay attention but to tell you its okay if you missed up on a couple of rows like I Did and the bag turned out lovely.
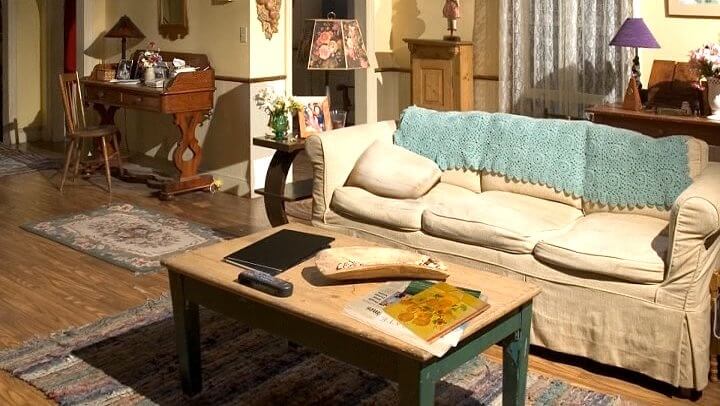
Speaking of Gilmore Girls have you seen this crochet blanket on their couch !! I just love it. any big fans of Gilmore Girls here??!
Now lets move directly to the pattern
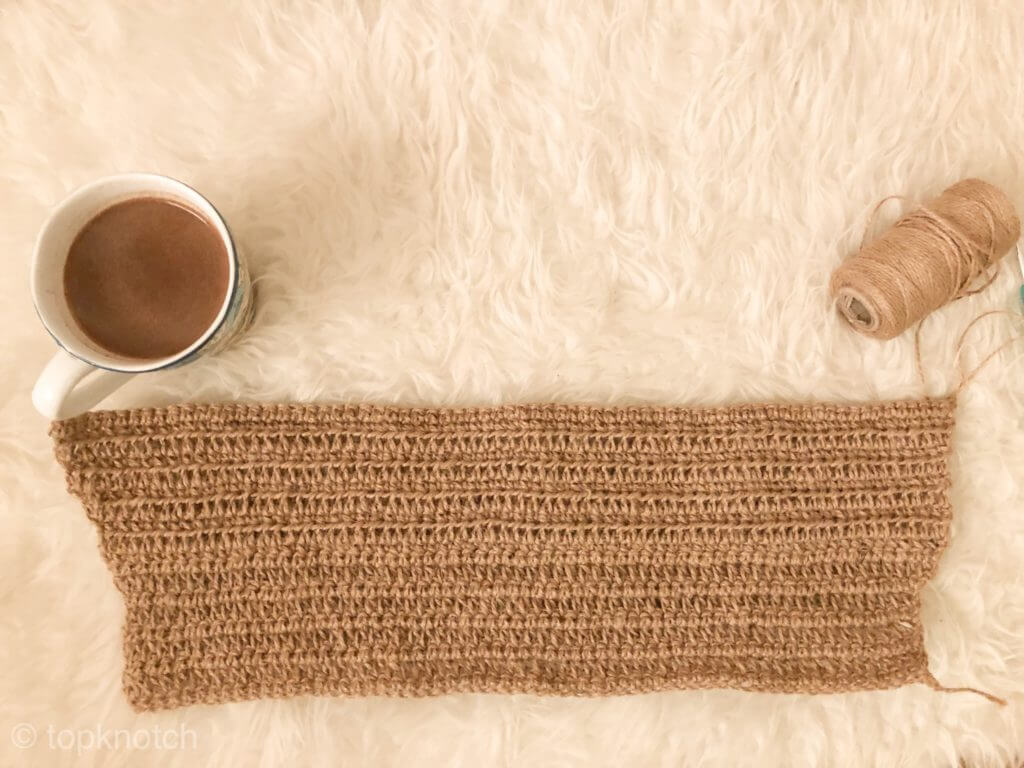
With a 4.5 mm hook, Chain 63
Row 1. Do one sc in each chain. so you have 62 SC, chain 1 and turn
Row 2. Hdc in the very first stitch and all the remaining stitches 62 stitches. chain 1 and turn
Row 3. Do one sc in each stitch from the previous row, chain 1 and turn.
Row 4. Repeat row 2 (hdc in each stitch)
Row 5. Do 2 sc in the very first stitch then complete the row as normal and finally do two sc in the last stitch (64 stitches) chain 1 and turn
Row 6. Hdc in each stitch from the previous row (64 stitches) chain 1 and turn.
Row 7. Sc in each stitch from the previous row (64 stitches) chain 1 and turn.
Row 8. Hdc in each stitch from the previous row (64 stitches) chain 1 and turn.
Row 9. Sc in each stitch around from the previous row (64 stitches) chain 1 and turn.
Row 10. Instead of the hdc we will do one sc row again. So that when we do the hdc the next row its right side will be reversed so we will have different textures. And don’t forget we will increase the same way we did on the 5th row. (66 stitches) chain 1 and turn
Row 11. Hdc in each stitch from the previous row (66 stitches) chain 1 and turn
Row 12. Sc in each stitch from the previous row (66 stitches) chain 1 and turn
Row 13. Hdc in each stitch from the previous row (66 stitches) chain 1 and turn
Row 14. Sc in each stitch from the previous row (66 stitches) chain 1 and turn
Row 15. We will increase here again the same way we did on the 5th and 10th rows but this time its hdc not sc (68 stitches)
Row 16. Sc in each stitch from the previous row (68 stitches) chain 1 and turn
Row 17. Hdc in each stitch from the previous row (68 stitches) chain 1 and turn
Row 18. Sc in each stitch from the previous row (68 stitches) chain 1 and turn
Row 19. Sc in each stitch from the previous row (68 stitches) chain 1 and turn
Row 20. We will increase here again the same way we did on the 15th row with hdc (70 stitches)
Row 21. Sc in each stitch from the previous row (70 stitches) chain 1 and turn
Row 22. Hdc in each stitch from the previous row (70 stitches) chain 1 and turn
Row 23. Sc in each stitch from the previous row (70 stitches) chain 1 and turn
Row 24. Hdc in each stitch from the previous row (70 stitches) chain 1 and turn
Row 25. We will increase here again the same way we did before on the 5th and 10th row with sc (72 stitches)
Row 26. Hdc in each stitch from the previous row (72 stitches) chain 1 and turn
Row 27. Sc in each stitch from the previous row (72 stitches) chain 1 and turn
Row 28. Sc in each stitch from the previous row (72 stitches) chain 1 and turn
Row 29. Hdc in each stitch from the previous row (72 stitches) chain 1 and turn
Row 30. Again we will increase in the same way with sc (74 stitches)
Row 31. Hdc in each stitch from the previous row (74 stitches) chain 1 and turn
Row 32. Sc in each stitch from the previous row (74 stitches) chain 1 and turn
Row 33. Hdc in each stitch from the previous row (74 stitches) chain 1 and turn
Row 34. Sc in each stitch from the previous row (74 stitches) chain 1 and turn
Row 35. The last increase with hdc (76 stitches)
Row 36. We will do one last row of sc. then cut yarn and weave in ends (76 stitches)
And we will repeat the whole process twice for a front and a back panel.
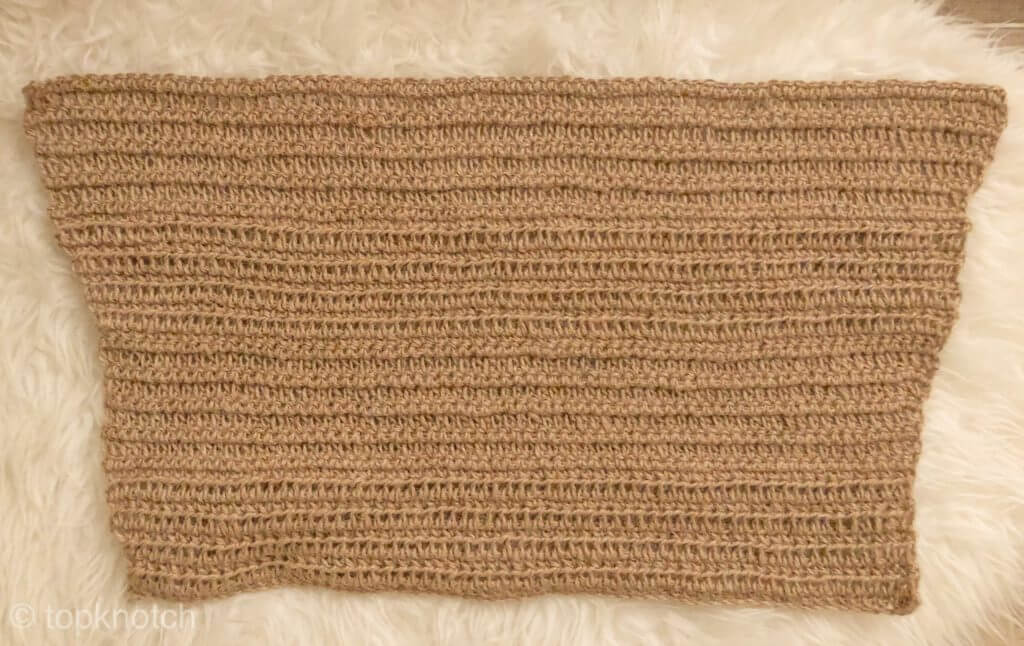
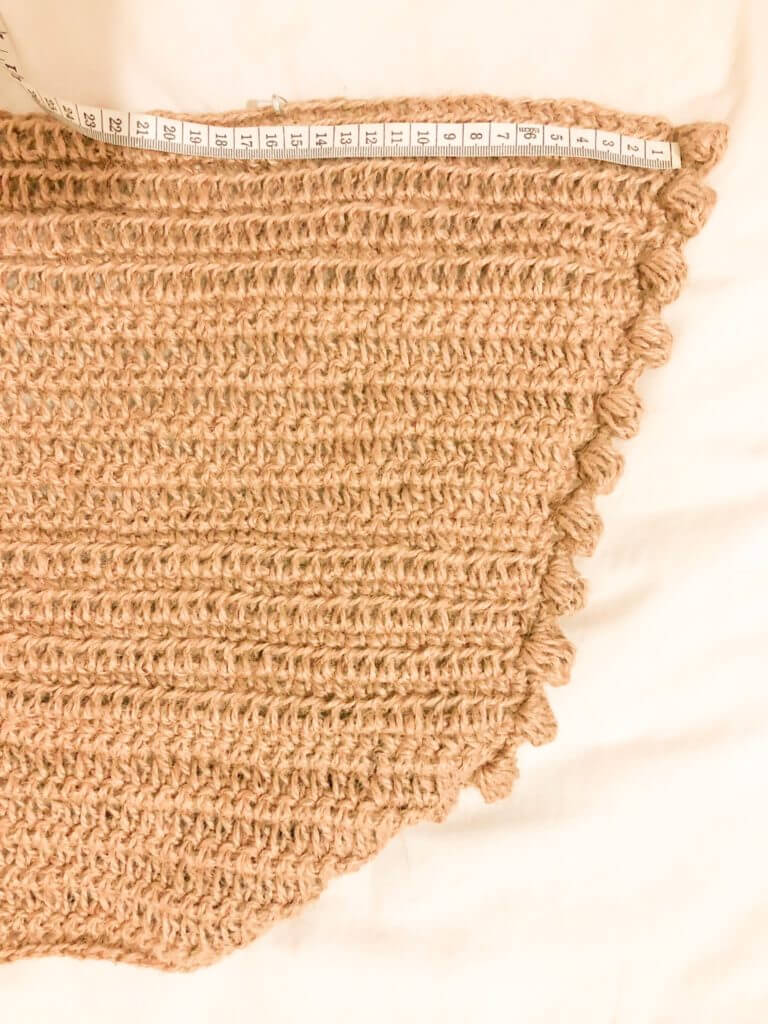
Bobble Edge
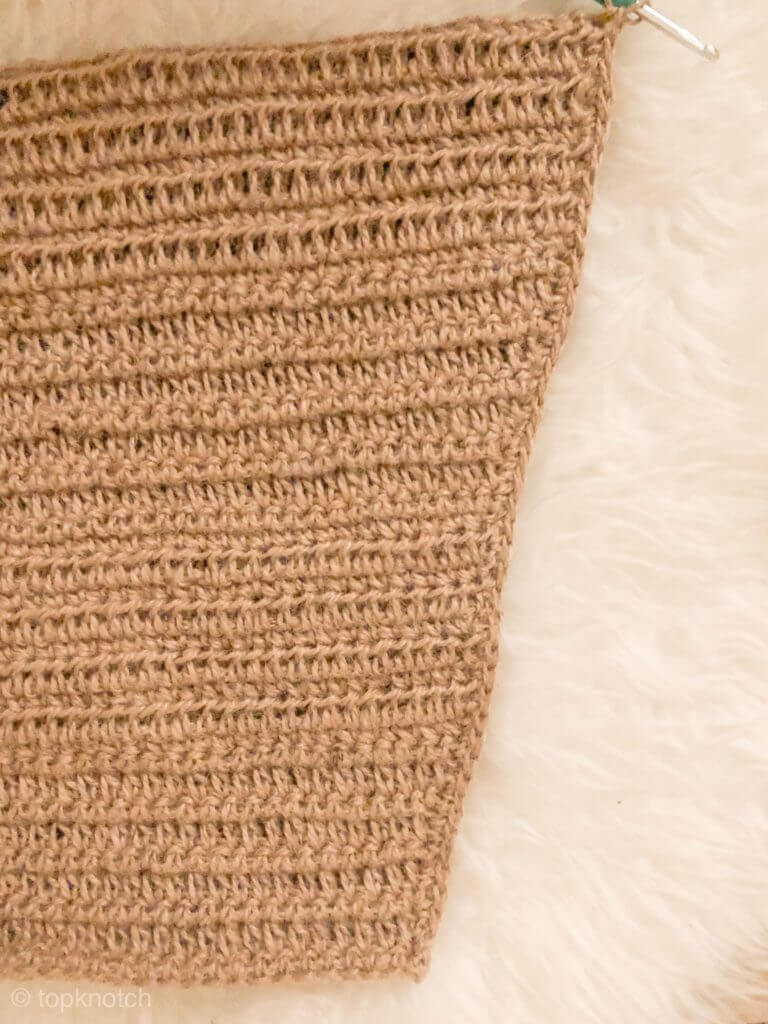
When you finish both parts we are going to align them together with the inside parts of the bag facing each other and start to single crochet the side edges together as seen in the picture. (we will goin each of the rows facing each other with one sc ) so we will have 36 single crochet stitches
To make the right side of the bobbles face one direction on both sides we will start joining the edges together from the bottom edge to the upper ( 36 stitches)
Then work your way back to the bottom with like this : *1 sc in each of the first two stitches and one bobble stitch * and repeat from * to* 10 more times and end with 1 sc in the last three stitches (see special stitches section above)
We will work the other side in the same way but we will start joining them from the upper edge to the lower then work our way back up with like this 1 sc in each of the first 3 stitches * 1 bobble stitch, 1sc in the next two stitches * repeat from * to* 10 more times
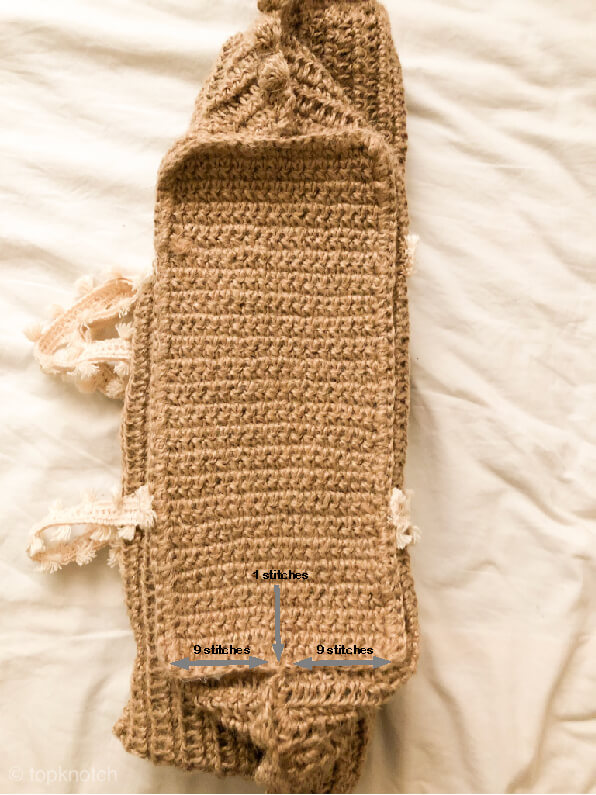
The base of the bag
We will make a rectangle like the one shown in the picture bellow
We will start with 20 chains so that we have 19 sc and we will work for 45 rows do not forget the tutorial I referred to earlier to get straight edges.
And sorry for my shadow in the picture 😀
You may also cut a thick card board piece the same size of the base and put it in the bag to support it.
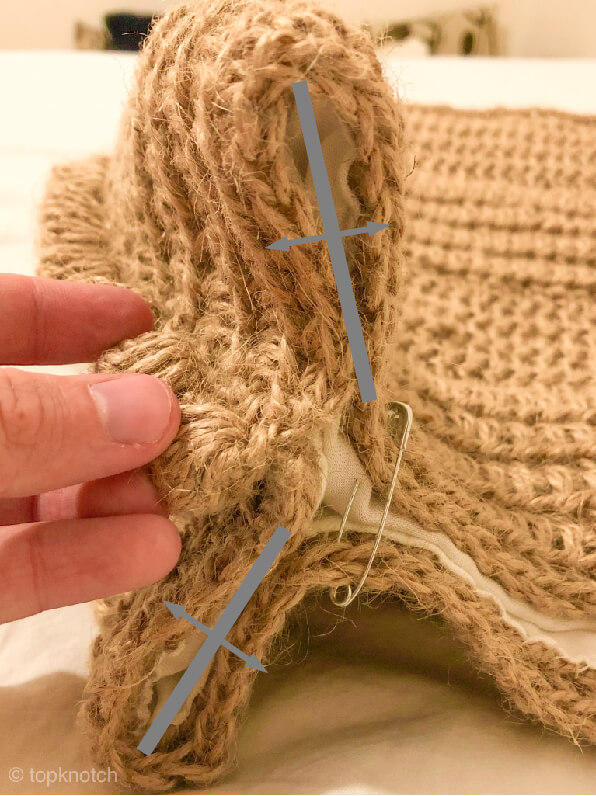
Joining the base to the bag
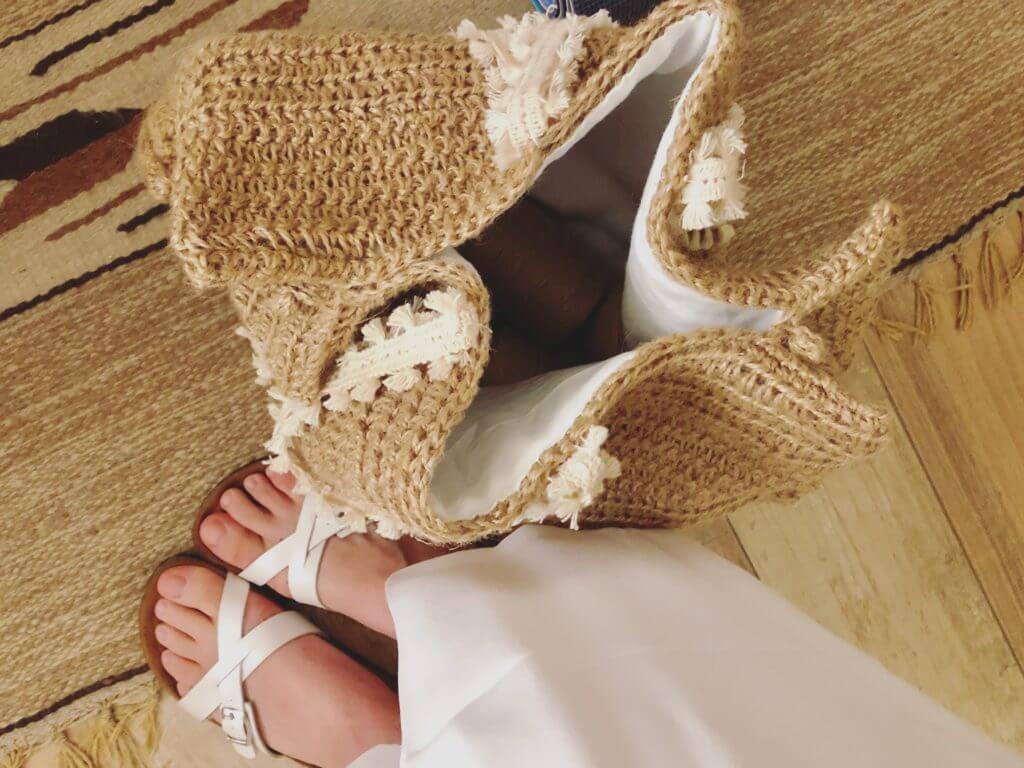
Since we have 19 stitches we want 9 of them to get attached to the back panel and the other 9 to the front and the last stitch to the middles where we worked the bobble edge (see the picture bellow)
The handles
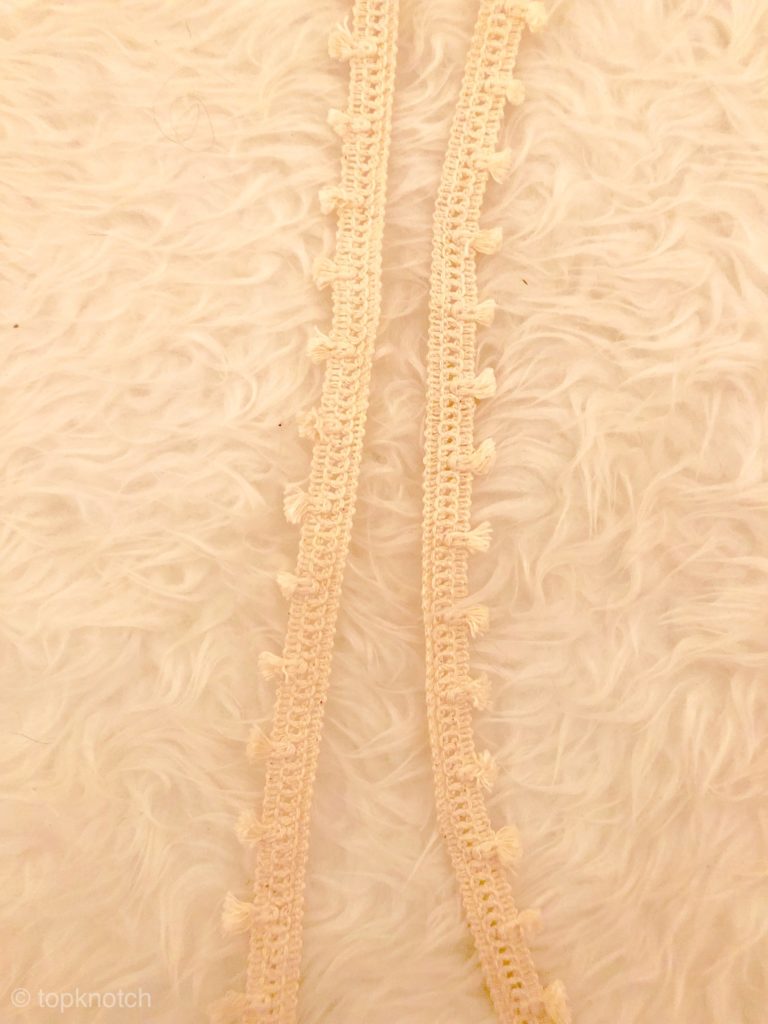
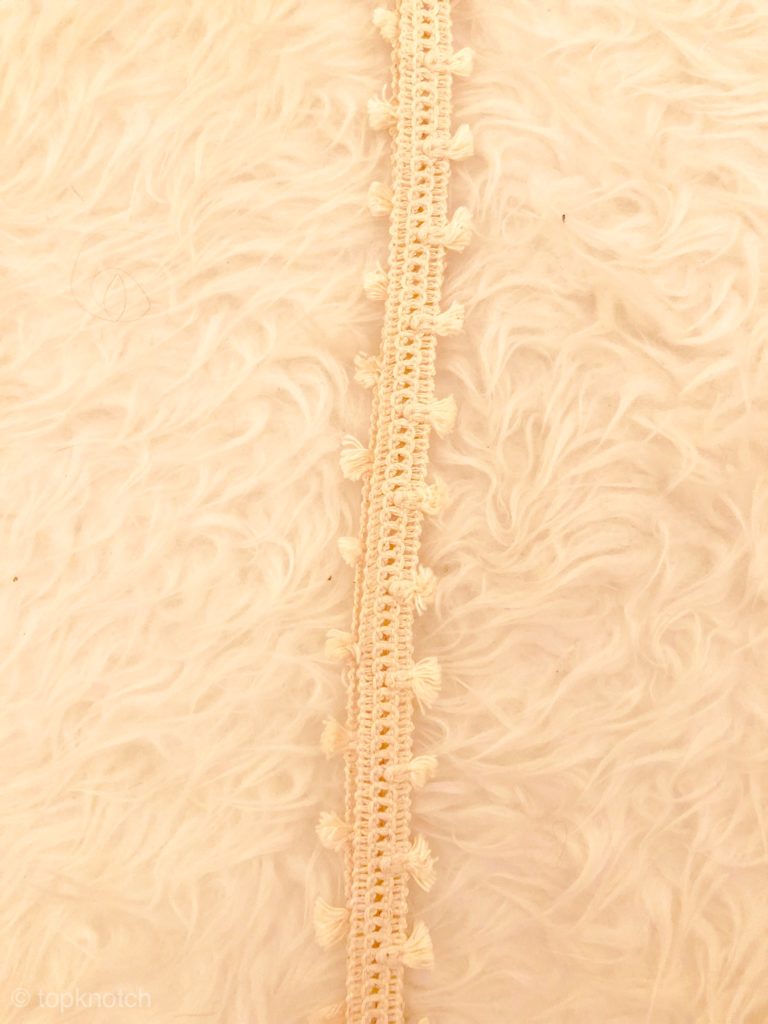
We will need 2 strands of 120 cm lace trims as you see bellow a single strand have tassels from one side and its not that strong. So to make it stronger I sewed two strands over each other like seen in the second picture and this way I have tassels from both sides.
Now you have to mark the center of the bag and sew the handles 7.5 cm away from the center (from the right and left)
Now is the right time to add a lining to your bag if you want. I personally did and here is a link to a nice tutorial demonstrating how to line a bag. Although she is using a sewing machine I hand stitched it .
Now we will Move to Last Step
Count 9 stitches and Insert a stitch marker ( I used a safety pin ) as you see in the picture.
And now sew them together as you see in the picture
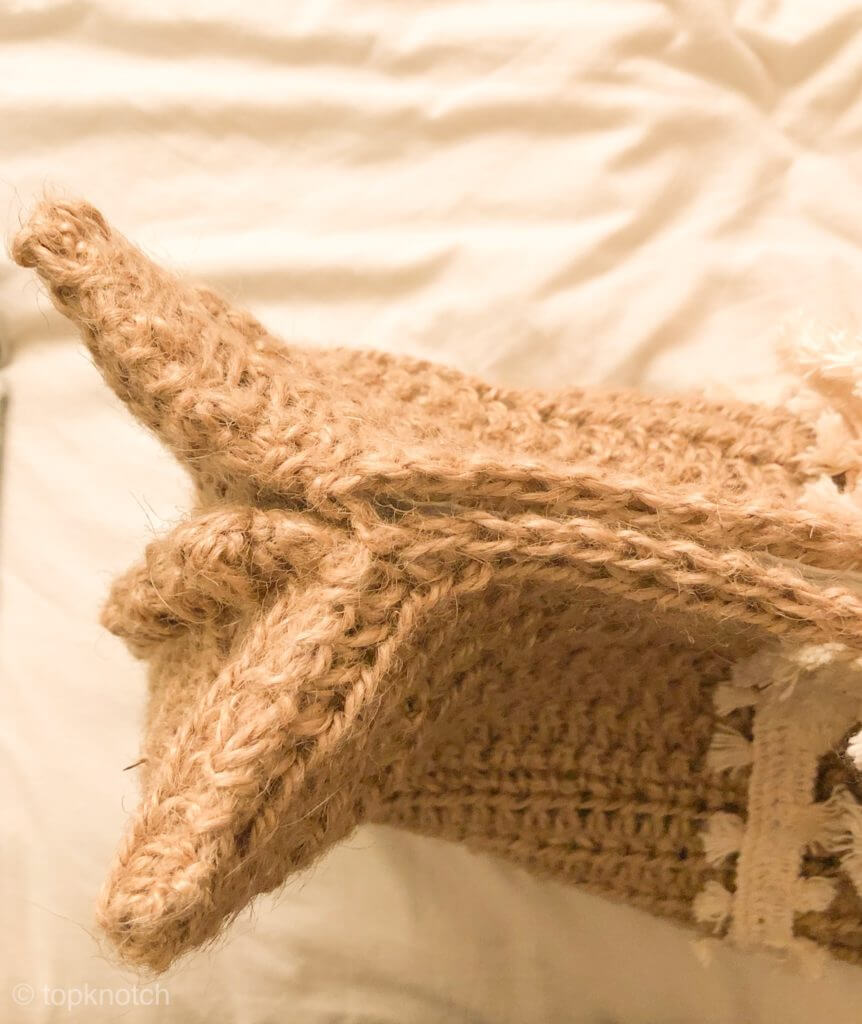
Here is what it will look like after you sew it together
AND CONGRATULATIONS YOU HAVE FINISHED THE PATTERN AND YOU HAVE MADE YOURSELF A STYLISH CROCHET BEACH BAG YOU SHOULD BE PROUD OF YOURSELF!!
Finally if you missed my previous pattern click here to see it.
I hope you liked this pattern. If you made one, share it with me on Instagram. I would love to see how you adapted it and what variations you made 🙂
I hope you liked this pattern. If you made one, share it with me on Instagram. I would love to see how you adapted it and what variations you made 🙂

I love this beach bag very much ❤
Hola
Muchas gracias por darnos fotos e instrucciones.
Te ha quedado muy bonita la bolsa!
Pienso hacerla en un tamaño más pequeño.
Saludos desde Texas
Muchas gracias por tu comentario, estoy muy feliz de que te haya gustado!
y me encantaría verlo cuando termines!
What other yarn can I use instead?