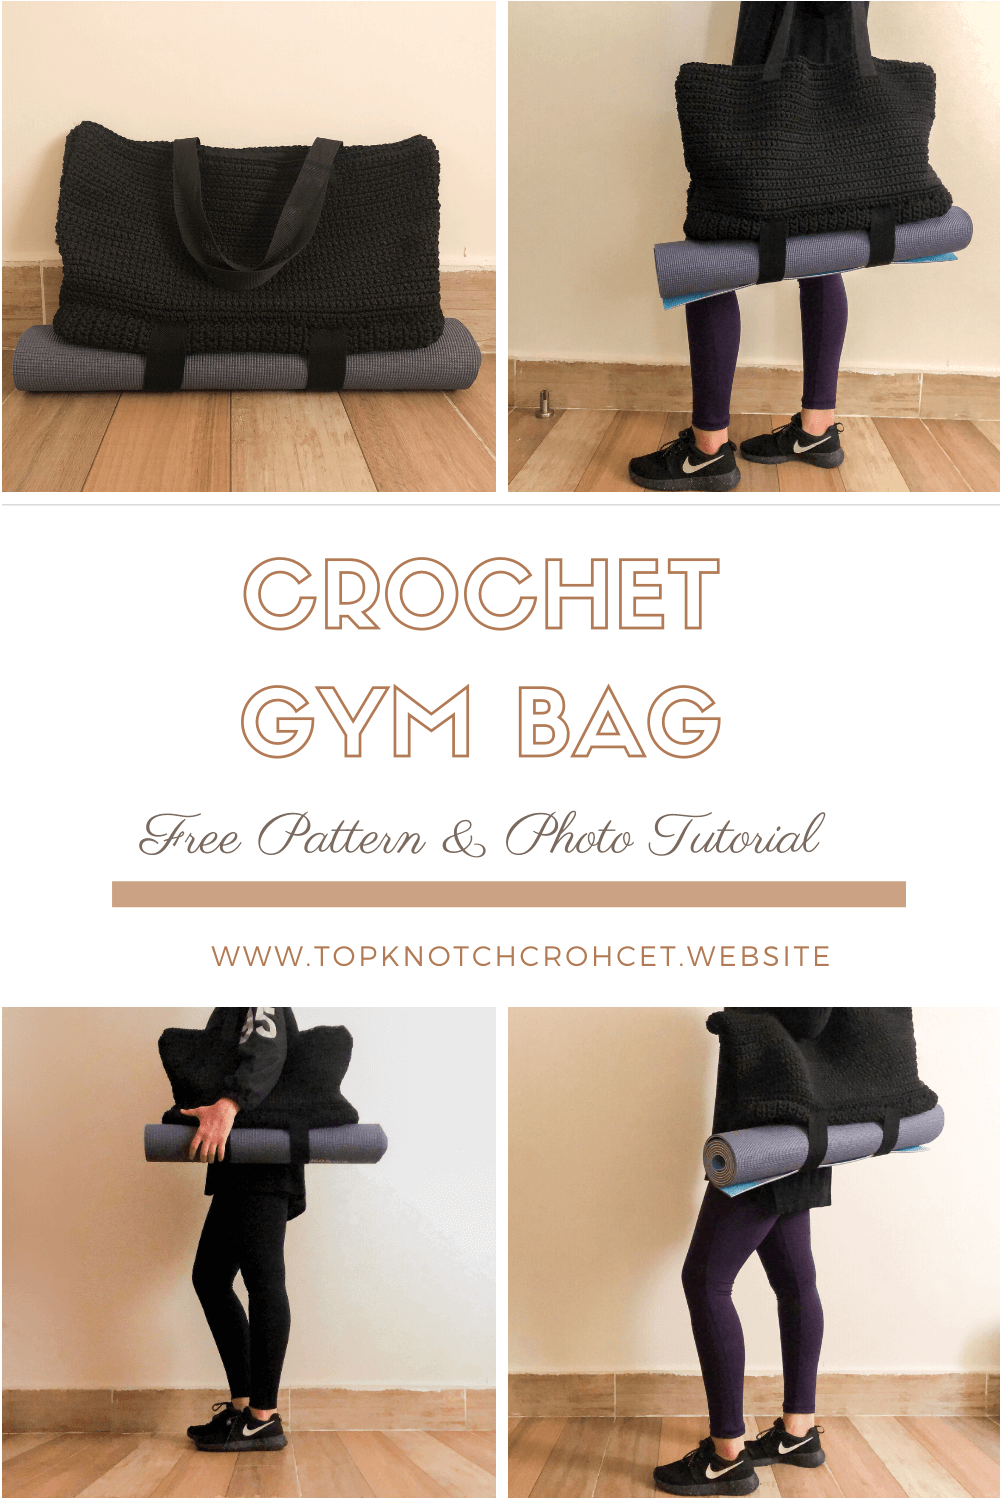
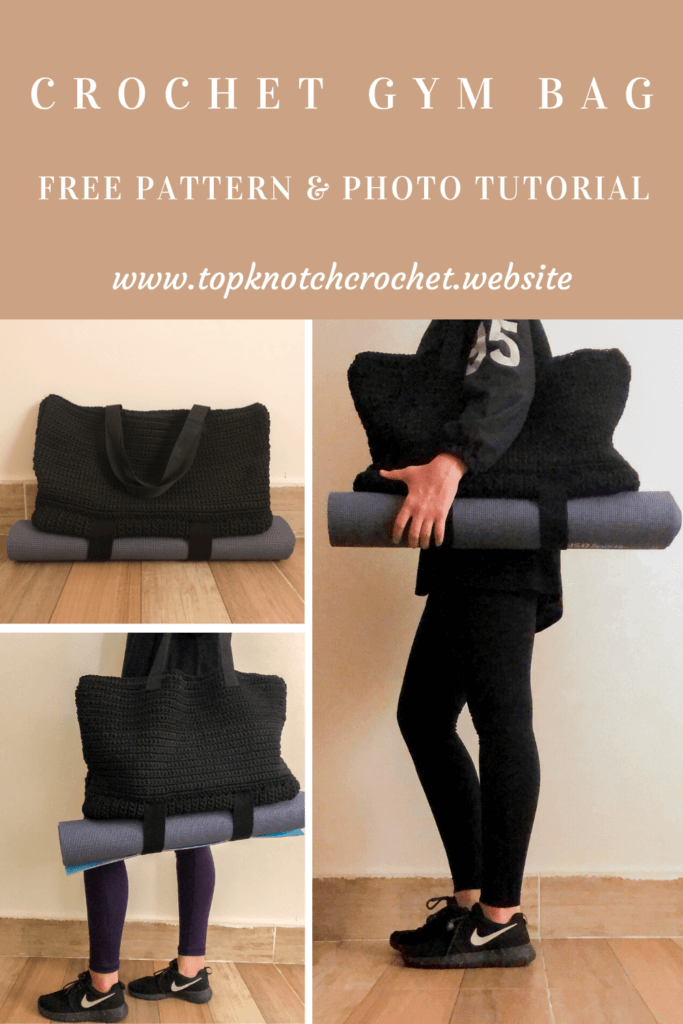
Hello everybody, am so excited to share this pattern with you today!! A crochet gym bag! why not right??!
One month ago I was shopping for sportswear and I saw all those gym bags so the idea popped immediately into my mind. I need a gym bag why not make one. And I wanted it to look modern and sportive. So I got a paper and a pencil, I tried to draw a few designs and at first I decided to go with a duffel cylindrical shape and I actually did it but I was not satisfied with the results so I unravelled my work and ended up doing this one and honestly am loving the result.
If you didn’t see my previous bag patterns check them Here
Pin it for later:
Now lets talk a little bit about this gym bag pattern
The bag is made with macrame yarn so its really sturdy and durable. The straps at the bottom of the bag that hold the yoga mat are made of elastic so they are flexible. To make sure if you have a thicker mat it will fit. The handles are made of durable strong nylon straps. Finally the boxed corners at the bottom make the bag roomy so that it can fit all your gym essentials.
The materials you will need for this gym bag pattern are:
Disclaimer: This blog post may contain affiliate links. I may earn a small commission to fund my coffee drinking habit if you use these links to make a purchase. You will not be charged extra, and you’ll keep me supplied in caffeine. It’s a win for everyone, really.
- About 650 meters of black 3 mm macrame yarn I bought mine from my local crafts store. However I Linked a few options that are very similar to the one I used 3mm Macrame Rope, Black polyester rope Crochet textile glitter cord Macrame cord 3mm Crochet bag supplies Metallic rope Crochet thread
- For the handles you will need: 1.5 meters of 3-4 cm nylon straps
- For the yoga mat straps you will need: 50 cm of 5 cm/ 2 inches wide elastic
- A 4 mm hook
- Stitch markers, sewing needle and matching thread, yarn needle to weave in ends, measuring tape.
- Optional cloth for the lining
Measurements:
60 cm x 30 cm ~ (24″ x 12″)
Gauge:
Gauge: 10 cm square= 11 Stitch and 12 rows (sc)
Skill level: Beginner
Abbreviations and Glossary (US Terms):
- ch – chain
- sc – single crochet
- ss- slip stitch
Notes:
- The pattern is written with US terms
- The bag is made of three parts that are crocheted separately and joined together
- Chain one is NOT considered as the first stitch throughout this pattern
The Front and Back Panels of The Bag
With a 4mm hook, Chain 65
Row 2: Work SC in each chain. Chain 1 and turn
Row 3: SC in the very first stitch and all the remaining stitches, Chain 1 and turn
Row 4: Repeat the previous row at the end of this row your last SC will be in the first SC of the previous row. Not the chain one space. Chain 1 and turn
If You don’t get the previous row. Check this tutorial to get straight edges by the amazing Sewrella
Row 5-33: repeat row 4.
Repeat the whole process one more time
The base of the bag
With a 4mm hook, Chain 25
Row 2: Work SC in each chain. Chain 1 and turn
Row 3: SC in the very first stitch and all the remaining stitches, Chain 1 and turn
Row 4: Repeat the previous row at the end of this row your last SC will be in the first SC of the previous row. Not the chain one space. Chain 1 and turn
Row 5-62: repeat row 4.
Assembling the bag parts
You now will have three parts and you are going to assembly them like shown in the picture bellow
Also if you are planing to line your bag its a good idea to lay you rectangle on a piece of fabric and cut your fabric now.
I Used the same macrame yarn and a crochet hook to join the rectangles together.
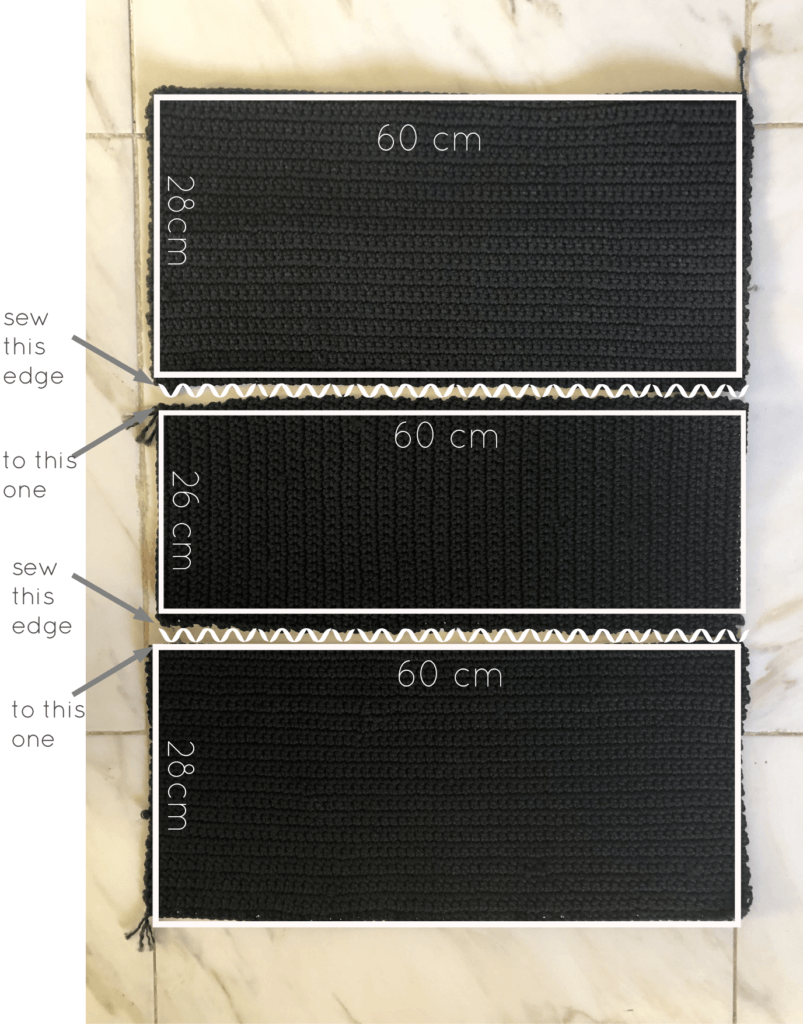
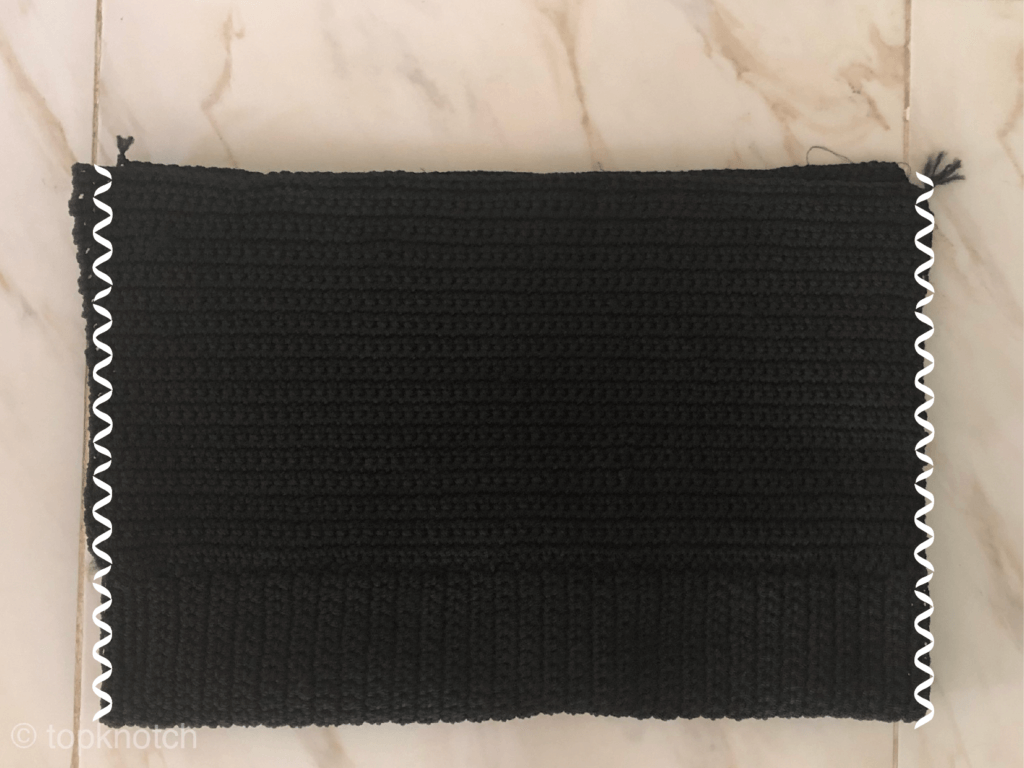
Now you are going to fold your rectangle as shown in the picture down align the sides together and sew the edge of the front panel to the edge of the back panel from both sides.
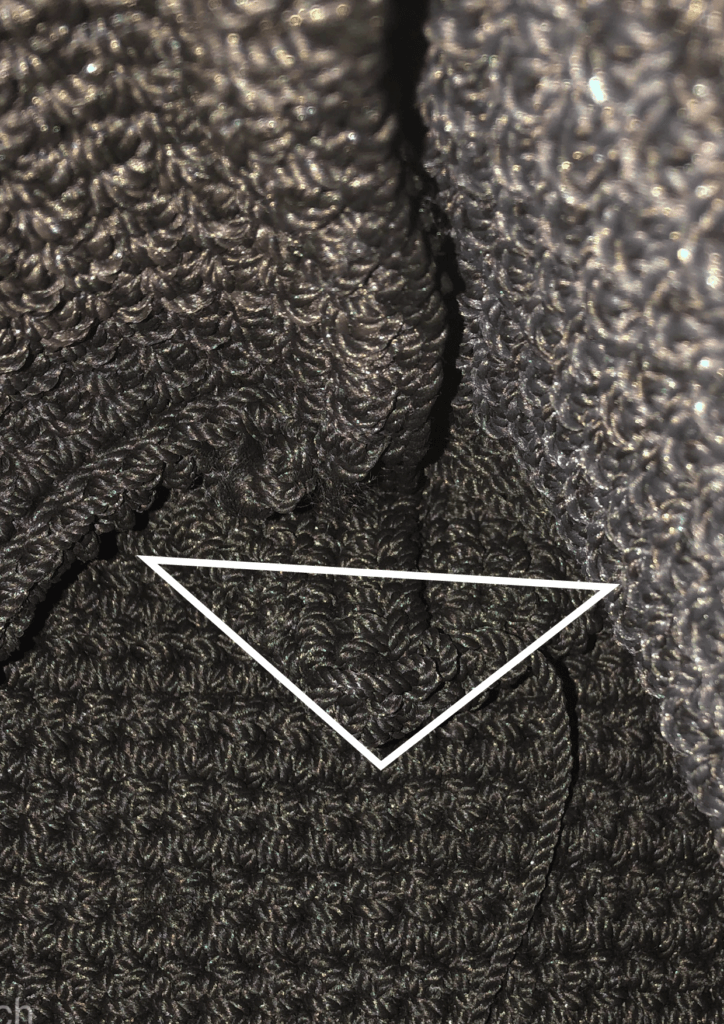
Boxed corners:
To create more room at the base of the bag you are going to sew the corners like shown in the picture bellow. The dimensions will be 5 cm long and 10 cm wide. I have also included a link to a clear tutorial of how to do this. Boxed corner tutorial.
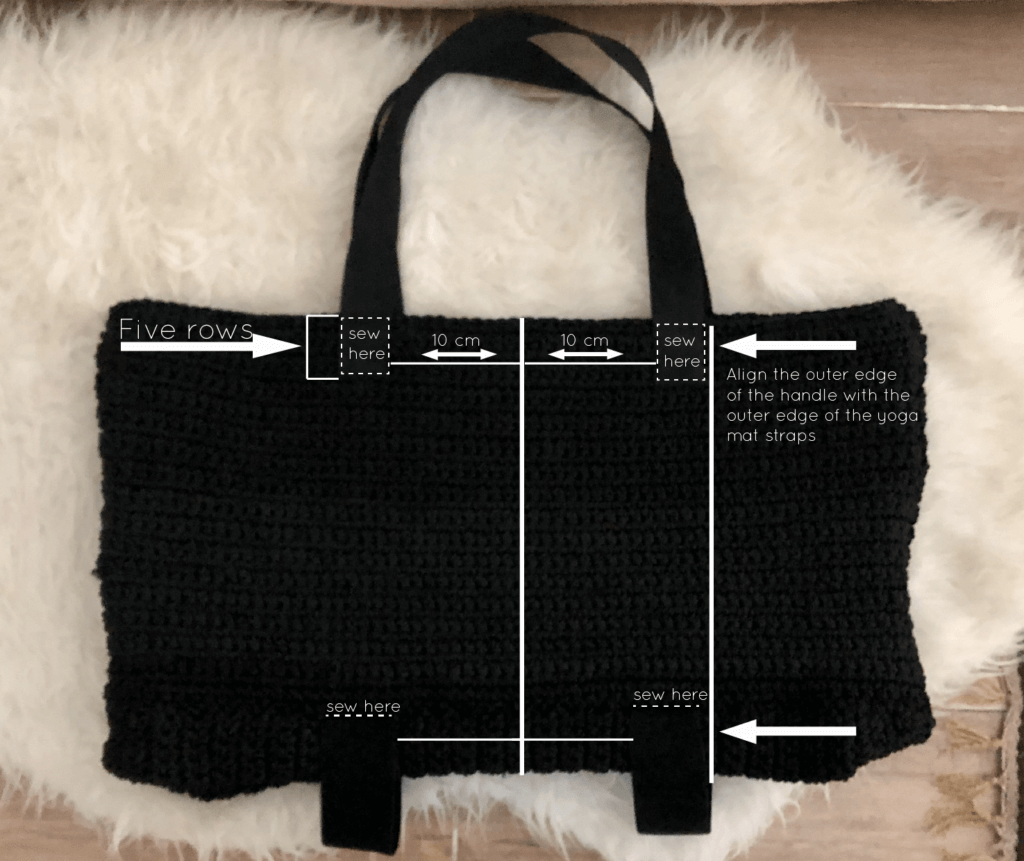
Sewing Handles and yoga holder straps
Cut two 64 cm pieces of nylon straps. and sew them as shown in the picture bellow
Cut two 25 cm long pieces of elastic
Sew them to the line where the base of the bag and the front/back panels meet. (see the picture bellow)
Finally if you are planning to add a lining (I recommend that u do.) You can now sew it to the bag. Here is a tutorial that can help you to do this.
I hope you liked this pattern. If you made one, share it with me on Instagram. I would love to see how you adapted it and what variations you made 🙂
Take care and happy crocheting.