
Hello everybody, Am so excited to share with you this pattern today. After last time’s attempt to design a pattern for boys, and it turned out to be a unisex baby romper I Wanted to design something only for boys and I came up with this Little man crochet pants and necktie.
I used acrylic anti pilling yarn, since I wanted to make it for winter to keep my adorable nephew warm. However, I wrote the pattern with measurements. So that you can use cotton acrylic blend yarn for warmer weather if you want.
The material you will need for both the crochet pants and necktie are:
Disclaimer: This blog post may contain affiliate links. I may earn a small commission to fund my coffee drinking habit if you use these links to make a purchase. You will not be charged extra, and you’ll keep me supplied in caffeine. It’s a win for everyone, really.
- Yarn: Himalaya everyday anti-pilling acrylic , or any worsted/aran weight acrylic yarn. 2 -4 balls according to the size you are making
- Hook: 3.5 mm., hooks Stitch markers, Scissors, Measuring tape, yarn needle to weave in ends, sewing needle and matching thread, Here is a set with one of my favorite hooks sets along with stitch markers and needles
- Stitch markers, yarn needle to weave in ends, measuring tape.
- And 2 buttons of your choice
Sizing:
This pattern is written for size 0-3 month and changes for 3-6 months , 6-12, 12-18, 18-24 months are in parentheses.
Gauge
Gauge: 10 cm square= 19 stitches * 12 rows (1 dc row and 1 sc row) I did this pattern with measurements so that you can do it with whatever yarn you want and get the right size. Yet, I included gauge if you want to achieve the exact same look.
Skill level: Beginner
Abbreviations and Glossary (US Terms):
- ch – chain
- sc – single crochet
- ss – slip stitch
- dc – double crochet
- front post dc
- back post dc
Special Stitches:
Front post dc
Yarn over. From the front of the work, insert the hook from right to left. Yarn over and pull a loop so that you have three loops on your hook. Yarn over and pull through two loops, then yarn over and pull throught the last two loops Another way to think about it is you are inserting your hook from front to back, then back to the front and working the stitch as normal.
Back post dc
Yarn over, then from the
back of the work, insert the hook from right to left around the post of the next stitch. Yarn over and pull a loop through so that you have three loops on your hook. Yarn over and pull through two loops, , then yarn over and pull throught the last two loops. Another way to think about it is you are you are inserting your hook from back to front, then to the back and complete the stitch as normal.
Notes:
- The pattern is written with us terms.
- Pants is worked from top and ends at the bottom and the suspenders are worked separately as well as the necktie
- Chain one is NOT considered as the first stitch throughout this pattern
PIN this pattern to your Pinterest boards for later

Pattern Instructions:
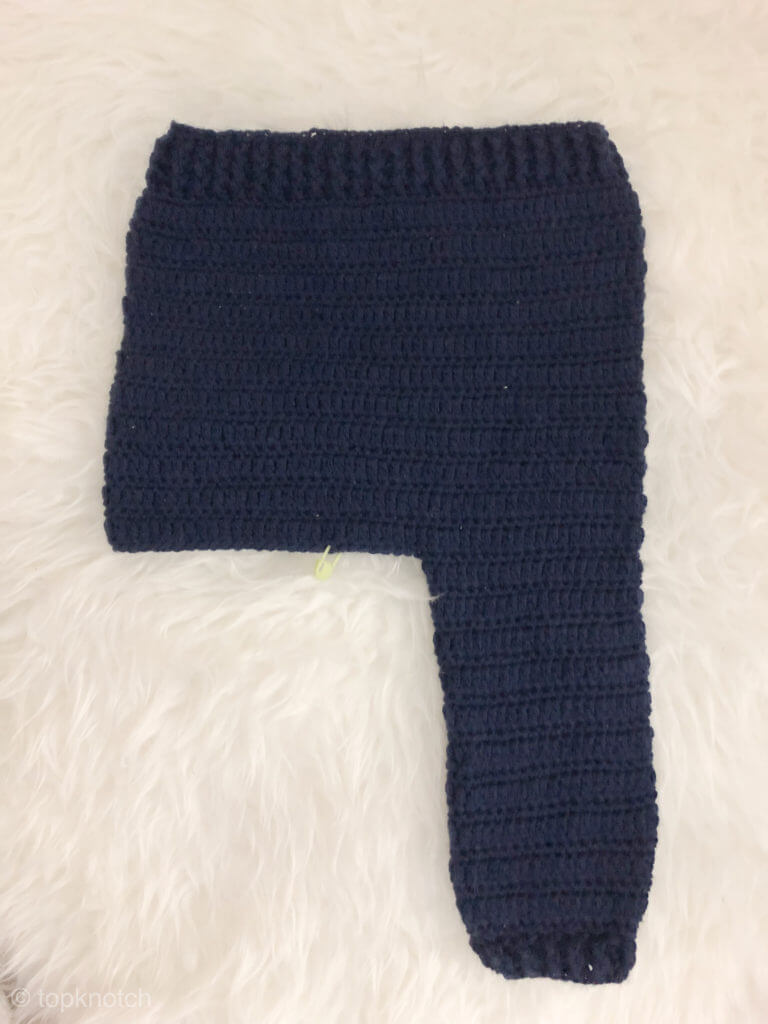
Pants:
Chain a 48 cm (50.5,50.5,53.5,56) chain, join to the first stitch (make sure not to twist the chain)
Round 1: SC in each chain around

To create a ribbing effect at the waist band we will work 3 rows of Front Post & Back Post dc
Round 2-4: ch2 work *one front post dc and one Back post dc*. repeat** till the end of the round, slip stitch to the first stitch (not the chain 2 space)
Put a stitch marker in the first stitch where you have just slip stitched. And another stitch marker in the opposite stitch

We will start to work one sc round and one dc round
Round 5 :2 SC in the first stitch, and the two after it. 1 SC in all the next stitches till you reach the two stitches before the marked stitch. Do 2 SC in the next 5 stitches (the marked one the two before it and the two after it.) Continue with 1 SC in each stitch, till you reach the last two stitches do 2 SC in each one of them.
Round 6: Double crochet in each SC from the previous round.
Round 7: SC in each dc from the previous round.
Repeat round6- 7 Till the shorts (without the waist band) reaches 13 cm(15.5,18,20.5,23) or your desired length.

put a stitch marker at the exact center and another one 1 cm away from the right and a third one one cm away from the left. Keep in mind the sticth markers is holding the front and back together. Meaning that the stitch at the back opposite to the front one is marked too.
To work each leg alone attach the yarn (as shown in the previous photo).
Continue in rounds with one dc and one sc round for 13 more cm(15.5,19.5,22,25).
Make sure to start the the legs working with a dc crochet round if the last round was sc and vice versa.
Then do 2 Front Post & Back Post dc ribbing rounds.
Work the other Leg like this one cut yarn and weave in ends

Suspenders
Put a stitch marker at the center of the back of the waist band. Then put two other stitch markers 4 cm away from the center from the right and the left.
Remove the center stitch marker and SC in the marked stitches and the ones between them. Continue with SC rows back and forth till you reach 8 cm(9,10,11,12)
Now divide the row into halves and work each strand alone. Continuing with SC in each stitch till you reach 23 cm(27,29,31,33) for each strand.
To shape the button hole put a stitch marker in the center stitch of each strap. Work SC the following stitches. Ch3 skip one before and on past the marked stitch, SC in the remaining stitches.
Do one more row of 1 SC in each stitch and 3 SC in the chain 3 space.
Repeat this process if you want more button holes to adjust the strap length
Finally end with 2 more rows of SC(1 SC in each stitch from the previous round)
Sew the two buttons to the waist band as shown in the picture

Repeat for the other strap cut yarn and weave in ends.


Necktie:
Chain 14
Row 1: SC in each chain space so that you have 13 SC
Row 2: SC in each SC from the previous row
Repeat row 2 for row 3-5
Maintain the number of sc to 13
Row 6: SC in the next 6 stitches , 3 SC in the next stitch, SC in the next 6 stitches
Row 7: to maintain the 13 stitch count. We are going to SC the first two stitches together. 1 SC in the next 4 stitches then 3 SC in the next stitch. 1 SC in the next 4 stitches finally SC the last two stitches together.
Repeat row 7 till you reach the desired length from (12-17) cm cut yarn and weave in ends.
Attach yarn to the very first stitch of the first row and do a sc finishing round around the whole necktie
To make the upper part of the neck tie through which the adjustable neck strap will be inserted. Sew the first row to the fifth row
After sewing the previous part sew the left to the right to give it the shape of the tie.
Chain a 35 cm chain and work hdc in the fifth chain (to shape the button hole) from the hook. Continue with hdc in each chain till the end of the row, cut yarn and weave in ends.
Sew small buttons at different places so that it can be easily adjusted.
Finally pass the neck strap through the hole in the upper part of the necktie.
I hope you liked this pattern. If you made one, share it with me on Instagram. I would love to see how you adapted it and what variations you made 🙂