

Hello everybody,
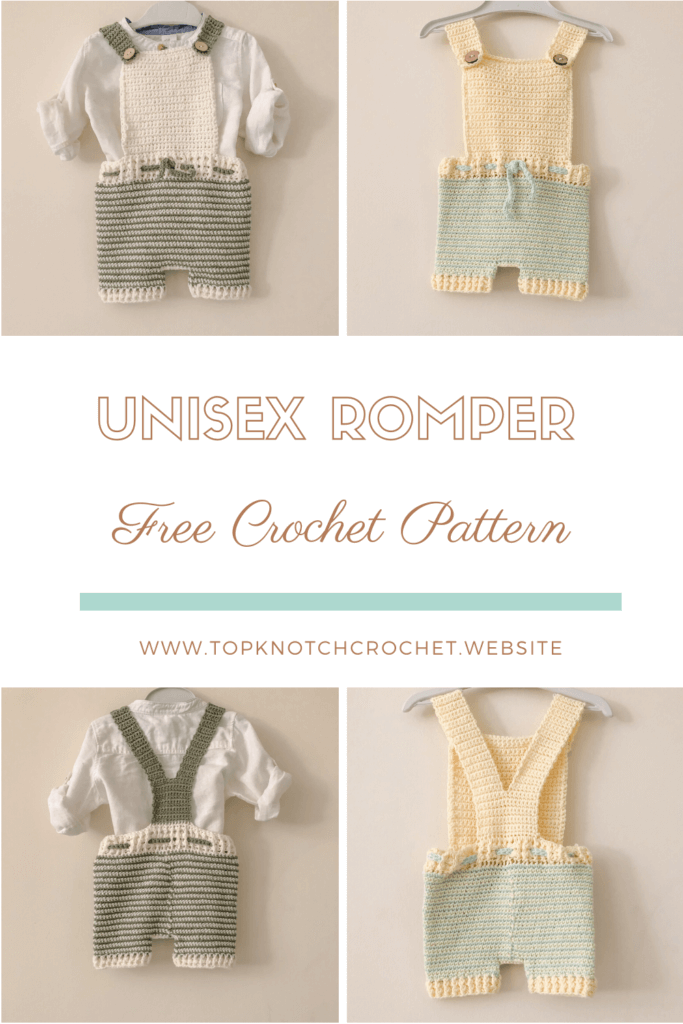
Today I have a new free pattern for you for a crochet romper. Its my first attempt for a baby boy. After doing two dresses check them here: Crochet Dress pattern with little Ruffles , Little Heart and Bow Dress
I wanted to create something for boys since my adorable nephew is a baby boy. Yet the pattern turned out to be a unisex crochet romper that can work for both genders based on the colors used.
The yarn used make it suitable for all seasons too. However, if you want to make it for winter only you can use a wool acrylic blend yarn. .
PIN this pattern to your Pinterest boards for later
For people who prefer to work offline or would like to have a copy of the pattern in their crochet library. You can buy an ad-free printable pdf version of this pattern with photo tutorial. Here on my etsy shop with a very small fee.
The material you will need for this crochet romper pattern are:
Disclaimer: This blog post may contain affiliate links. I may earn a small commission to fund my coffee drinking habit if you use these links to make a purchase. You will not be charged extra, and you’ll keep me supplied in caffeine. It’s a win for everyone, really.
- Yarn: 1-3 skeins of Alize Cotton Baby 50% cotton 50% acrylic. CREAM , 1-2 WINTER SKY
- A great alternative is the cotton gold also by alize WHITE, KHAKI
- Or any sport weight cotton acrylic blend yarn.
- 4 mm hook, Stitch markers, Scissors, Measuring tape, yarn needle to weave in ends. Here is a set with one of my favorite hooks sets along with stitch markers and needles
- Sewing needle and matching thread
- 2 buttons
Sizing:
This pattern is written for size 0-3 month and changes for 3-6 months , 6-12, 12-18, 18-24 months are in parentheses.
Gauge:
10 cm square= 20sc and 23 rows
I mainly write my patterns with measurements not gauge. I feel its easier when someone is working with a different yarn.
Yet, I included gauge if you want to achieve the exact same look.
Skill level: Beginner
Abbreviations and Glossary (US Terms):
- ch – chain
- sc – single crochet
- hdc – half double crochet
- Front post hdc
- Back post hdc
Special Stitches:
Front post hdc
Yarn over. From the front of the work, insert the hook from right to left. Yarn over and pull a loop so that you have three loops on your hook. Finally Yarn over and pull through the three loops.
Another way to think about it is you are inserting your hook from front to back, then back to the front and working the stitch as normal.
Back post hdc
Yarn over, then from the back of the work. Insert the hook from right to left around the post of the next stitch. Yarn over and pull a loop through so that you have three loops on your hook. Yarn over and pull through the three loops. For this post stitch, you insert your hook from back to front, then to the back and complete the stitch.
Notes:
- The pattern is written with us terms.
- Romper is worked form top and ends at the bottom and the straps are worked lastly.
- Chain one is NOT considered as the first stitch throughout this pattern
Pattern Instructions:
Top:
With a 4 mm hook chain as many chains to reach 13 cm(14.5,16.5,17,18), plus 1 chain
Row 2: Work SC in each chain.
Row 3: Chain one (Chain one is not considered as the first stitch throughout this pattern). SC in the very first stitch and all the remaining stitches
Row 4: Chain one and repeat the previous row at the end of this row your last SC will be in the first SC of the previous row. Not the chain one space. If You don’t get the previous row.
Check this tutorial to get straight edges by the amazing Sewrella.
Repeat row 4 till you reach 13 cm(14.5,16.5,17,18)

Shorts/ bottom
With the same size hook chain as many chains to reach 34 cm(35,35.5,36.5,37). Join to the other end of the square with a slip stitch be careful not to twist the chain

Round 1: SC in each stitch and chain around
To create a ribbing effect at the waist band we will work 3 rows of Front Post & Back Post hdc
Round 2-4: CH 2 work *one front post HDC and one Back post HDC* repeat** till the end of the row. Put a stitch mark at each of the sides of the waist band and in the center of the back of the waist band.

Round 5: Attach the second color yarn to the marked stitch in the back. Work 1 SC in each stitch except the marked stitches (on the sides). And the two before it and the two after it from each side. Do 2 SC in each one of those. join to the very first stitch of this round with a slip stitch
Round 6: Switch the first color and work SC in each stitch
Continue switching colors each round working sc in each stitch around Till the shorts (without the waist band) reaches 13 cm(15.5,18,20.5,23) or your desired length. cut yarn and weave in ends.
Put a stitch marker in the center of your work and one and a half CM from the center from the right and left (total 3 cm). Attach yarn at the right stitch markers and single crochet the two sides together. Till you reach the left stitch marker.

Make sure to single crochet the two sides with the right color to maintain the stripes sequence. cut yarn and weave in ends.
lower Part of The Shorts
To work each leg alone attach the yarn to one of the marked stitches at the sides and work more stripes for 2 more cm(2,3,3,4)
Make sure to continue the the legs working with the right side of the single crochet. (work with the same way you worked the upper part of the shorts)
Then do 3 Front Post & Back Post hdc ribbing rounds. Exactly the same way you worked the waist band.Work the other side like this one cut yarn and weave in ends.

Shoulder Strap
Row 1: Attach the yarn 4 cm away from the marker at the center of the back and SC for 4 cm more past the marker chain 1 and turn
Row 2: SC in each stitch CH1 and turn
Repeat row 2 till you reach 5 cm(6,7,8,9)
Then divide the row into halves. Now work each strand alone continuing with SC in each stitch till you reach 18 cm(19.5,19.5,21,21) for each strand.
To shape the button hole, put a stitch marker in the center of each strap. Work SC in the following stitches. CH2 skip one before and on past the marked stitch, SC in the remaining stitches
Finally do one more SC row in each stitch and 3 SC in the CH2 space
Repeat this process if you want more button holes to adjust the strap lenght
Repeat for the other strap cut yarn and weave in ends.


Waist Band Drawstring:
Row 1: Chain as many chains to get a 60cm() chain,
Row 2: SC in each chain cut yarn and weave in ends then put it in the waist band
Assembly and finishing instructions:
SC one row around the front top square, Then sew the two buttons.