Hello crochet buddies!!
For the love of winter and Christmas magic, I made this Free Christmas Crochet Pattern for the cozy velvet socks. I love the winter season. There is something magical about it. One of my favorite moments in winter is coming home, snuggling in my favorite lounge wear. wear a pair of cozy fluffy socks. Make myself a cup of coffee or green tea to keep my hands warm while I watch one of my favorite series. If you are an introvert like myself. You will understand that moments like this bring extreme happiness and gratitude. Especially if it is Christmas and you are watching Christmas movies while feeling cozy and warm with your loved ones!
Today’s pattern is perfect for enjoying a moment like the one I have just imagined. It’s velvet yarn make it extremely cozy, soft and fluffy.
If you have read any of my previous posts you may know that am Egyptian and Muslim. So you may be wondering why am I doing a Christmas related pattern? We too love Christmas! I remember when I was young we used to decorate The mini Christmas tree that my lovely grandmother (who was Swedish and christian) bought for us and we always used to call her on Christmas Eve to wish her a Merry Christmas and a Happy New Year. We also used to sit together as a family and watch Christmas movies. We used to watch home alone every single year!
Talking about Christmas did you see my crocheter/maker Christmas gift guide/ wishlist :D?? if you didn’t get a gift for your crochet buddies take a look you may get inspired!!
You can also check other patterns with velvet yarn here
Now lets take you to the pattern!
The material you will need for this Cozy velvet crochet socks pattern are:
Disclaimer: This blog post may contain affiliate links. I may earn a small commission to fund my coffee drinking habit if you use these links to make a purchase. You will not be charged extra, and you’ll keep me supplied in caffeine. It’s a win for everyone, really.
- Yarn: 1 Ball super bulky (6) velvet yarn for the main color and a few amount of the secondary color.
- I used Himalaya Dolphin Baby. Red(code 80318)and White
- Hook: 4 mm, 6 mm
- Stitch markers, yarn needle to weave in ends. Here is a set with one of my favorite hooks sets along with stitch markers and needles
Size
Directions are for size 6-8 (36-38)
Changes for size 8.5-10.5 (39-42)written in parentheses at row 17
Skill level: Beginner
Abbreviations and Glossary (US Terms):
- ch – chain
- sc – single crochet
- hdc – half double crochet
- front and back post hdc
Special stitches:
Front post hdc
Yarn over. From the front of the work, insert the hook from right to left. Yarn over and pull a loop so that you have three loops on your hook. Again yarn over and pull through the three loops.Another way to think about it is you are inserting your hook from front to back. Then back to the front and working the stitch as normal.
Back post hdc
Yarn over, then from the back of the work, insert the hook from right to left around the post of the next stitch. Again yarn over and pull a loop through so that you have three loops on your hook. Yarn over and pull through the three loops. For this post stitch, you insert your hook from back to front, then to the back and complete the stitch.
Notes:
- The pattern is written with us terms
- Directions are written for women however you can easily make it work for men or children by by increasing or decreasing the starting chain and increasing or decreasing the number of Rounds (before shaping the heels)
- I used white yarn to add the stripes but you can make it with one color
Instructions:
First the toes part of the socks
With a 4mm hook chain 6
Round 1. Work 2 SC in the first stitch, 1 SC in the next 3 stitches. 3 SC in the next stitch, then to work your way across the other side of the chain. SC in the next 3 stitches. SC one more stitch in the first stitch your already worked 2 SC in (dnt slip stitch)

Round 2. SC in the first stitch, 2 SC in the next one. Then 1 SC in the next 3 stitches. 2 SC in the next stitch. 1 SC in the next stitch. 2 SC in the next stitch. 1 SC in the next 3 stitches, 2 SC in the next stitch. 1 SC in the next 2 stitches (don’t slip stitch.) put a stitch marker in the last stitch you worked
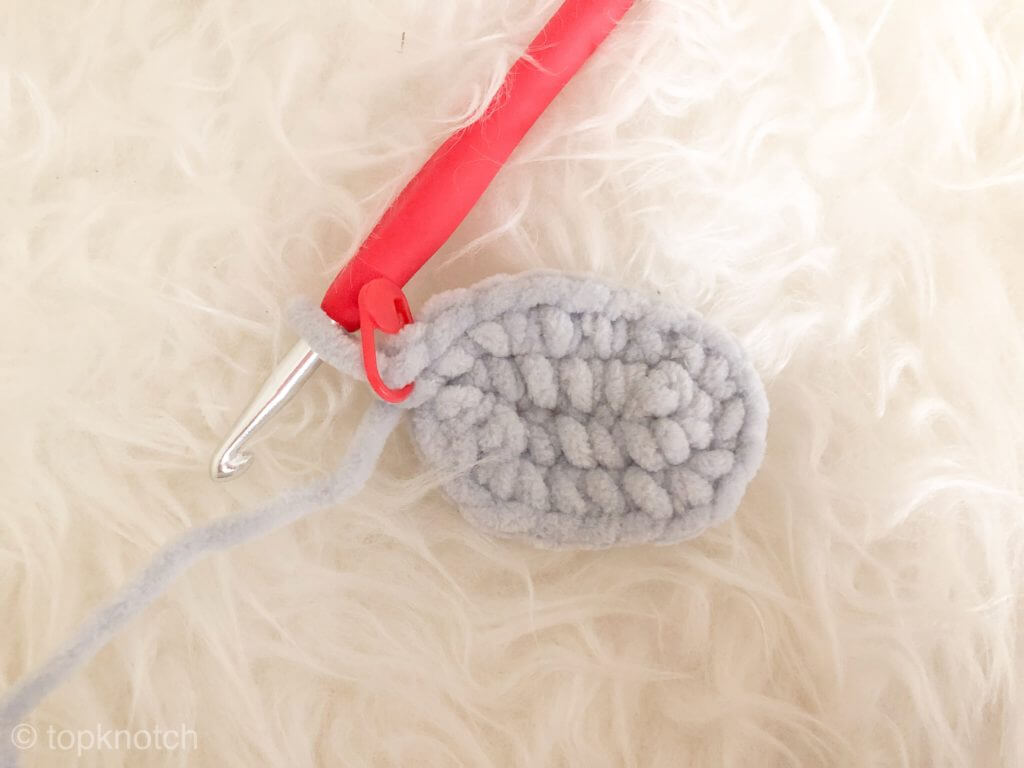
Round 3. Change to a 6mm hook, 1 SC in each stitch around. When you reach the marked stitch do 1 SC in it and put the stitch marker again.
Round 4-6: repeat round 3

Round 7. put a stitch marker in the stitch opposite to the marked stitch (see photo)Do 2 SC in the very first stitch (the marked one). Then put the stitch marker in the second stitch of the 2 SC you have just worked. 1 SC in the next 8 stitches. 2 SC in the marked stitch. 1 SC in the next stitches till the end of the round.
Round 8. 1 SC in each stitch around (when you reach the marked stitch do 1 SC and put the stitch marker again)
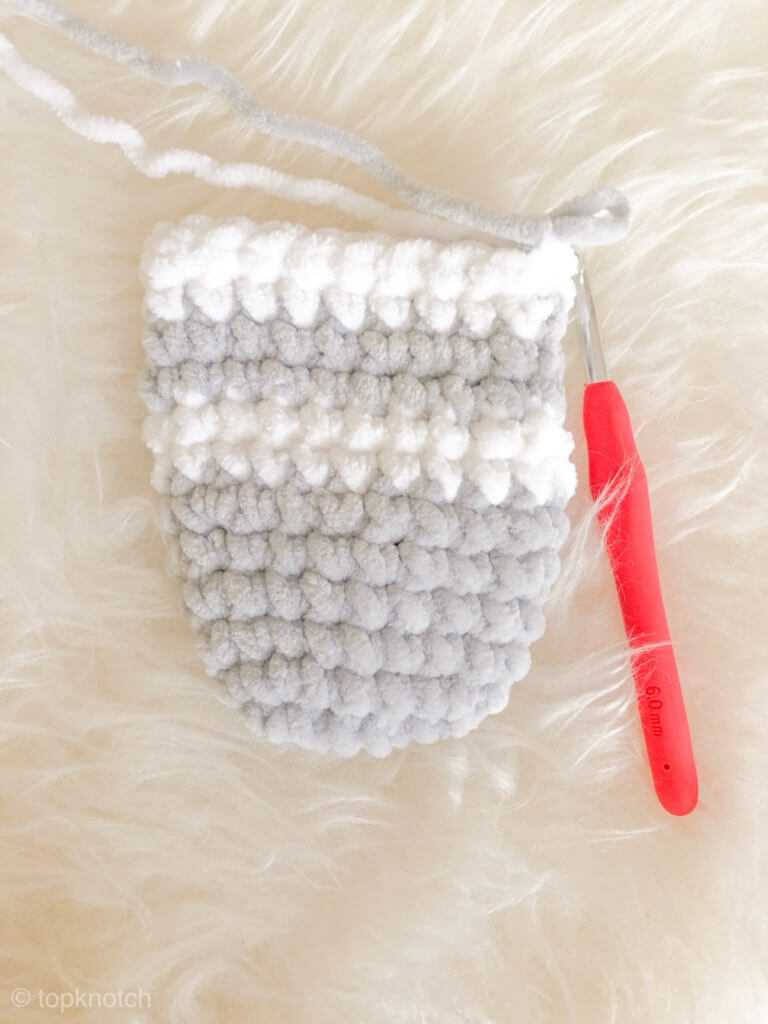
We will start in the middle part of the socks
Round 9-10. Attach the white yarn to the marked stitch. Sc in each stitch around slip stitch to the first stitch. and put the stitch market in the slip
Round 13-14. Switch to grey and repeat, ( 1 SC in each stitch around, slip stitch to the first stitch)
Round 11-12. Attach the white yarn to the marked stitch. Sc in each stitch around slip stitch to the first stitch. and put the stitch market in the slip stitch.
Round 15-16. Switch again to grey. Do 1 SC in each stitch around, slip stitch to the first stitch) If your size is 6-8 skip the next two rounds.
If your size is 8.5-10.5 continue for two more rounds
Round 17-19. Switch to grey and repeat round 6.
Shaping the Heels part of the socks
Row 1. 1 SC in the next 3 stitches turn your work. CH 1 and SC the other way around till you have leave the last 6 sc from the previous round. (see photo)
Row 2. CH 1, 1 SC in each SC from the previous rowCH 1, 1 SC in each SC from the previous row
Row 3-8. Repeat row 2

Row 9. Put a stitch marker (as seen in photo.) 1 SC in each stitch till the one before the marked stitch. SC the marked stitch and the one before it and the one after it together. Then 1 SC in each stitch to the end of the row.
.Slip stitch the two sides together (as seen in photo ) cut yarn and weave in ends
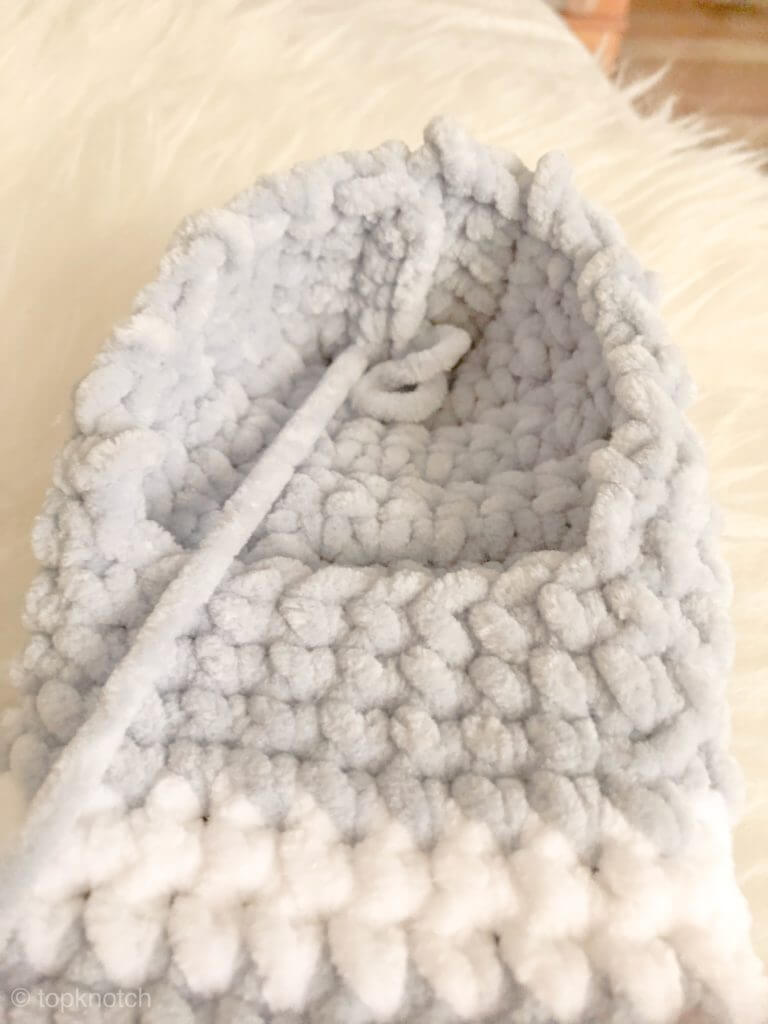
Attach white yarn as seen in the picture bellow

Round 1. 1 SC in each row as seen in the picture
Round 2-8. 1 SC in each SC from the previous row
Round 9-10. To create a ribbing effect. We will work two rounds of front post and back post hdc,
Chain 1, *do one fornt post hdc, in the next stitch do 1 back post hdc* repeat ** to the end or the round. (see the stitches section)
Repeat the whole pattern twice to do a pair of cozy velvet socks.