Hello everybody,
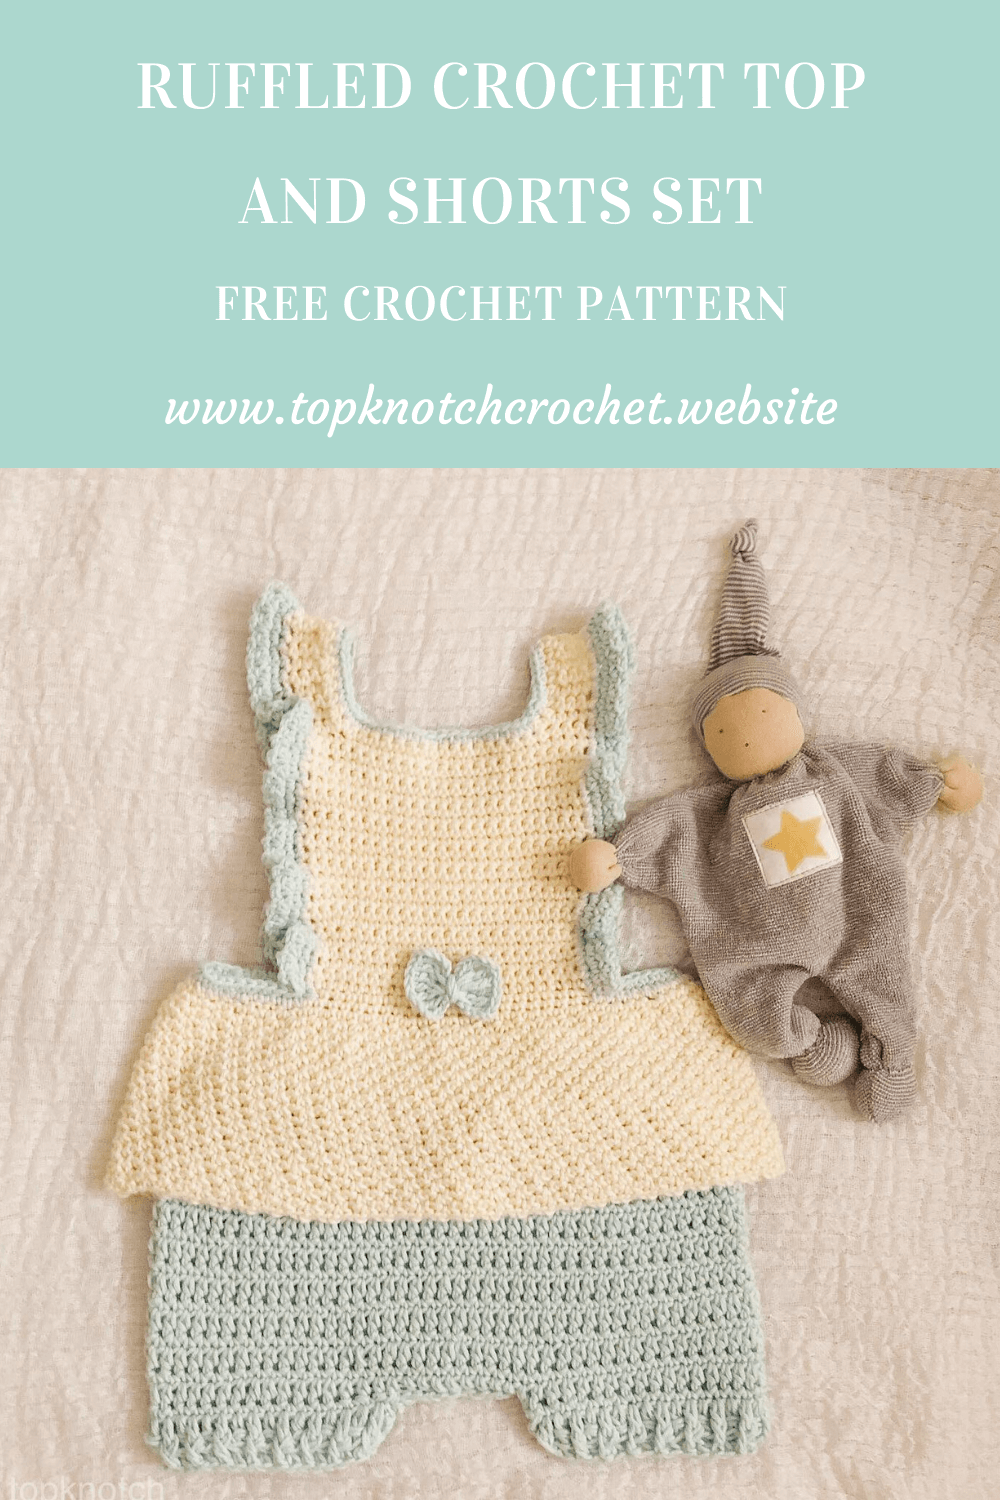
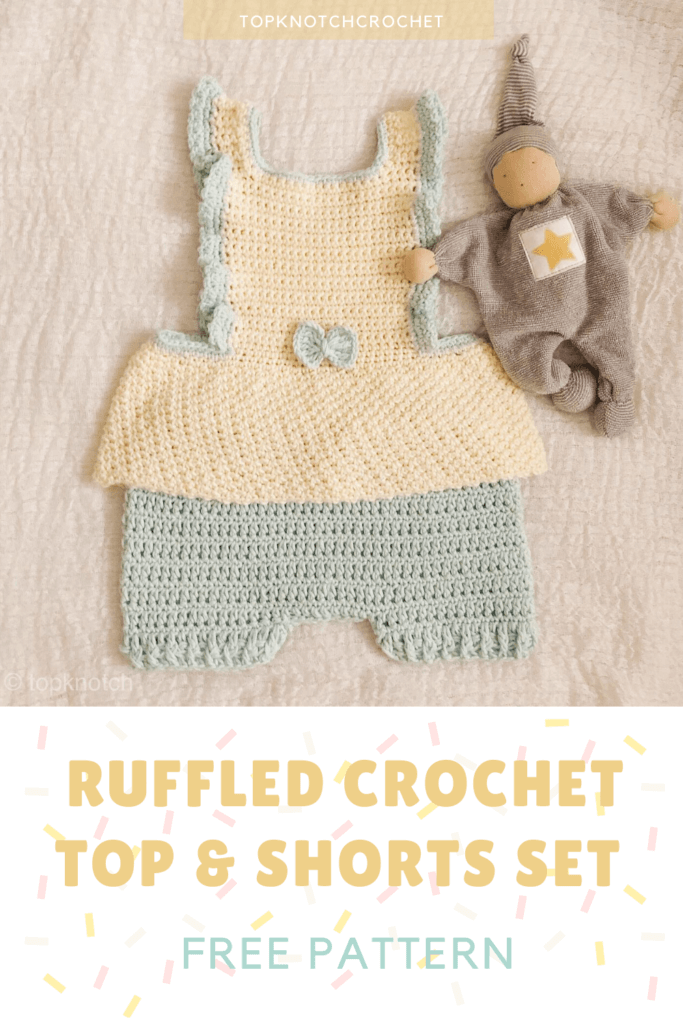
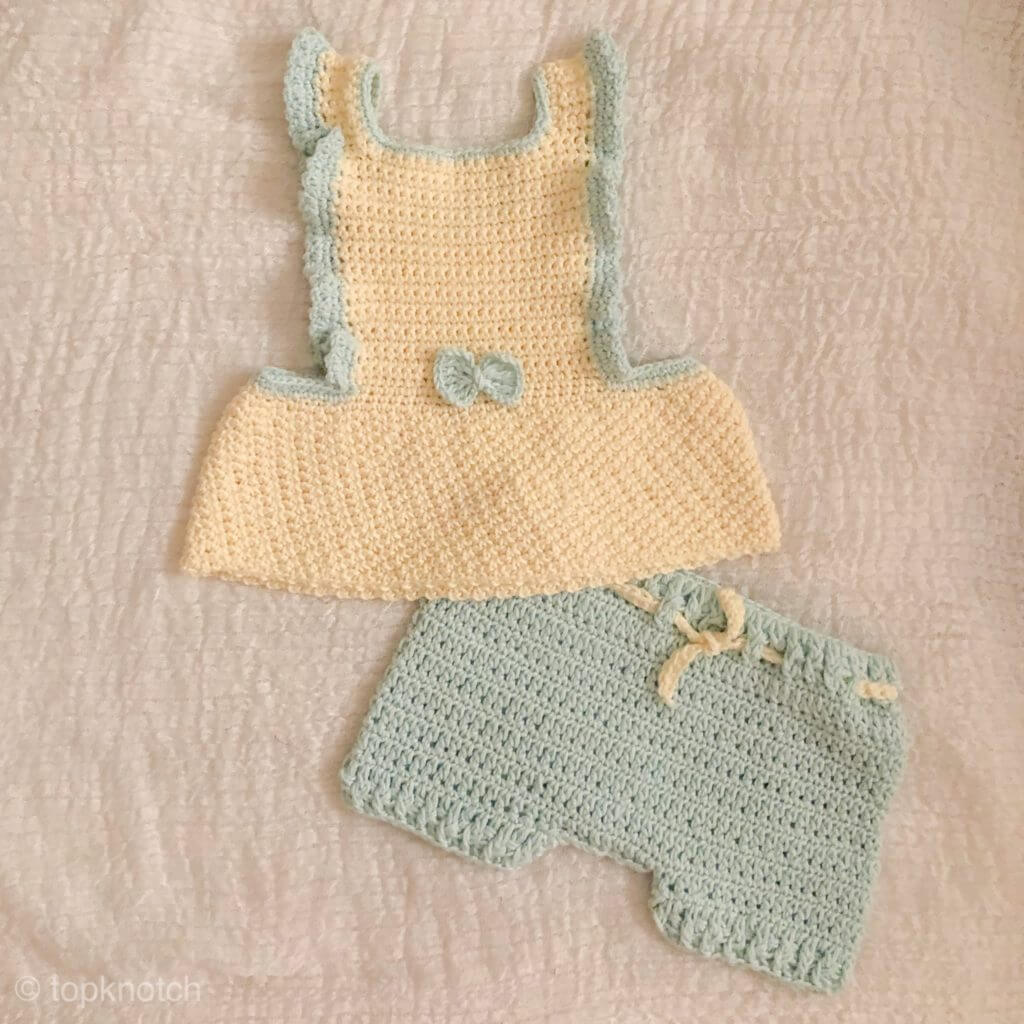
Today’s I have a free pattern that I really love. This Ruffled crochet top and shorts set is one of the projects that I was so proud after making however the one I first did (the one in the picture above) I felt that there is something wrong with its top proportions. So I went back to the craft yarn council size chart. Modified the pattern and tested it and it turned out more proportioned. However I couldn’t help but show you the first version of it because I really loved it. And because we all have those projects that turn out a mess before turning out right. Now lets move directly to the pattern.
If you didn’t see my previous patterns for baby girls check them HERE, HERE, HERE, HERE, and HERE.
The material you will need for this crochet pattern are:
Disclaimer: This blog post may contain affiliate links. I may earn a small commission to fund my coffee drinking habit if you use these links to make a purchase. You will not be charged extra, and you’ll keep me supplied in caffeine. It’s a win for everyone, really.
- 1-3 skeins (According to the size you are making) of Alize Cotton Baby 50% cotton 50% acrylic WINTER SKY ,1-2 of the CREAM color.
- Or any sport weight cotton acrylic blend yarn.
- A great alternative is the EKO bomull 100% organic cotton yarn (The one with the white and baby blue you will se it down bellow in the step by step photo tutorial)
- 4 mm hook
- Stitch markers, sewing needle and matching thread, yarn needle to weave in ends. Here is a set with one of my favorite hooks sets along with stitch markers and needles
Size:
This pattern is written for size 0-3 month and changes for 3-6 months , 6-12, 12-18, 18-24 months are in parentheses.
Skill level: Beginner to Advanced beginner
Abbreviations and Glossary (US Terms):
- ch – chain
- sc – single crochet
- ss – slip stitch
- dc – double crochet
- Front post dc
- Back post dc
- Spider stitch
Notes:
- The patten is written with us terms
- The shorts are designed to be above the knee and the blouse to be hip length
Special Stitches:
Front post hdc
Yarn over. From the front of the work, insert the hook from right to left. Yarn over and pull a loop so that you have three loops on your hook. Finally Yarn over and pull through the three loops.
Another way to think about it is you are inserting your hook from front to back, then back to the front and working the stitch as normal.
Back post hdc
Yarn over, then from the back of the work. Insert the hook from right to left around the post of the next stitch. Yarn over and pull a loop through so that you have three loops on your hook. Yarn over and pull through the three loops. For this post stitch, you insert your hook from back to front, then to the back and complete the stitch.
Spider Stitch:
Row1: sc, ch1, sc in the same stitch skip one stitch, repeat
Row2: sc, ch1, sc in the ch1 space form the previous row.
Pin it for later
Instructions:
Top:
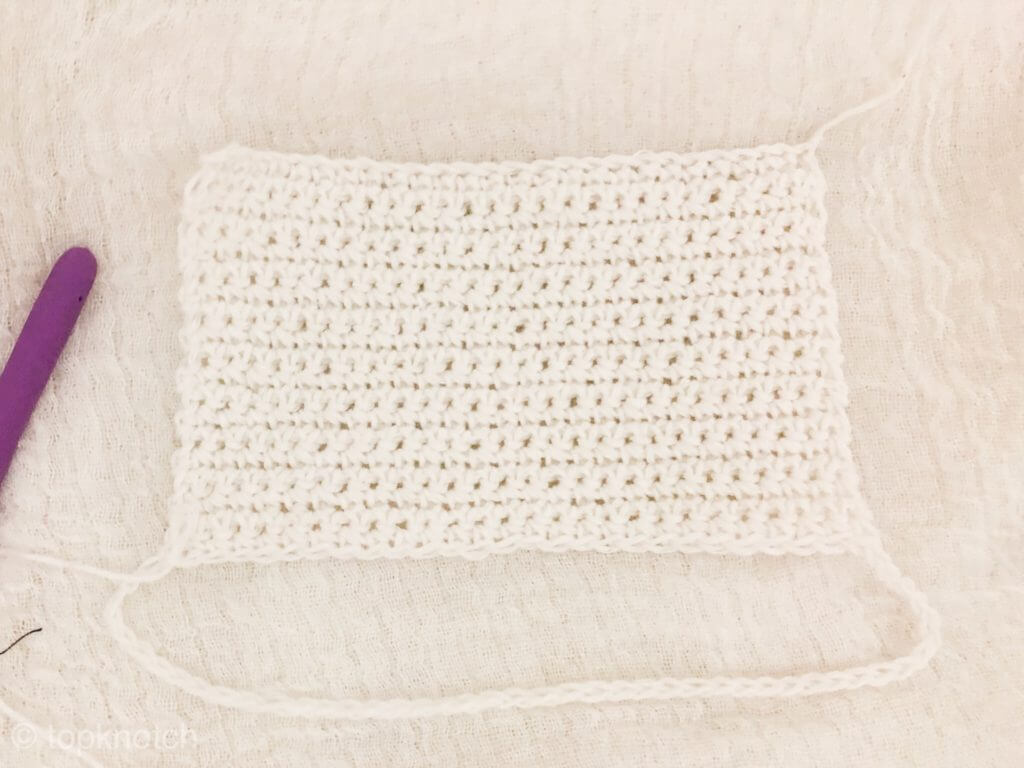
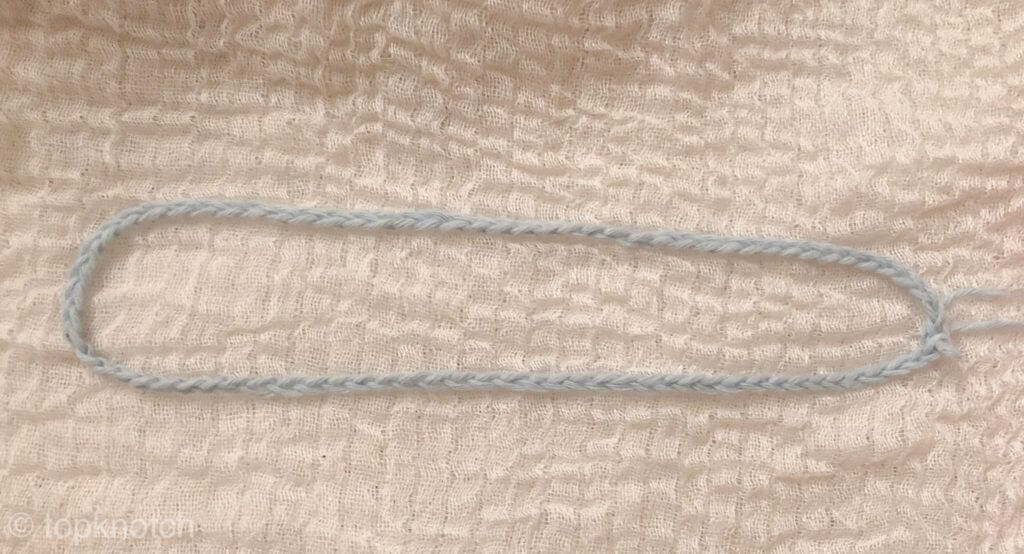
With a 4 mm hook chain as many chains to reach 16.5 cm(17.5, 19, 20, 21.5), plus 1 chain
Row 1: Work SC in each chain.
Row 2: Chain one (Chain one is not considered as the first stitch throughout this pattern). SC in the very first stitch and all the remaining stitches
Row 3: Chain one and repeat the previous row at the end of this row your last SC will be in the first SC of the previous row. Not the chain one space. If You don’t get the previous row. Check this tutorial to get straight edges by the amazing Sewrella.
Repeat row 4 till you reach 11.5cm(13,15,15.5,16.5)
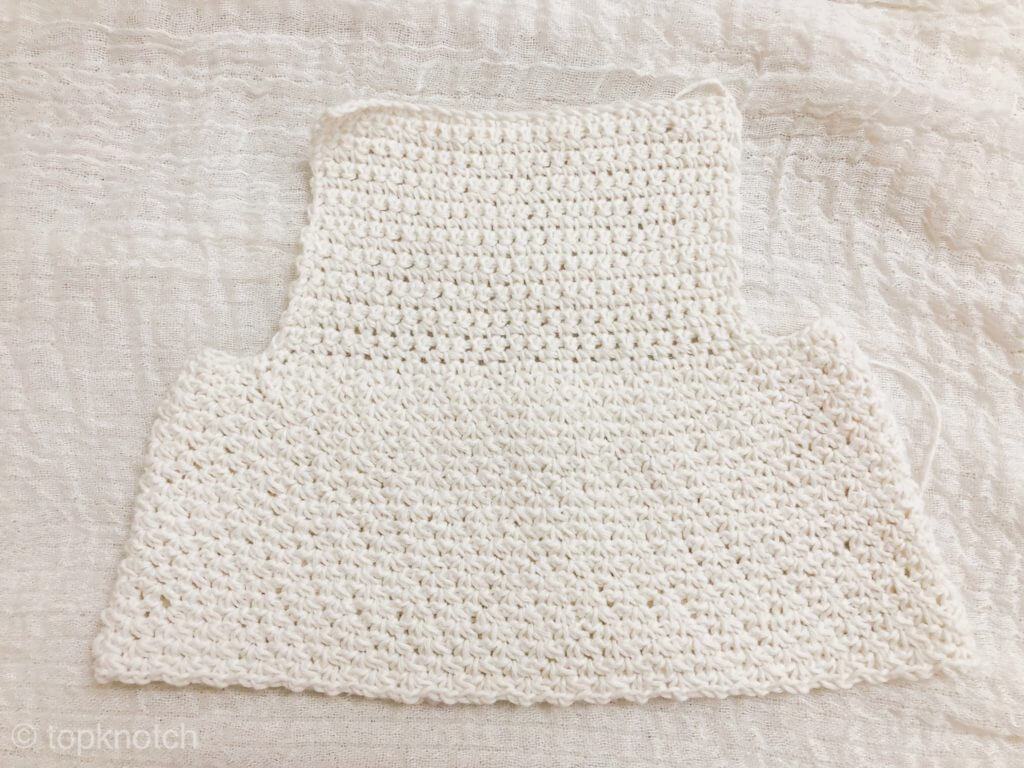
Chain a 29 cm chain (30.5, 31.5, 32, 32). Join to the other end of your rectangle with a slip stitch be careful not to twist the chain
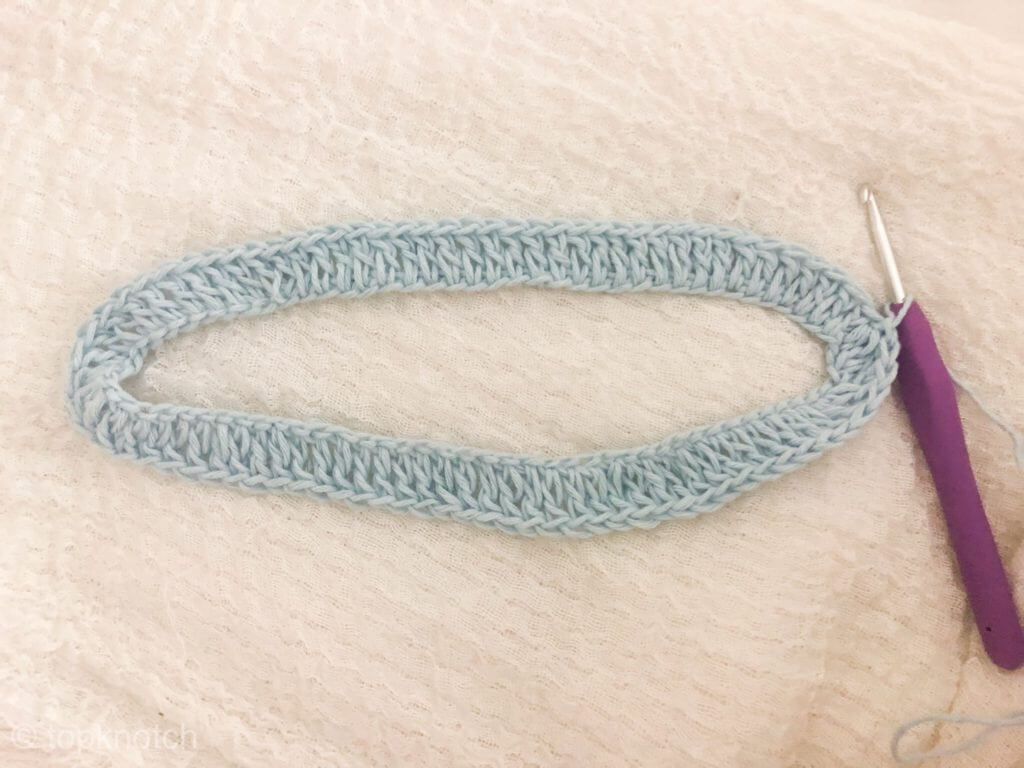
Round 1. *2 sc in the next two stitches, 1 sc in the next stitch* repeat from * to* to the end of the round.
Now we will start to work with the spider stitch (see special stitches section above)
Round 5. sc, ch1, sc in the same stitch skip one stitch, repeat
Round 6. sc, ch1, sc in the ch1 space form the previous row.
Continue with the spider stitch till the peplum part (lower flared part) of the blouse reaches 8 cm( 8, 9, 9, 10) or your desired length. cut yarn and weave in ends.
Back:
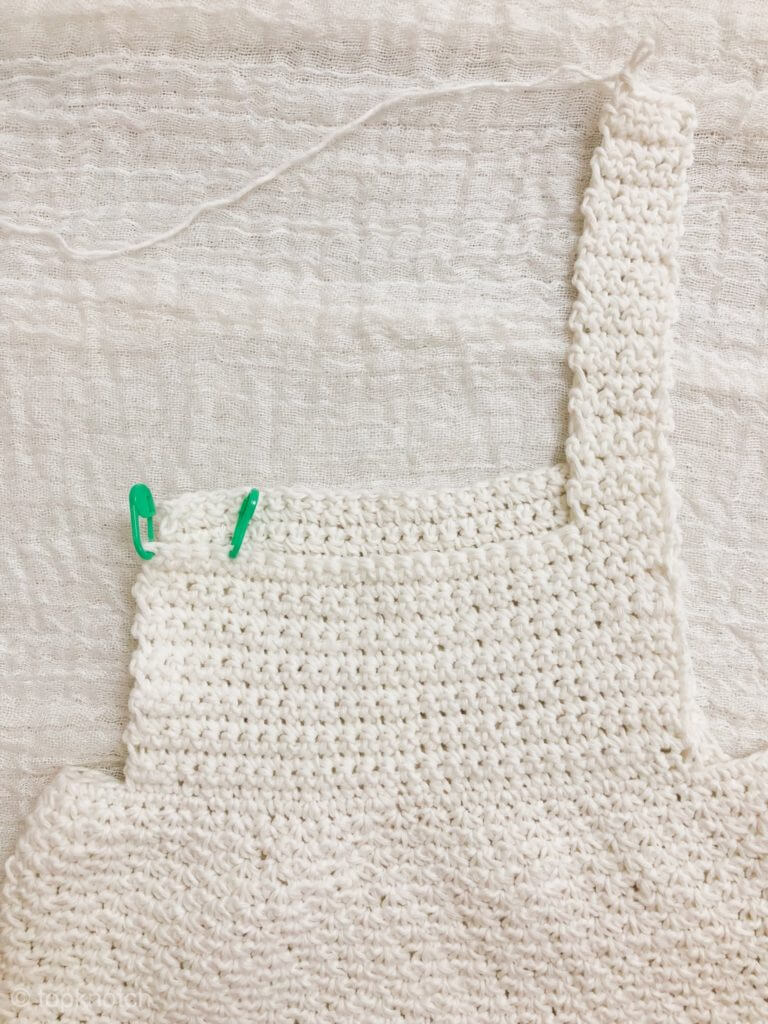
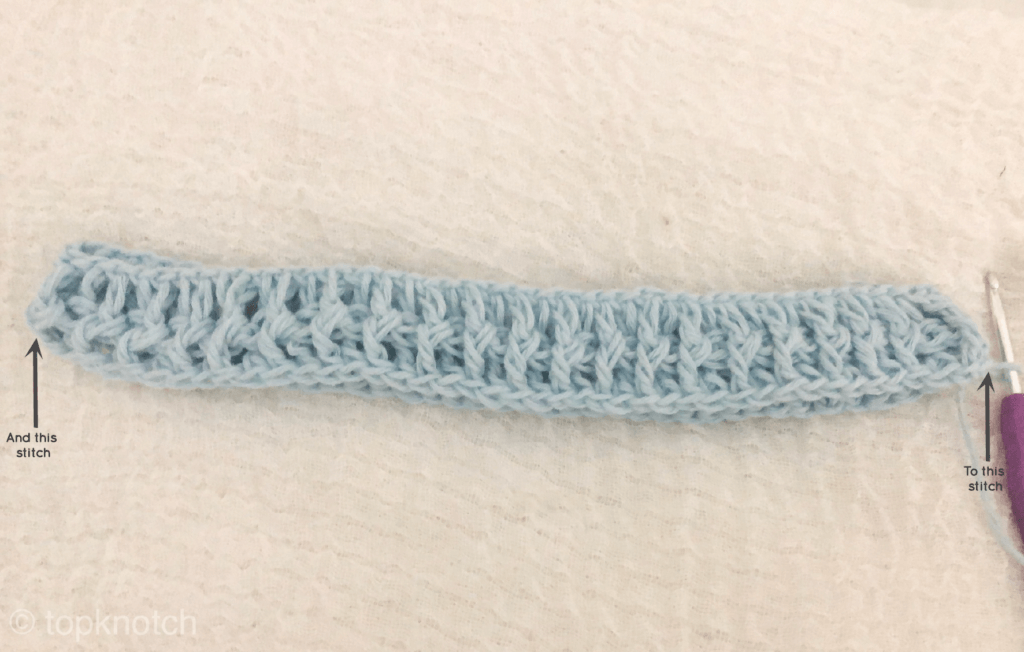
Put stitch marker to the back as shown in the picture bellow (one infront of each end of the front part). Attach yarn to one stitch marker and work you way with SC to the other stitch marker. and continue back and forth with sc rows.
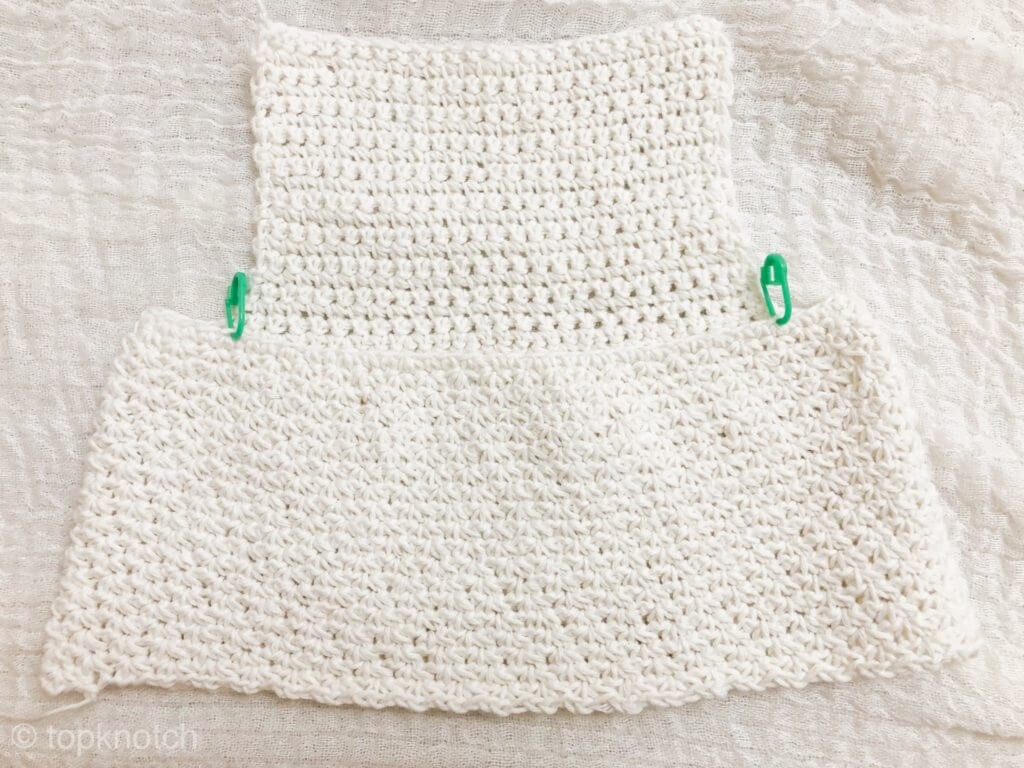
Stop when the back piece is shorter than the front by 2 cm(2, 3, 3, 3). (see the picture bellow)
Shoulder Strap
Put stitch markers like shown in the picture bellow one at each end of the back and leave 2 cm (2, 2.5, 2.5 ,2.5) from each stitch marker and put another one.
Attach yarn to the stitch marked at one end and work you way to the other marked stitch with sc and continue with sc rows till you strap total length reaches 12 cm(13, 13, 15, 16)
Repeat on the other side.
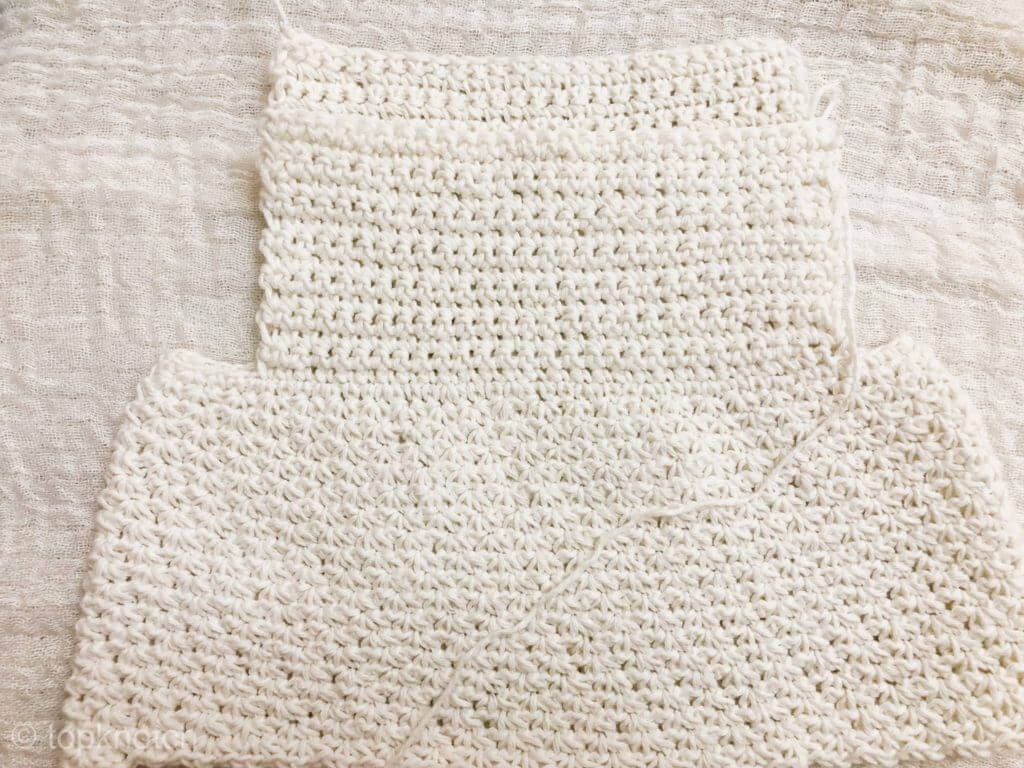
Finally sew the lose ends to the front part of the top.
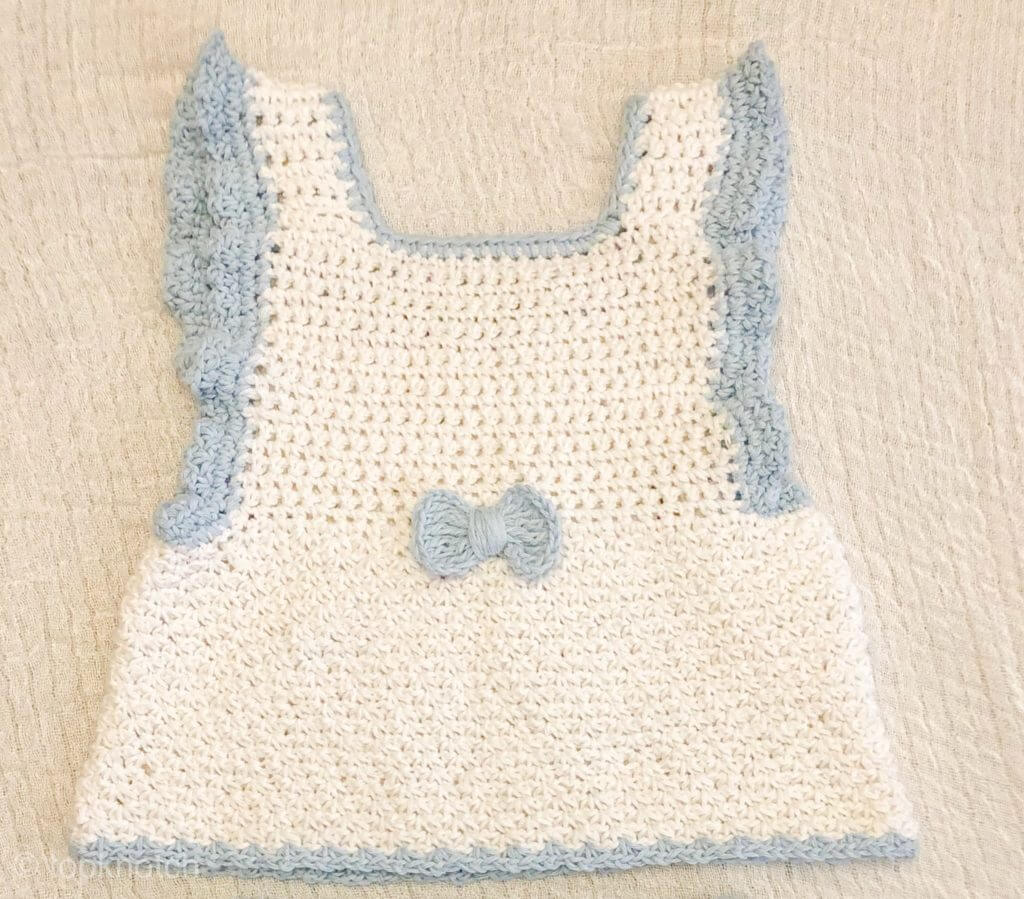
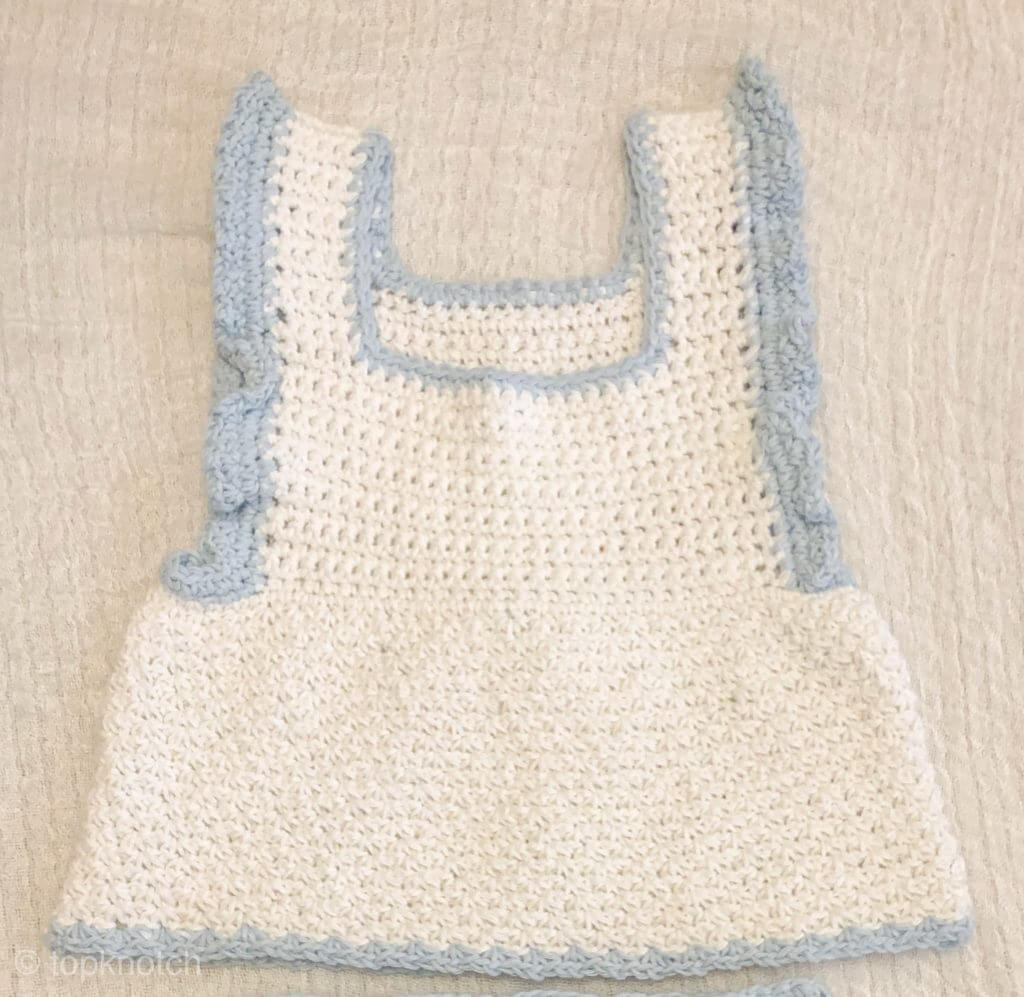
Ruffles
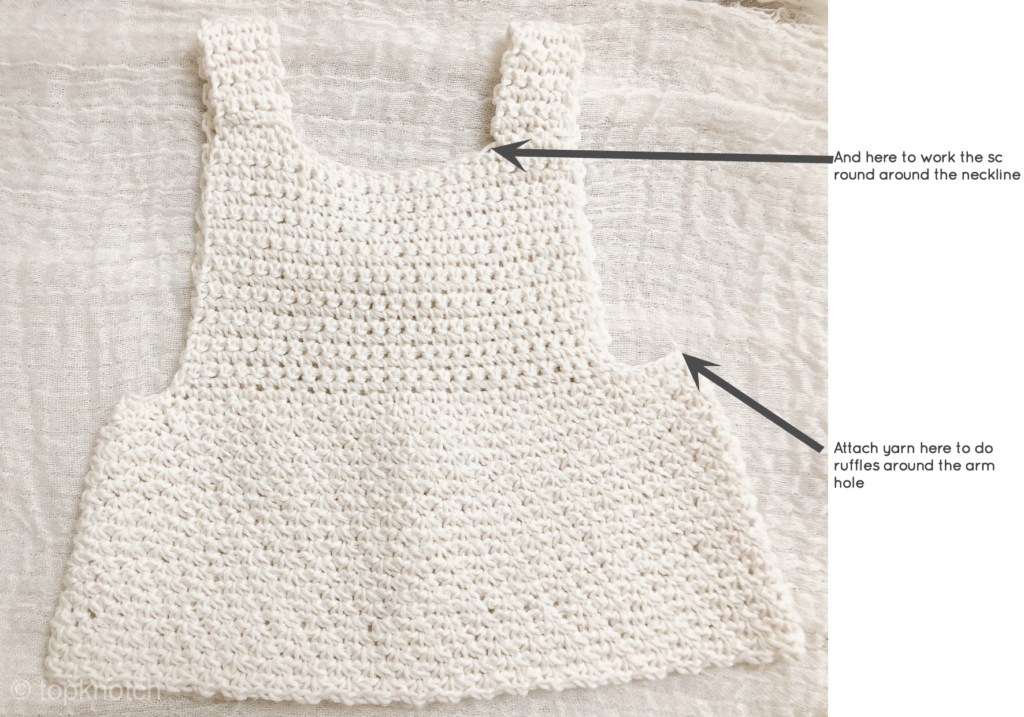
Attach the yarn (second/accent color) as shown in the picture bellow.
Round1. Work a sc round around the arm hole, till you reach the first stitch. slip stitch
Round 2. Work 2 sc on top of each stitch from the previous round.
Round 3. Work 1 last round of spider stitch (sc,ch1,sc in the same stitch skip one stitch and repeat till the end of the round)
Repeat the whole thing on the other side
The last step which is optional is to work one spider stitch round at the bottom of the top with the second/accent color. And another round of sc around the neck line.
Mini bow instructions:
Make a magic circle
Chain 6 then do 6 TC. Then chain 6, slip stitch in the magic circle. Again chain 6, 6 TC. finally chain 6, Slip stitch to the magic circle pull the loose strand.
Cut yarn leaving a tail at least a few inches long. To create the center of the bow wrap the two ends under and then back over the bow a few times.
Sew it to as shown in the picture bellow
Shorts:
Chain a 48 cm (50.5, 50.5, 53.5, 56) chain, join to the first stitch (make sure not to twist the chain)
Round 1: Dc in each chain around
To create a ribbing effect at the waist band we will work 1 row of Front Post & Back Post dc
Round 2. ch 2 work *one front post dc and one Back post dc*. Repeat from* to* till the end of the round, slip stitch to the first stitch (not the chain 2 space)
As shown in the picture bellow put a stitch marker in the first stitch where you have just slip stitched. And another stitch marker in the opposite stitch
We will start to work one sc round and one dc round or all sc crochet rounds its your choice you will find that in the picture above the shorts are made with one sc and one dc row and the one in the pictures here is worked with sc only. it does not matter since we are working with measurements so feel free to choose whatever you feel is better.
Round 3. 2 SC in the first stitch, and the two after it. 1 SC in all the next stitches till you reach the two stitches before the marked stitch. Do 2 SC in the next 5 stitches (the marked one the two before it and the two after it.) Continue with 1 SC in each stitch, till you reach the last two stitches do 2 SC in each one of them.
Round 4. Double crochet in each SC from the previous round.
Round 5. SC in each dc from the previous round.
Repeat round 4-5 Till the shorts (without the waist band) reaches 13 cm (15.5,18,20.5,23) or your desired length.
Put a stitch marker at the exact center and another one 1 cm away from the right and a third one one cm away from the left. Keep in mind the sticth markers is holding the front and back together. Meaning that the stitch at the back opposite to the front one is marked too.
Lower part of the shorts
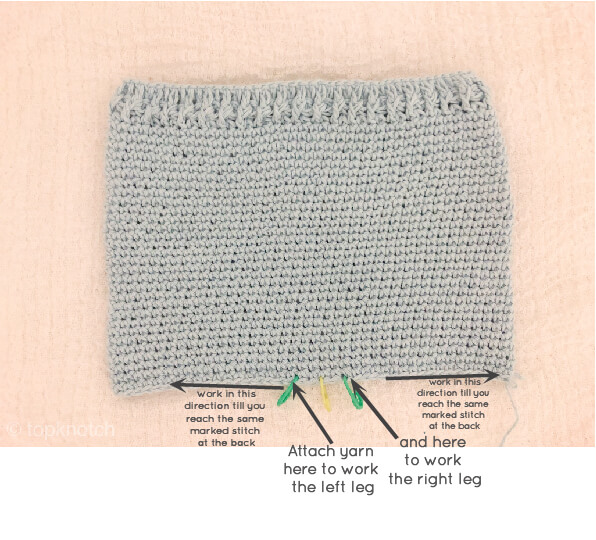
Sew the front to the back so that you have two leg openings and then to work each leg alone attach the yarn (as shown in the previous photo).
Row1. dc in each stitch
Row2. Ch2.*one front post dc and one Back post dc*. Repeat from* to* till the end of the round, slip stitch to the first stitch (not the chain 2 space)
Repeat on the other leg
Waist Band Drawstring:
Row 1: Chain as many chains to get a 60cm(65,65,70,70) chain,
Row 2: SC in each chain cut yarn and weave in ends then insert it to the waist band.
I hope you liked this pattern. If you made one, share it with me on Instagram. I would love to see how you adapted it and what variations you made 🙂
Take care and happy crocheting.