Hello everybody, I am so excited to share this waist bag pattern with you. I originally designed this pattern for my best friend’s birthday who is fond of waist bags. And honestly I have never tried to get or make one before this one. However after I made it I fell in love with it and made myself one. And I didn’t imagine I will be wearing it this much. It does not only look very stylish on almost every outfit I wear, but also its so functional. It takes my small wallet, keys and mobile-phone what else do I need right? and I feel very light as I walk and my hands and shoulders are free!!
If you didn’t see my previous beach bag bag pattern check it here
Pin it for later:

Now lets talk a little bit about this pattern
The materials you will need for this waist bag pattern are:
Disclaimer: This blog post may contain affiliate links. I may earn a small commission to fund my coffee drinking habit if you use these links to make a purchase. You will not be charged extra, and you’ll keep me supplied in caffeine. It’s a win for everyone, really.
- 2 rolls (It may take less than this) of natural twine yarn I bought mine from my local crafts store. However I Linked a few options that are very similar to the one I used. KINGLAKE 300 Feet Natural Jute Twine. Katzco Heavy Duty All Natural Jute Twine. TIAMALL 300 Feet Natural Jute Twine. Natural Jute Twine 2 Pack
- A 2.5 mm hook
- Stitch markers, yarn needle, measuring tape. Here is a set with one of my favorite hooks sets along with stitch markers and needles
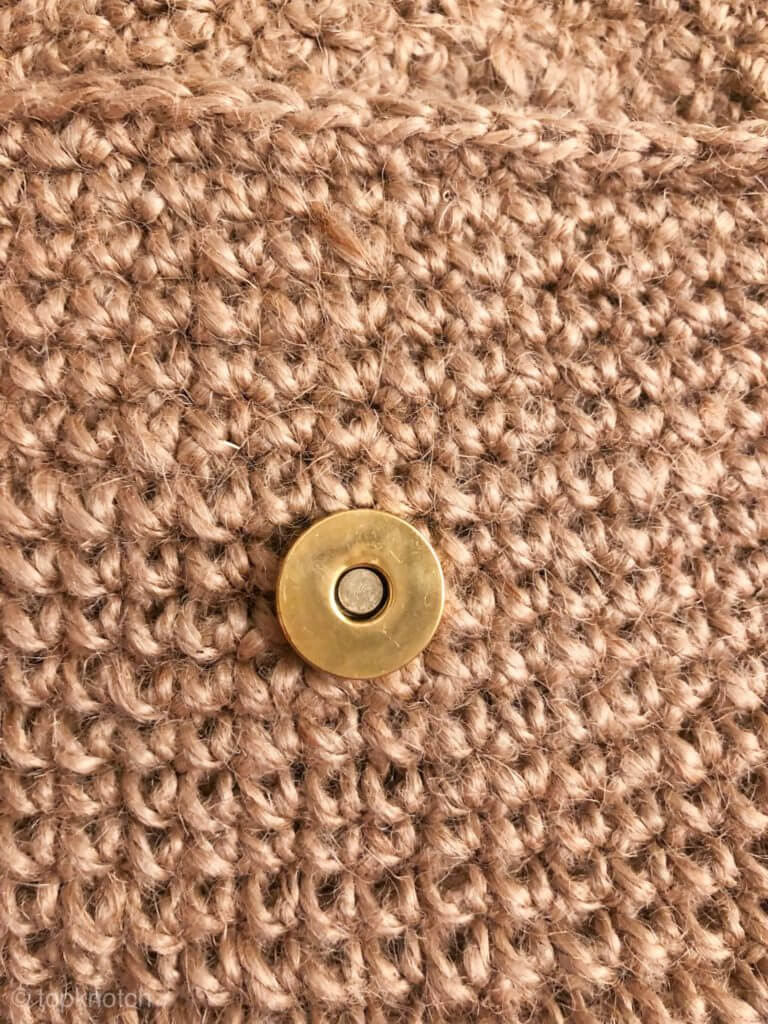
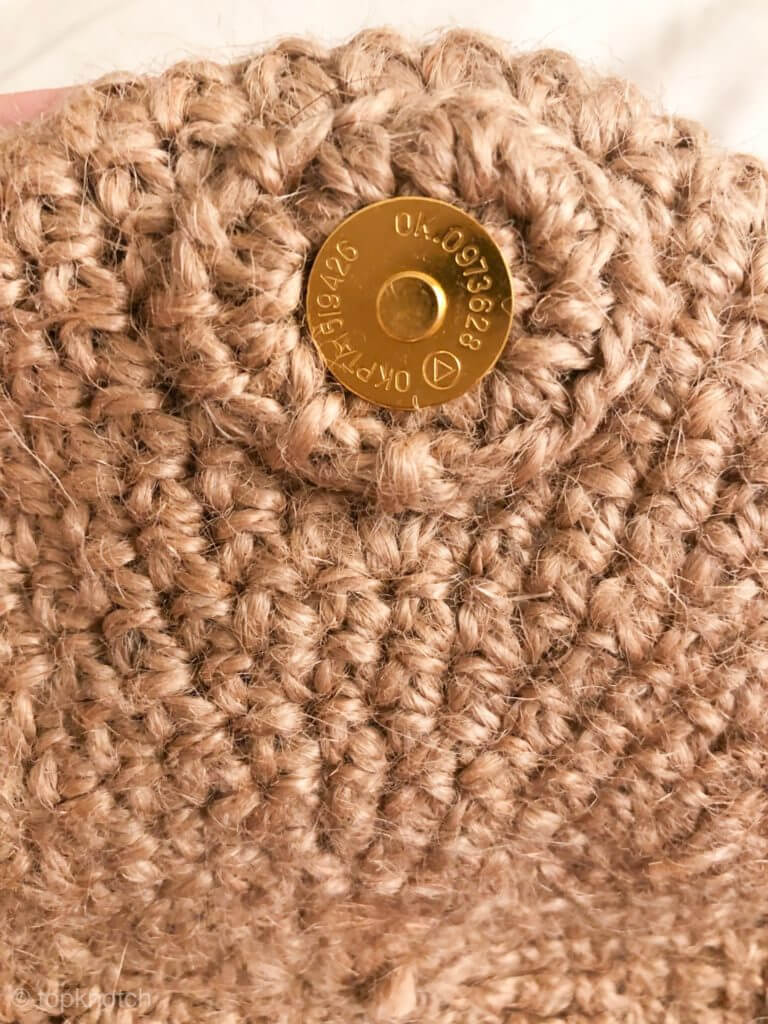
- Magnetic Button Clasp Snaps
- Belt Buckle: I have linked you a couple of options bellow, Silver Belt buckles 10 pcs, Bronze Belt buckles 50 pcs
Gauge
Gauge: 10 cm square= 15 sc stitches and 15 sc rows
Skill level: Beginner
Abbreviations and Glossary (US Terms):
- ch – chain
- sc – single crochet
- half double crochet
Skill level: Beginner
Abbreviations and Glossary (US Terms):
- ch – chain
- sc – single crochet
- hdc – half double crochet
- dc – double crochet
- tr – triple crochet
Notes:
Skill level: Beginner
Abbreviations and Glossary (US Terms):
- ch – chain
- sc – single crochet
- hdc – half double crochet
- dc – double crochet
- tr – triple crochet
Notes
- The pattern is written with US terms
- The top part is crocheted first then the lower part of the bag and finally the belt.
Pattern Instructions
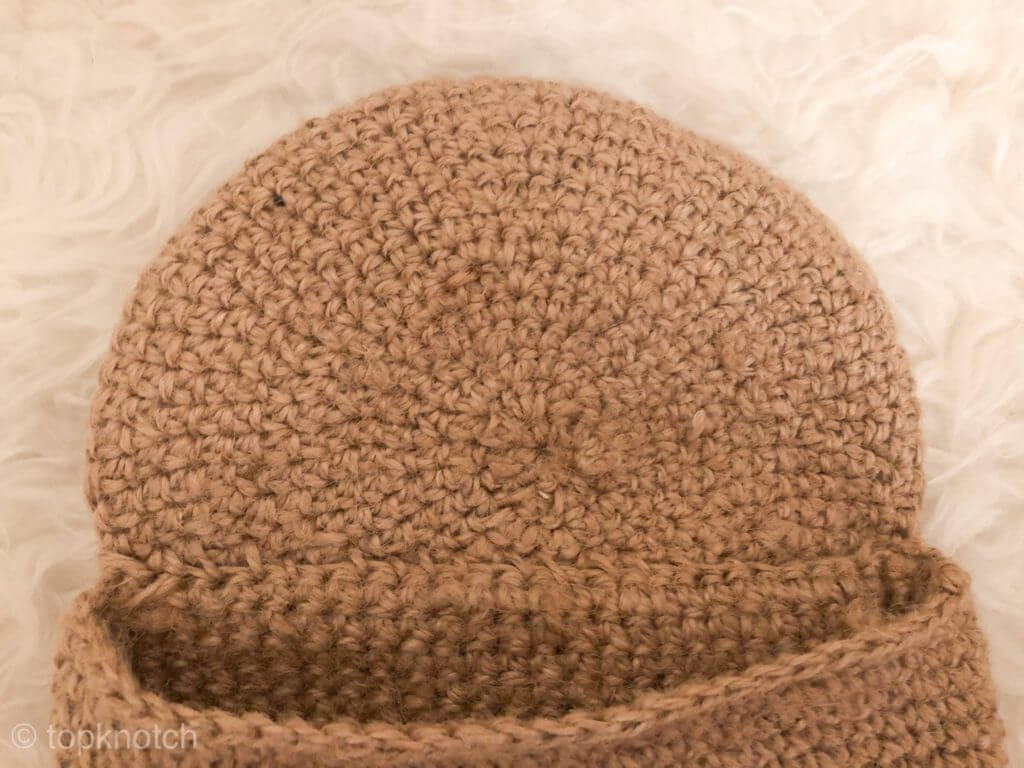
Top part of the bag
Rnd 1. 8 sc in magic ring {8}
Rnd 2. Two sc in each sc from the previous round {16}.
Rnd 3. *sc in one stitch, Inc * repeat from * to* around {24}
Rnd 4. *sc in the next 3 stitches, Inc*. Repeat from * to* around {30}
Rnd 5. sc in the first two stitches. *Inc, sc in the next 4 stitches*. Repeat from * to* 5 times, Inc, sc in the last 2 {36}
Rnd 6. *Sc in the next 5 stitches, Inc.* Repeat from * to* around {42}
Rnd 7. Sc in the first 3 stitches. *Inc, sc in the next 6 stitches.* Repeat from * to* 5 times, Inc, sc in the last 3 stitches. {48}
Rnd 8. *Sc in the next 7 stitches, Inc. *Repeat from * to* around {54}
Rnd 9. Sc in the first 4 stitches. *Inc, sc in the next 8 stitches* Repeat from * to* 5 times, Inc, sc in the last 4 {60}
Rnd 10. *Sc in the next 9, Inc.* Repeat from * to* around {66}
Rnd 11. Sc in the first 5 stitches. *Inc, sc in the next 10 stitches.* Repeat from * to* 5 times, Inc, sc in the last 5 {72}
Rnd 12. Sc in each stitch around {72}
Rnd 13. *sc in the next 11 stitches, Inc* repeat from * to* around {78}
Rnd 14. Sc in each stitch around {78}
Rnd 15. Sc in the first 6 stitches. *Inc, sc in the next 12 stitches.*repeat from * to* 5 times, Inc, sc in the last 6 {84}.
Lower part of the bag
First we will start with the base of the bag:
Chain 27
Row 1. sc in each chain.(26)
Row 2.(Chain one is not considered as the first stitch throughout this pattern). SC in the very first stitch and all the remaining stitches
Row 3-4. Chain one and repeat the previous row. At the end of this row your last SC will be in the first SC of the previous row. Not the chain one space.
If You don’t get the previous row. Check this tutorial to get straight edges by the amazing Sewrella
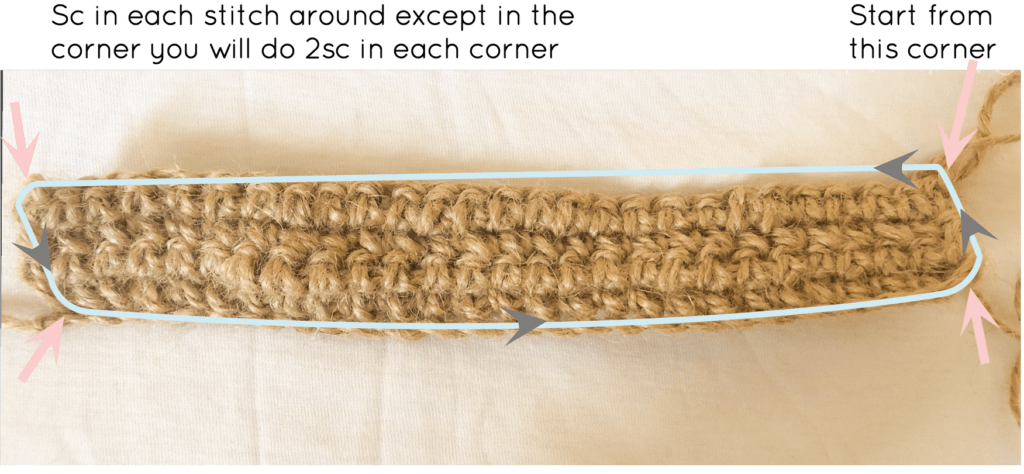
Now we will work one round of sc around the base part. As shown in the picture bellow
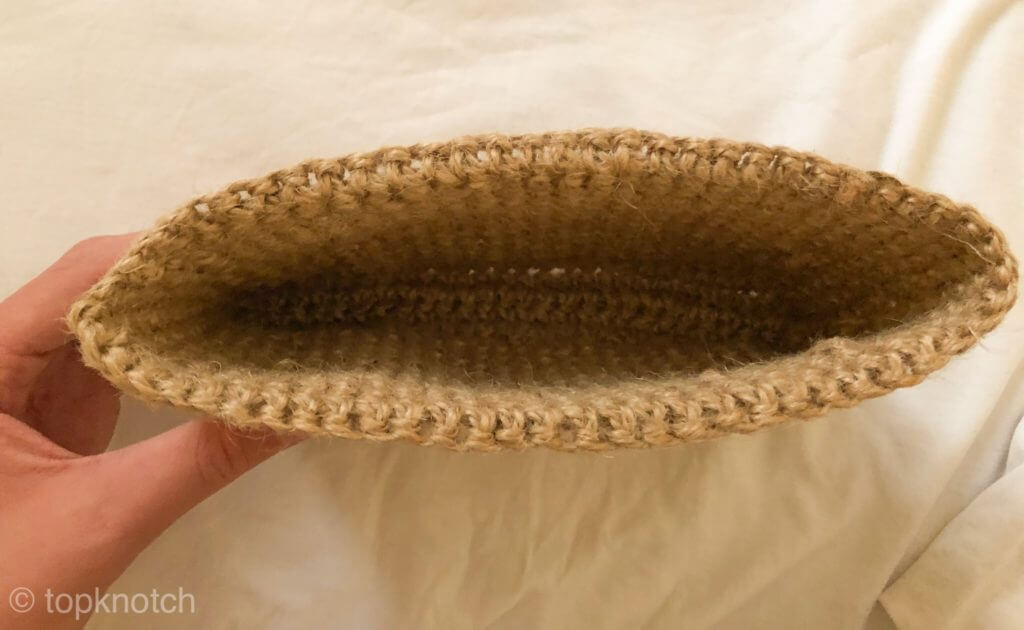
Then you will continue to work with rounds of one sc in each stitch around for 16 more rounds
Don’t forget to place a stitch marker to your first stitch in the each round to keep it easier for you to track the first stitch in the round.
The Belt
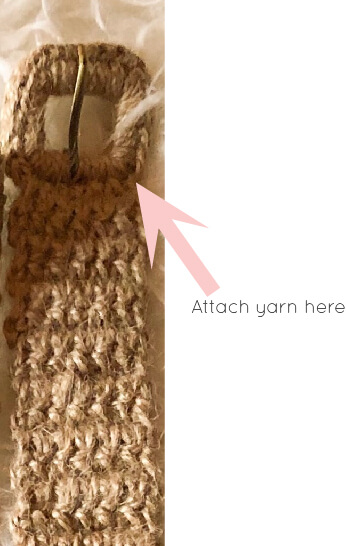
Sc in each around the belt the same way you sc around a ring. And remember to keep this long metal thing that gets into the holes of the belt exactly in the middle and sc crochet around it.
You will then attach the yarn as shown in the picture. And sorry I could not get you a clearer picture.
And continue to go back and forth with sc rows. Till your reach the desired length of your belt that fits your waist and remember this tutorial to get straight edges.
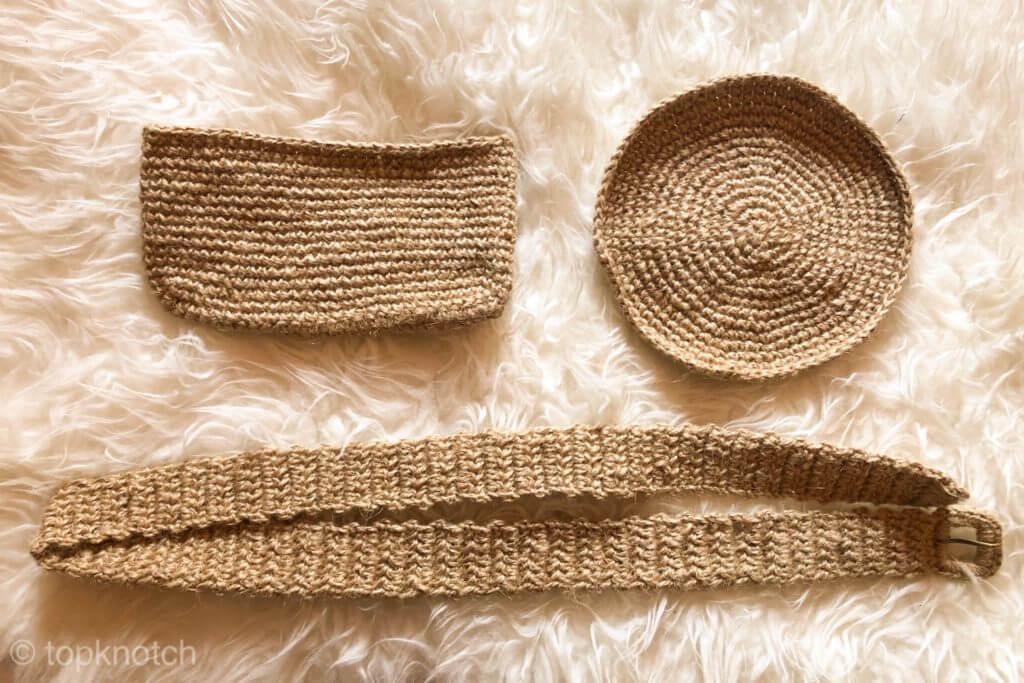
After finishing the belt, you will have the three parts of the bag you just have to sew it together.
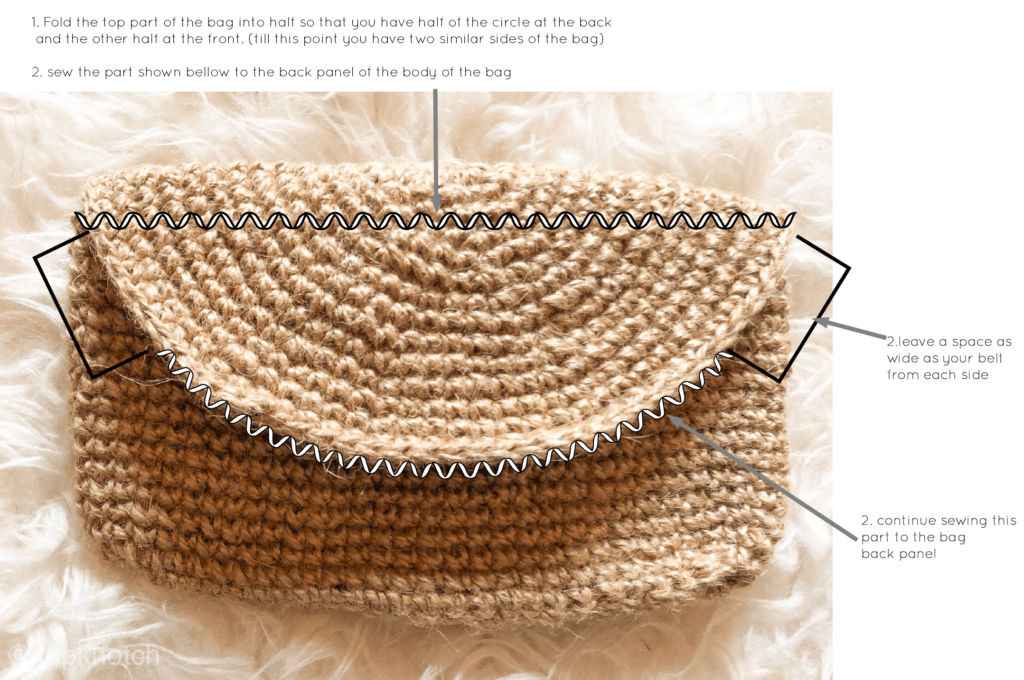
Using a yarn needle and the same twine yarn sew the top part to the body of the bag as shown in the pictures bellow.
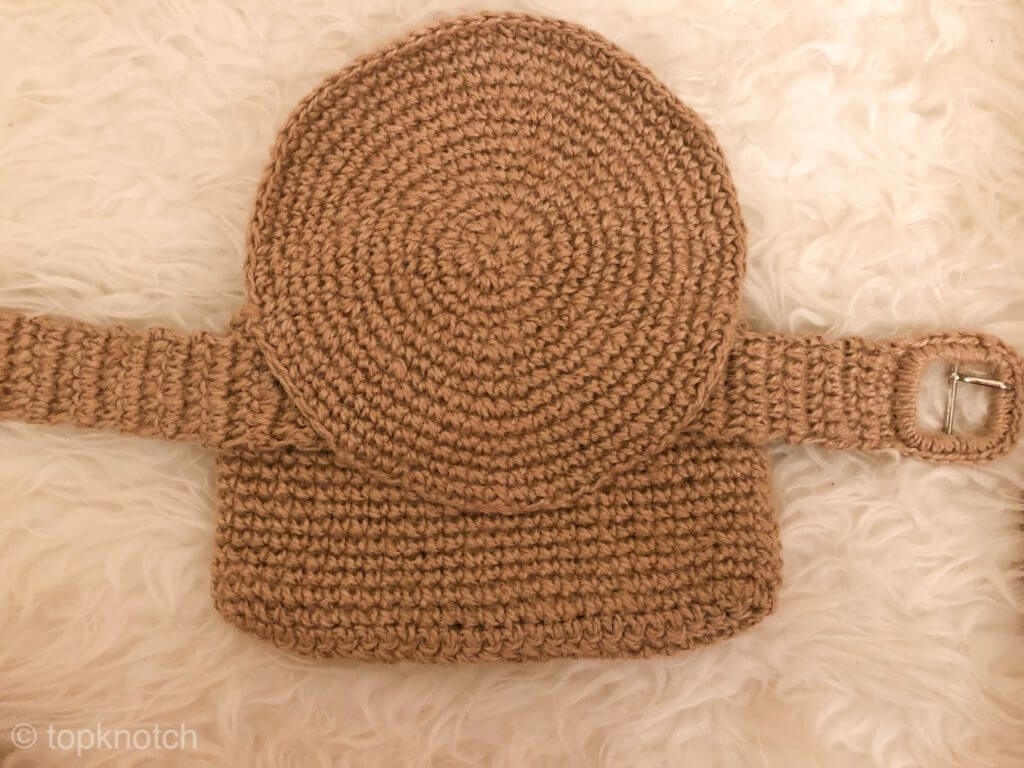
To move to the last step. Which is to add the magnetic button clasp snaps. Make sure that you attach them at the center of the bag.
You just have to crochet a crochet circle (like the one shown in the second picture bellow). Or a rectangle will do it too. The purpose of this is to hide the piece that secure the button in its place.
For the lower part of the button you don’t have to crochet an extra crochet piece. Since this security part will be hidden inside the bag.
AND CONGRATULATIONS YOU HAVE FINISHED THE PATTERN AND YOU HAVE MADE YOURSELF A STYLISH CROCHET WAIST BAG YOU SHOULD BE PROUD OF YOURSELF!!
I hope you liked this pattern. If you made one, share it with me on Instagram. I would love to see how you adapted it and what variations you made 🙂