

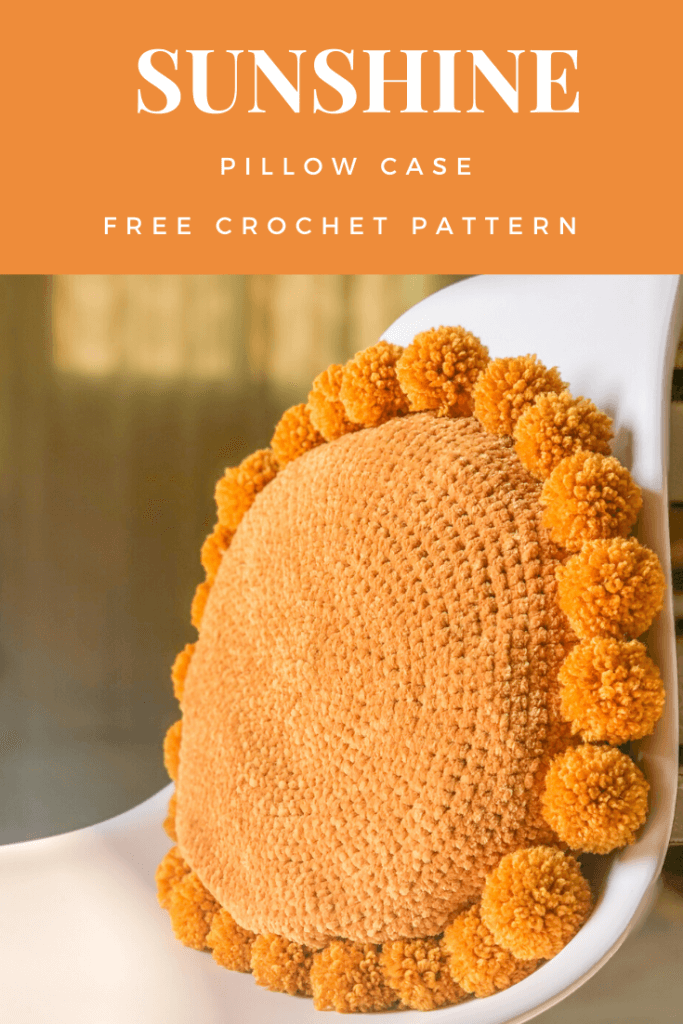
Hey Everyone, Am so glad am here sharing this beginner friendly crochet pillow case pattern with you! I had a very tough week but its easy to face the dark when we remember that its the path leading us into a beautiful morning when the sun will shine again! And here comes this pattern to add some positive vibes to a place that may needs a little more sunshine!
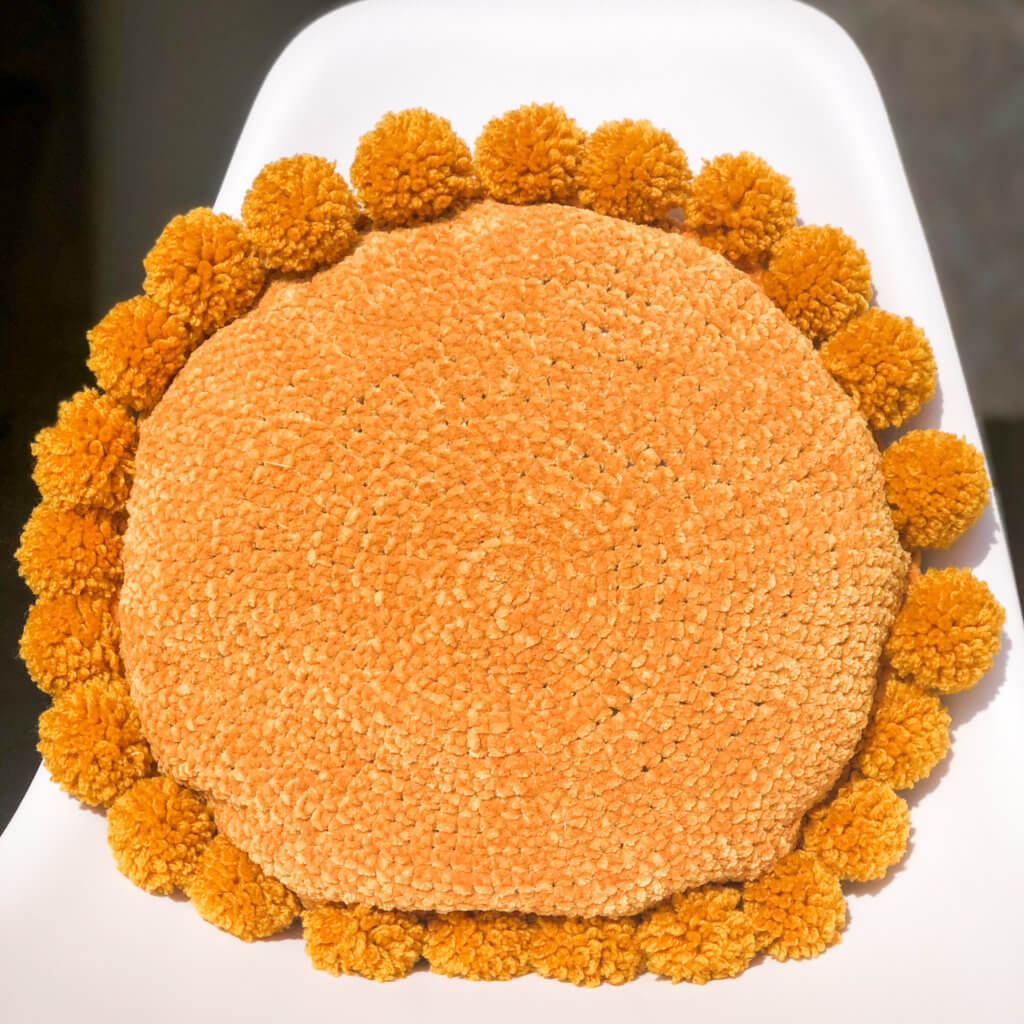
I honestly like the mix of the velvet yarn and the texture added by the back side of the single crochet stitch. It makes it look like those trendy woven pompom pillows!
If you don’t already know let me give you some background!
This pattern is part of bigger project that I have been preparing for a while. I am doing a room makeover on a budget using mainly crochet and some other DIYs!! I’am a big believer that our surrounding space affect our mood and productivity levels and I find my self more productive and happy when I have a place that is organized and looks pretty.
Also my room is the space where I work on my blog, sit down and chill, study, and even workout!! so basically If I don’t have a pilates class to teach or a family commitment I’ll be in my room (coz am an extremely introverted human being and I like it) :D. Hence I always want to add new things to my room, make it prettier and more functional that’s why I have created this room makeover series!!
Through out this series you will find cute decorative items as well as some functional/ storage solution items too. So If you are interested to see the rest of the series sign up here and receive all the updates, the free patterns and tutorials as well as the reveal of the before and after!!
Check the other patterns in this series that I have already released:
- “Enjoy little things” wall hanging
- Wall pocket / wall organizer
- Bobble-licious Crochet Pillow Case Free Pattern
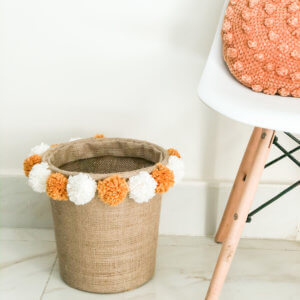
- Crochet boho Baskets
- Cozy crochet cushion
- DIY Vision board
- Wall pocket / wall organizer
- DREAM dream catcher
- Boho ceiling lmapshade
- Bedside Table Lampshade Free Pattern & Photo Tutorial
- Round Velvet Crochet Pillow Case
- Crochet Plant Pot Cover / Decorative Basket
- Rise and shine wall hanging
- DIY Waste Basket / Trash Can – Photo Tutorial
Pin it for later!!
Now let’s take you directly to the pattern
The materials you will need for this crochet pillow case are:
Disclaimer: This blog post may contain affiliate links. I may earn a small commission to fund my coffee drinking habit if you use these links to make a purchase. You will not be charged extra, and you’ll keep me supplied in caffeine. It’s a win for everyone, really.
Yarn:
- Two skeins of Himalaya bursa chenille velvet yarn this is the one I used (no.7) or any medium(4) velvet yarn of your choice
- For pompoms 1-2 skeins off yarn (Based on the number of pompoms you are going to make, mine was 24 and they took approximately 1.5 skeins) I used Alize super lana maxi ,saffron 02
- 4 mm hook
- Stitch markers. Here is a set with one of my favorite hooks sets along with stitch markers and needles
- A Round Pillow Insert: I have linked you a couple of options, Mine was 40cm/16 Inches however you can use any thing between 15-17 inches and adjust the pattern easily.
- Round Circular Pillows
- Round Pillow insert
- ComfyDown 95% Feather 5% Down
- 16″ Round Cluster Fiber Pillow
Or Follow this tutorial and make it yourself!!
Measurements:
The size of the finished pillow is 40cm/16 Inches excluding the pompoms.
The gauge
You don’t need gauge for this project.
Skill level: Beginner
Abbreviations and Glossary (US Terms):
- ch – chain
- sc – single crochet
- ss- slip stitch
- Inc – 2 sc in one stitch
Notes:
- The pattern is written in us terms, However the hook size is in mm
- You need to put a stitch marker at the last stitch of each round to mark the end of the round.
- You may want to make the pillow case 0.5 inch smaller than the actually pillow insert. To make sure that your pillow case fits perfectly without any loose areas, pumps or gaps.
- The diameter of the circles I used to trim my pompoms are 1.5” 4 cm
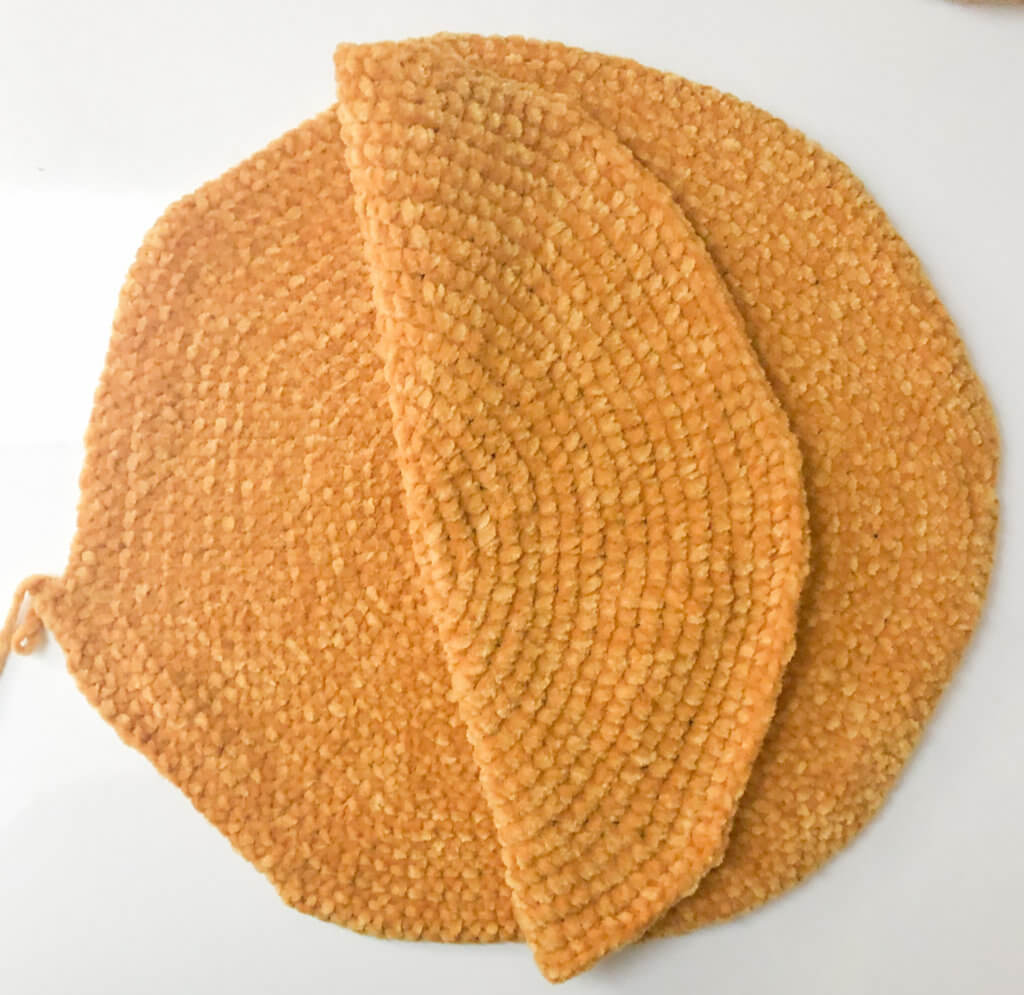
Make Two of the Following:
Round 1. 8 sc in magic ring {8}
Round 2. Two sc in each sc from the previous round {16}.
Round 3. * sc in one stitch, Inc * repeat from * to* till the end of the round {24}
Round 4. * sc in the next 2 stitches,Inc*. Repeat from * to* till the end of the round {32}
Round 5. *sc in the next 3 stitches,Inc*. Repeat from * to* till the end of the round {40}
Round 6. *sc in the next 4 stitches,Inc*. Repeat from * to* till the end of the round {48}
Round 7. *sc in the next 5 stitches, Inc*. Repeat from * to* till the end of the round {56}
Round 8. *sc in the next 6 stitches,inc*. Repeat from * to* till the end of the round {64}
Round 9. *sc in the next 7 stitches,inc*. Repeat from * to* till the end of the round {72}
Round 10. *sc in the next 8 stitches,inc*. Repeat from * to* till the end of the round {80}
Round 11. *sc in the next 9 stitches,inc*. Repeat from * to* till the end of the round {88}
Round 12. *sc in the next 10 stitches,inc*. Repeat from * to* till the end of the round {96}
Round 13. *sc in the next 11 stitches,inc*. Repeat from * to* till the end of the round {104}
Round 14. *sc in the next 12 stitches,inc*. Repeat from * to* till the end of the round {112}
Round 15. *sc in the next 13 stitches,inc*. Repeat from * to* till the end of the round {120}
Round 16. *sc in the next 14 stitches,inc*. Repeat from * to* till the end of the round {128}
Round 17. *sc in the next 15 stitches,inc*. Repeat from * to* till the end of the round {136}
Round 18. *sc in the next 16 stitches,inc*. Repeat from * to* till the end of the round {144}
Round 19. *sc in the next 17 stitches,inc*. Repeat from * to* till the end of the round {152}
Round 20. *sc in the next 18 stitches,inc*. Repeat from * to* till the end of the round {160}
Round 21. *sc in the next 19 stitches,inc*. Repeat from * to* till the end of the round {168}
Round 22. *sc in the next 20 stitches,inc*. Repeat from * to* till the end of the round {176}
Assembly and finishing:
Now lay down your two pieces. For variation I wanted my pillow to have slightly different looking sides. So I put my lower piece with the “wrong side” of the stitch upwards. which by the way does not look wring at all its just perfect!! and the upper piece again. I put it in the same way so that you have one wrong side facing one right side.
Now is the time to assemble both sides together as you see in the video bellow. And add your pompoms too!
Notes on the video:
- Single crochet both sides together till you have an opening big enough to insert your pillow.
- Then continue the same way till you finish assembling the two parts together.
- make sure to leave a long tail in the pompom to be able to tie it to the pillow as you see in the video.
Here is another video that includes how to make pompoms if you want some extra details.
I hope you liked this pattern. If you made one, share it with me on Instagram. I would love to see how you adapted it and what variations you made 🙂
Take care and happy crocheting.
Hello there! Would you mind if I share your blog with my facebook group?
There’s a lot of folks that I think would really appreciate your content.
Please let me know. Thanks
Yes please do!!! it would be my pleasure! thanks a lot
Hello! I am a beginner and haven’t crochet before, do you have a beginners video that I can follow to make this pillow?
HELLO!! THANK YOU OS MUCH FOR YOUR INTEREST IN MY PATTERN!! CURRENTLY I DON’T HAVE A YOUTUBE CHANNEL TO SUPPORT MY PATTERNS WITH VIDEO TUTORIALS. BUT AM WORKING ON IT! PLZZ SUBSCRIIBE TO MY EMAIL LIST SO THAT I CAN UPDATE YOU WHEN I START MY CHANNEL AND I PROMISE THIS PILLOW IS GOING TO BE ONE OF THE VERY FIRST VIDEOS ON THIS CHANNEL !
I’ve been exploring for a bit for any high-quality articles or weblog posts on this sort of house .
Exploring in Yahoo I at last stumbled upon this site.
Studying this info So i am glad to convey that I’ve a very
just right uncanny feeling I discovered exactly what I needed.
I so much definitely will make certain to do not forget this site and provides it a look on a constant basis.
thank you so much it makes me so happy!