
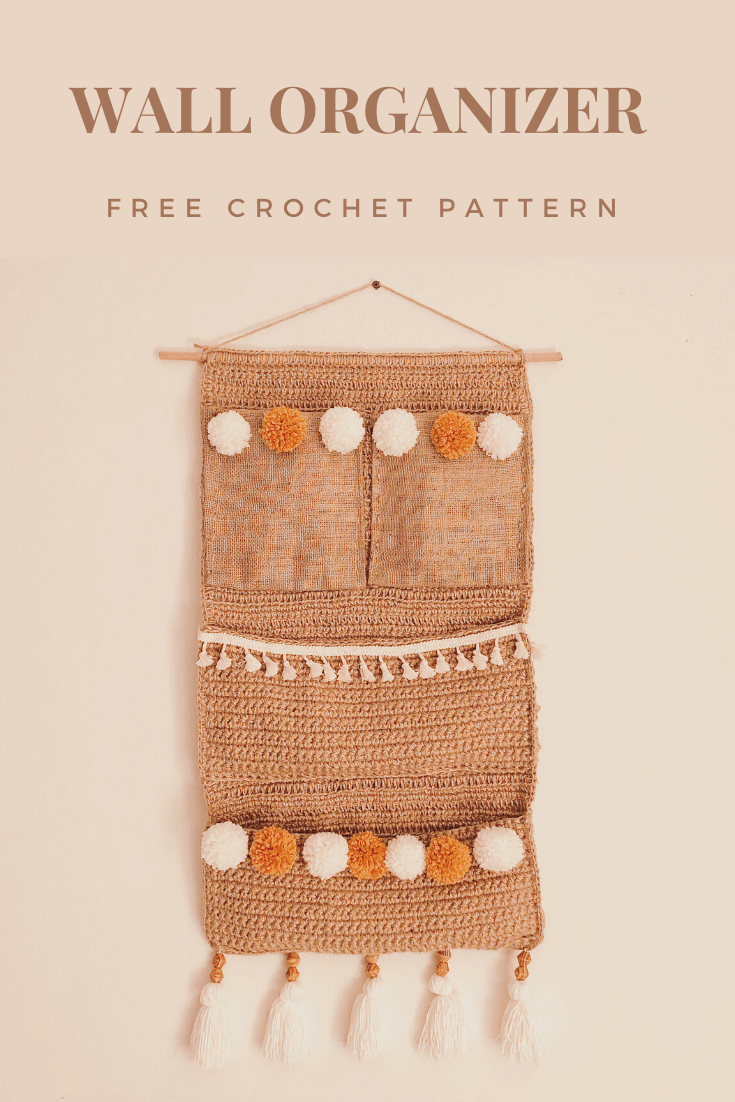
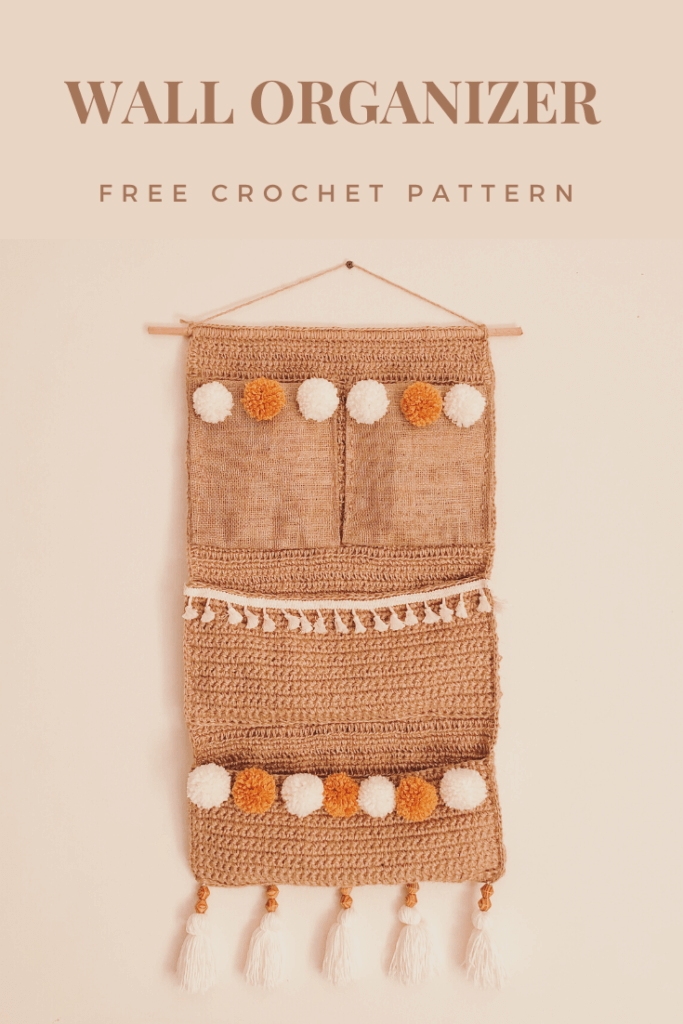
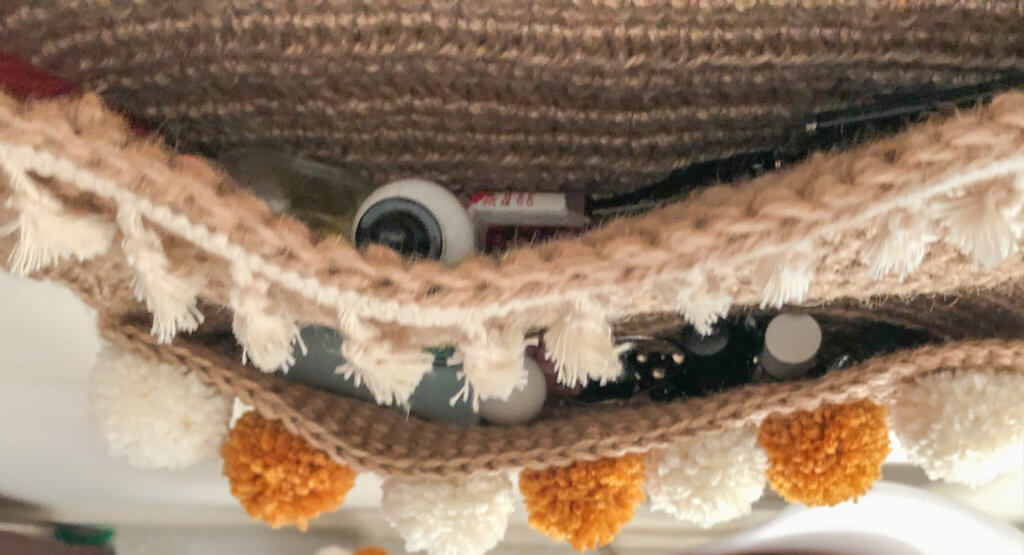
Hi Everyone! Today I have another pattern from my room makeover series! Its crochet wall pocket/ wall organizer. It’s a beginner friendly simple pattern. Yet it’s so functional and practical.
I made this wall pocket to hang beside my full length mirror. Since I don’t have a vanity table. So I wanted something to store my makeup and hair accessories beside my mirror. And when it comes to makeup and accessories am very minimal so this wall organizer actually took all my stuff! however you can use this to hang beside your desk for some extra storage, for craft supplies, pens, pencils notebooks etc.
If you don’t already know let me give you some background!
This pattern is part of bigger project that I have been preparing for a while. I am doing a room makeover on a budget using mainly crochet and some other DIYs!! I’am a big believer that our surrounding space affect our mood and productivity levels and I find my self more productive and happy when I have a place that is organized and looks pretty.
Also my room is the space where I work on my blog, sit down and chill, study, and even workout!! so basically If I don’t have a pilates class to teach or a family commitment I’ll be in my room (coz am an extremely introverted human being and I like it) :D. Hence I always want to add new things to my room, make it prettier and more functional that’s why I have created this room makeover series!!
Through out this series you will find cute decorative items as well as some functional/ storage solution items too. So If you are interested to see the rest of the series sign up here and receive all the updates, the free patterns and tutorials as well as the reveal of the before and after!!
Check the other patterns in this series that I have already released:
- Bobble-licious Crochet Pillow Case Free Pattern
- Crochet boho Baskets
- Cozy crochet cushion
- DIY Vision board
- “Enjoy little things” wall hanging
- Wall pocket / wall organizer
- DREAM dream catcher
- Boho ceiling lmapshade
- Bedside Table Lampshade Free Pattern & Photo Tutorial
- Round Velvet Crochet Pillow Case
- Crochet Plant Pot Cover / Decorative Basket
- Rise and shine wall hanging
- DIY Waste Basket / Trash Can – Photo Tutorial
- Sunshine Crochet Pillow Case – Free Pattern.
AND STAY TUNED FOR MORE!!
PIN IT FOR LATER:
Now lets take you to the pattern!
The materials you will need for this crochet wall pocket are:
Disclaimer: This blog post may contain affiliate links. I may earn a small commission to fund my coffee drinking habit if you use these links to make a purchase. You will not be charged extra, and you’ll keep me supplied in caffeine. It’s a win for everyone, really.
- Yarn: 5 (6 if you will make all pockets crocheted) roll of natural twine yarn (however this can change if you want to make a bigger or smaller size )
I bought mine from my local crafts store. However, I Linked a few options that are very similar to the one I used KINGLAKE 300 Feet Natural Jute Twine , Katzco Heavy Duty All Natural Jute Twine, TIAMALL 300 Feet Natural Jute Twine, Natural Jute Twine 2 Pack - Hook: 3.5 and 5 mm, Stitch markers, Scissors, Measuring tape. Here is a set with one of my favorite hooks sets along with stitch markers and needles
- Wooden dowel (approximately 18.5″ 47 cm)
- 50 CM X 50 CM( 20″ x 20″) burlap fabric
Optional material for decorations:
- Some extra yarn for tassels and pompoms
- I used ALIZE SUPERLANA light cream code (code 62), saffron (code 02) for pompoms and I used COTTON GOLD by alize WHITE,for tassels
- Wood beads here are the ones I used
- A Glue gun
- Roughly 45 CM (18″ )lace trims of your choice. Again mine was from my local store. But I linked you very similar ones that I think would go great with the pattern.
- 5 Yards 100% Cotton Tassel Trim
5 Yards 100% Cotton Tassel Trim, - Dyeable Cotton Knotted Tassel Trim
- Cotton Fringe Trims, 53/64in Wide
- Susuntas 5 Yards 4cm Wide Cotton Lace Trim
- Here are some colorful ones that I think would look so cute too! Multi coloured tassel fringe trim, and Tassel trim, tassel net fringes.
Measurements:
40 cm wide * 75 cm long. (Excluding the tassels)
Guage:
Base: 10 cm square = 14sc 11 rows (Alternating 2 sc rows and 1 hdc row)
Pockets: 10 cm square= 11sc *11 rows
Skill level: Beginner
Abbreviations and Glossary (US Terms):
- ch – chain
- sc – single crochet
- hdc – half double crochet
- ss- slip stitch
Notes:
- The pattern is written in us terms, (However the hook size is in mm)
- Watch this tutorial and apply it through out the pattern to help you achieve straight edges.
- I added a cotton lining to the base to help keep the shape of the wall pocket. However the pattern is designed to be sturdy enough to keep its shape even without the lining.
- I decided to make my top pockets with burlap fabric. However you can make it with crochet too if you prefer.
- I used a glue gun to glue the pompoms and tassel trims to my wall pocket/organizer.
Instructions:
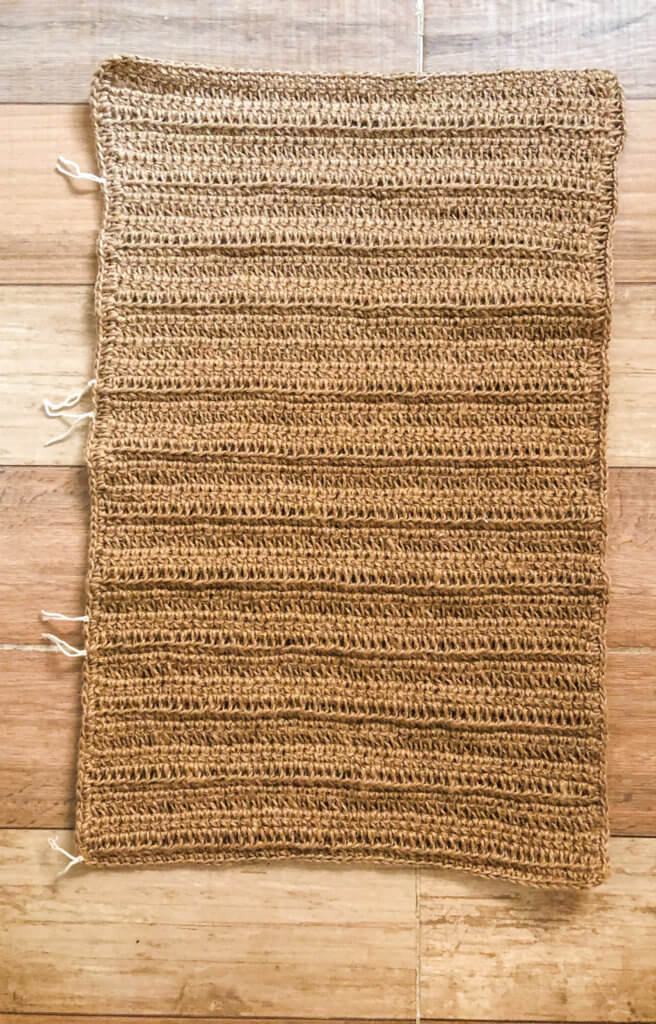
Base:
With a 3.5 mm hook, Chain 41
Row 1. Do one sc in each chain. so you have SC, chain 1 and turn
Row 2. Hdc in the very first stitch and all the remaining stitches. Chain 1 and turn
Row 3-4 Do one sc in each stitch from the previous row, chain 1 and turn.
Row 5-74. (Repeat row 2-4)
Row 75 sc in each stitch in the row
Do one final sc row around the 4 edges of your crocheted piece.
Before you make the pockets:
MARK FOR CORRECT PLACEMENT, I used white yarn to mark my rows where the pockets starts and ends. And the gaps between them.
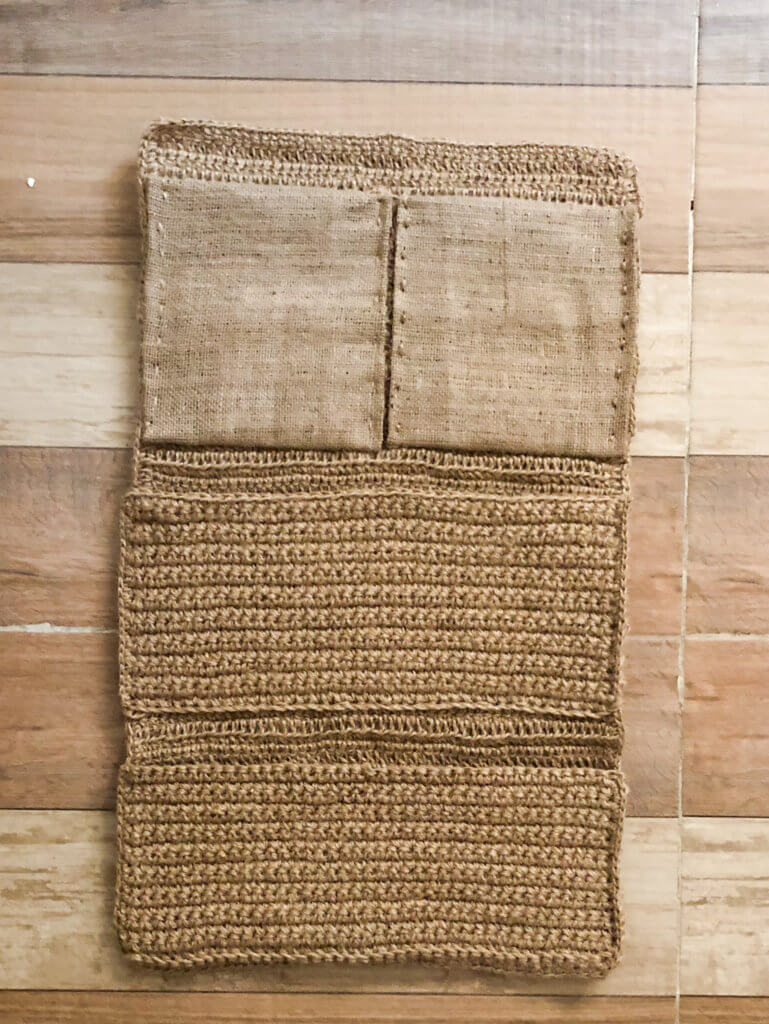
I marked row 1 at the bottom to row 18 to mark the space for the bottom pockets. I left 19-21 as a gap between the bottom and middle pocket, then I marked form 22 to row 40 for the middle pocket. Again I left from row 40 to 43 as gap. Then I decided to make the top pockets with burlap fabric, split it into two pockets & make it a little bit longer than the two other pockets .However if you want to make the third pocket similar to the first ones mark row 44 and 62 then leave the rest as a gap between the pocket and the wooden dowel.
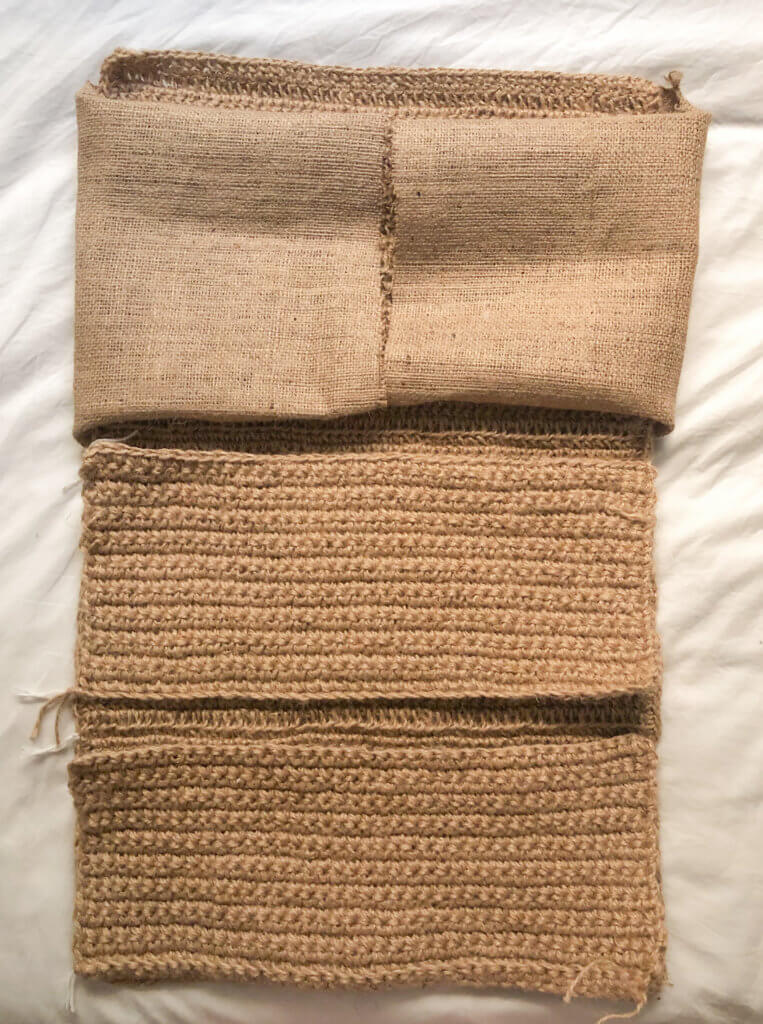
Pockets: Make 2 (or 3 if you choose to make it all crochet)
With a 5 mm hook and double strand of jute/twine yarn
Chain 41
Row 1-19. Do one sc in each chain. Chain 1 and turn.
Assembly & Decorations:
Now place your pockets on its places that you marked previously.
For the bottom pocket you are going to Join the pocket to the base with a sc as shown in this video.(The only difference will be that you are placing the two pieces on top of each other not flat side to side as shown in the video.) Using jute/twine yarn and a 3.5 mm hook starting from the left side going through the bottom edge then the right.
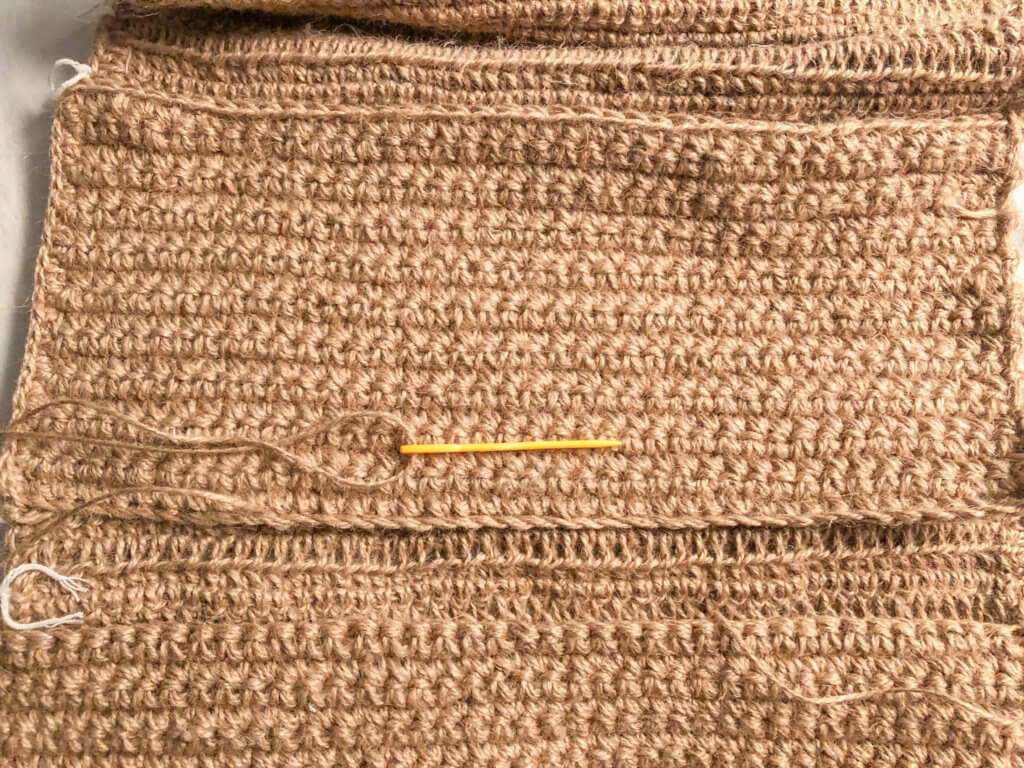
However for the middle part you won’t be able to the bottom edge with the sc edge seam so you are going to make the right and left sides with sc edge seam and the bottom with a tapestry needle
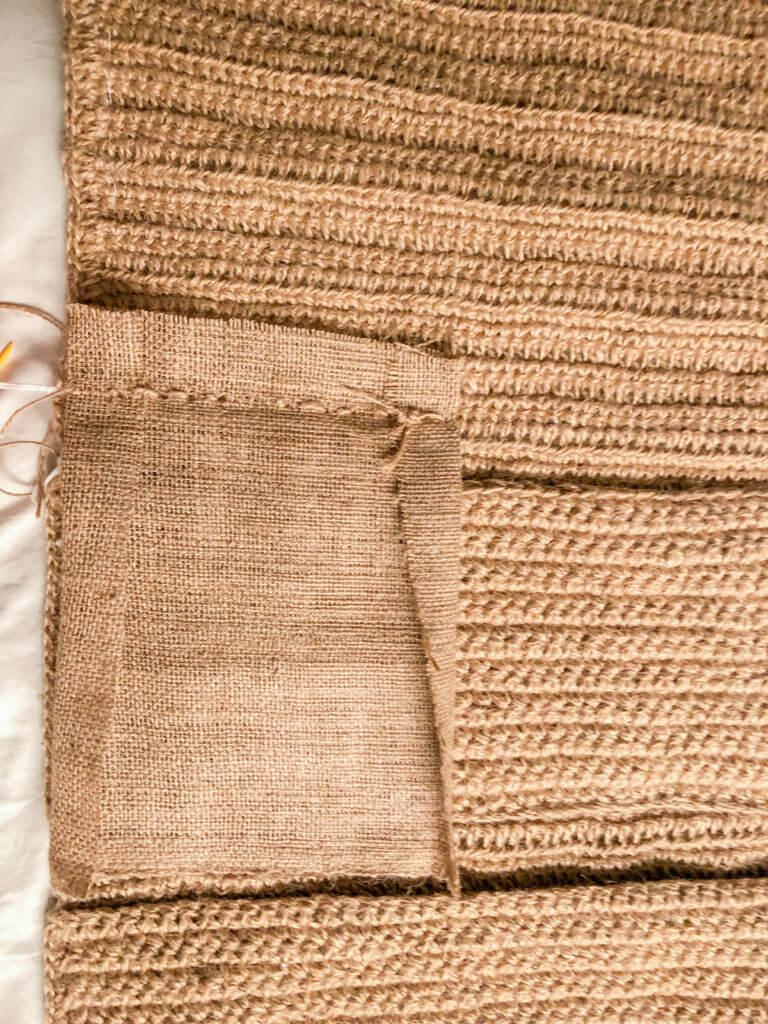
Lastly place your burlap pocket as you see in the picture bellow fold the seam edges then sew it to the base. starting from the bottom edge as you see in the picture (align this bottom edge with the marked stitch that mark the bottom of the pocket). After you sew the bottom you are going to flip it upwards and sew it to the base from the right and left. Finally repeat this again with the second pocket.
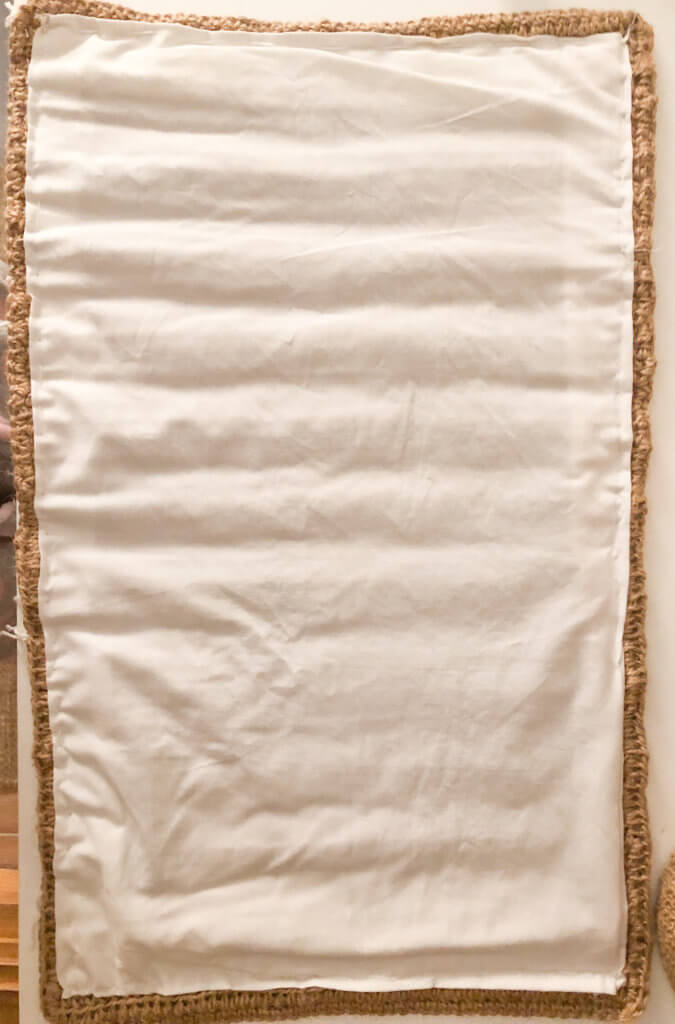
Now before moving to the fun part. If you want to add a lining to the base. You may do this now.
And excuse my sewing skills am a terrible sewer :D. although this pocket was designed to be sturdy enough and made with non stretchy yarn. I decided to add a cotton lining to the base to make it even stronger. and prevent stretching. however I didn’t line the pockets coz they are very sturdy and rigid.
Now It’s time to have some fun decorating with pompoms and tassels!!
Here Is a video showing how I made my tassels and pompoms!
Your last step is to attach your pocket to a wooden dowel again with a 3.5 mm hook and jute/twine yarn using the method shown in the video bellow.
I hope you liked this pattern. If you made one, share it with me on Instagram. I would love to see how you adapted it and what variations you made 🙂
Take care and happy crocheting.
As I said at the beginning the post, This pattern is a part of a room makeover using mainly crochet and some other DIYs. If you are interested to see the rest of the series sign up here and receive all the updates, the free patterns and tutorials as well as the big reveal of the before and after!!

Very good info. Lucky me I discoveredd your blog by accident.
I have book-marked itt for later!
thank you so muchhh!! am so happy you like my content hope it is useful for you!
I am wanting to use your pattern for a Christmas greeting card holder for my son but I don’t see how many chains you started the base with.
Hi thank you for informing me and so sorry for any inconvenience I have just updated the pattern you start with 41 chains
I was completely captivated by your article—it was truly brilliant! I’ll definitely be following your work moving forward. If you ever have time, I’d love for you to explore some of my content as well. Thanks for sharing such an incredible read! – 24betting
I’m really thankful to the creator of this content for all the time, effort, and helpful ideas shared. It was not only useful but also inspiring, and it made a big difference in my work. I truly appreciate the hard work behind it and can’t wait to see more great content ahead. – run 567