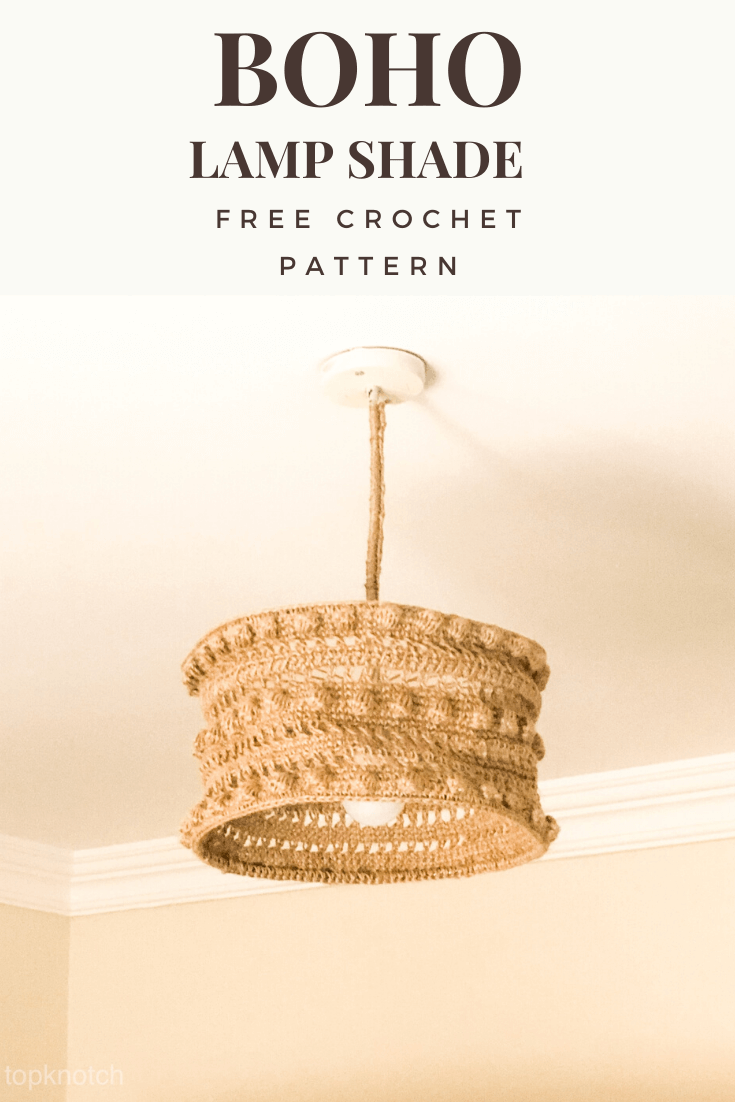
Hello everybody, Today I have a new home decor pattern for you. Its a boho crochet ceiling lamp shade! If you read my beach bag post you’ll probably know how I was excited about this twin yarn. And as I was writing the post the idea of making a lamp shade from this yarn crossed my mind since I hated the one I already had. However, I kept procrastinating on this project for months but its finally here!
This was one of those projects that I didn’t plan to write a pattern for. I started with no particular clear plan in my head however I liked the results pretty much so I decided to write a pattern and share it with you. I also made few small tweaks to the written pattern to avoid some of the mistakes I did when doing this lamp shade. But I promise you will get the same look and results I have if you followed it.
This pattern is part of a room makeover on a budget using mainly crochet and some other DIYs!!
I’am a big believer that our surrounding space affect our mood and productivity levels and I find my self more productive and happy when I have a place that is organized and look pretty.
Also my room is the space where I work on my blog, sit down and chill, study, and even workout!! so basically If I don’t have a pilates class to teach or a family commitment I’ll be in my room (coz am an extremely introverted human being and I like it) :D. Hence I always want to add new things to it, make it prettier and more functional that’s why I have created this room makeover series!!
Through out this series you will find cute decorative items as well as some functional/ storage ideas items too. So If you are interested to see the rest of the series sign up here and receive all the updates, the free patterns and tutorials as well as the reveal of the before and after!!
Check the other patterns in this series that I have already released:
- Crochet boho Baskets
- Cozy crochet cushion
- DIY Vision board
- “Enjoy little things” wall hanging
- Wall pocket / wall organizer
- DREAM dream catcher
- Rise and shine wall hanging
- Bedside Table Lampshade Free Pattern & Photo Tutorial
- Round Velvet Crochet Pillow Case
- Crochet Plant Pot Cover / Decorative Basket
- Bobble-licious Crochet Pillow Case Free Pattern
- DIY Waste Basket / Trash Can – Photo Tutorial
- Sunshine Crochet Pillow Case – Free Pattern.
Now let’s move directly to the pattern!
Disclaimer: This blog post may contain affiliate links. I may earn a small commission to fund my coffee drinking habit if you use these links to make a purchase. You will not be charged extra, and you’ll keep me supplied in caffeine. It’s a win for everyone, really.
The material you will need for this pattern are:
- 2 rolls of natural twine yarn I bought mine from my local crafts store. However, I Linked a few options that are very similar to the one I used KINGLAKE 300 Feet Natural Jute Twine , Katzco Heavy Duty All Natural Jute Twine, TIAMALL 300 Feet Natural Jute Twine, Natural Jute Twine 2 Pack
- Hook: 3.5 mm
- Stitch markers, yarn needle. Here is a set with one of my favorite hooks sets along with stitch markers and needles
- You will also need some sort of a lamp shade ring set to attach your lamp shade to. You might also need a Pendant Lamp Cord.
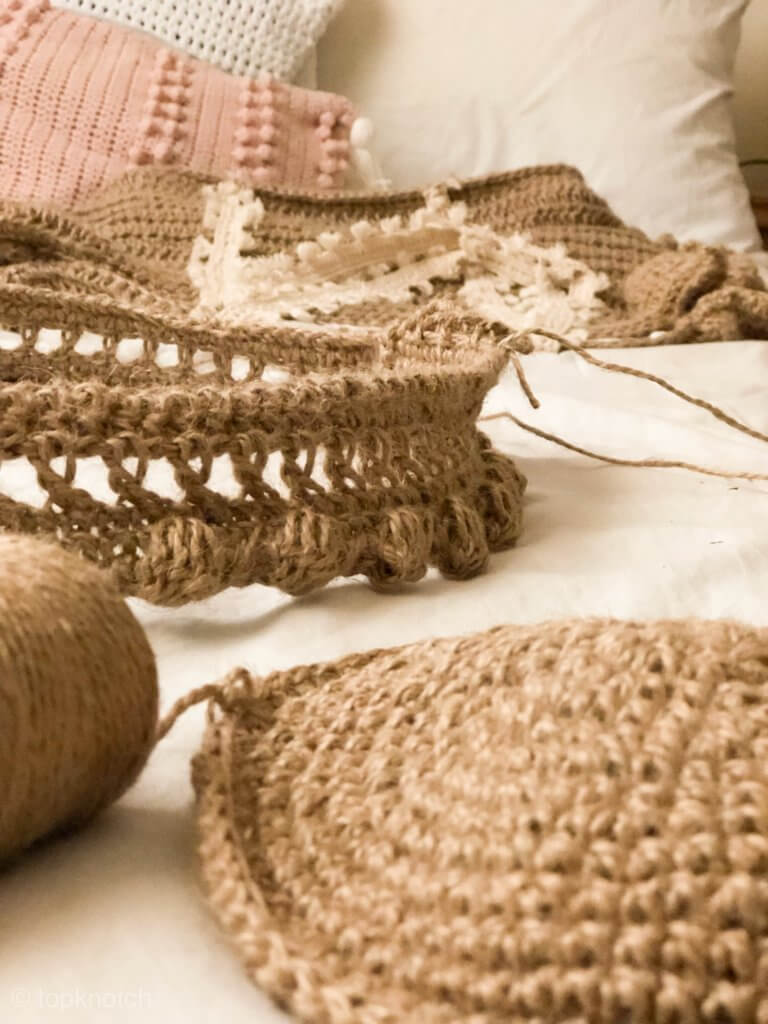
Now for me I have this hobby of using old stuff in things That I make. So, I used this flexible bendy metal wire thingy you will see in the pictures it was originally one of the decorations of my old lamp shade so if you are like me you are welcomed to try anything that you already have in your house. However, if you are less patient and wants better results I highly recommend that you buy a lamp shade ring set coz it will make you life much easier. I don’t recommend that you use anything bendy or flexible like mine coz it was very difficult to maintain the circular shape I wanted with it.
Also I thought it may be a good ides to crochet this for a bedside lamp and attach it to a Drum Lampshade
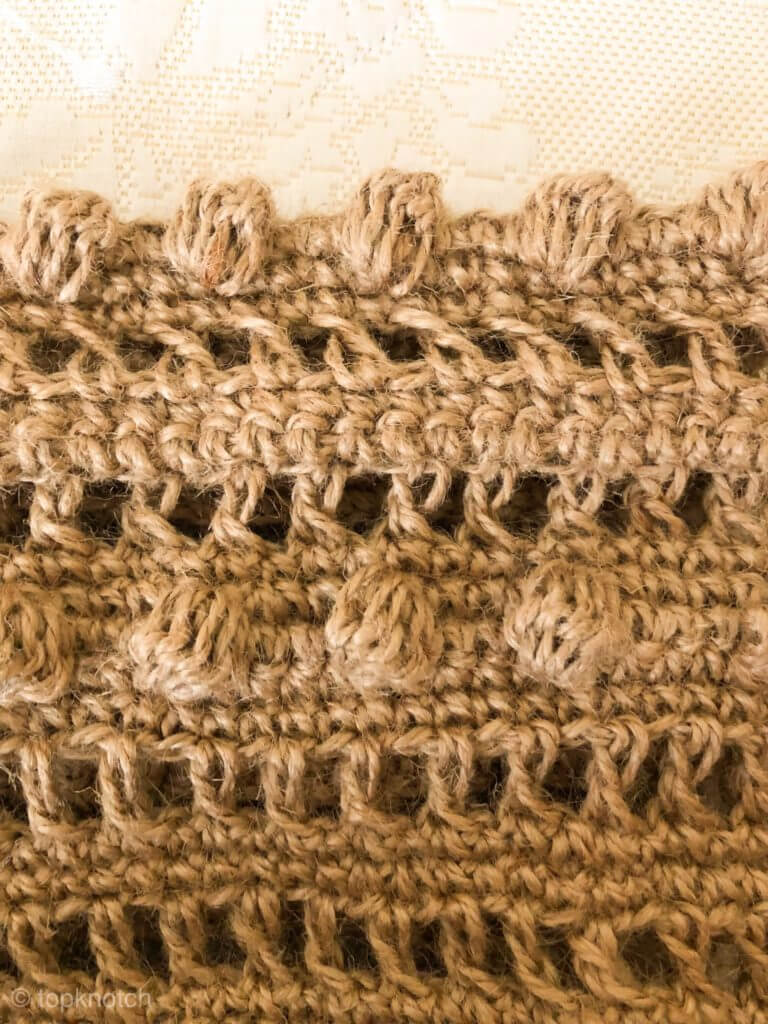
Stitches used in this pattern are:
Chain (ch), single crochet (sc). slip stitch (ss), double crochet (dc), bobble stitch.
Special Stitches:
Bobble stitch:
Yarn over, insert hook into the next stitch and pull up a loop. Yarn over, pull through two loops. as if you are doing the first part of a double crochet (DC) (2 loops on the hook);
repeat it until you have 5 HDC on your hook and 1 initial loop (total 6 loops on the hook);
yarn over and pull through all 6 loops (1 loop on the hook – pull pretty tight, so your bobble really pops up); and sc in the next stitch.
Gauge
You don’t need gauge for this project.
Skill level: Beginner
Abbreviations and Glossary (US Terms):
- ch – chain
- ss- slip stitch
- sc – single crochet
- dc – double crochet
- bo- bobble stitch
Notes:
- The pattern is written in us terms.
- You need to put a stitch marker at the last stitch of each round to mark the end of the round.
- Although I covered the cord with yarn as u see in the picture I removed it later since it may overheat so I don’t recommend you cover it.
- YOU SHOULD ALSO USE AN LED LAMP TO AVOID OVERHEATING!!!
Instructions:
Chain 120 or as manny stitches to fit you ring diameter
Slip stitch to the first chain so that you have a ring with the same diameter as your metal ring or better wider with 1-2 cm. (coz this yarn tend to shrink a little bit) mine was approximately 12 inches
Round 1. Sc in each chain around. Put a stitch marker in the last stitch (AS YOU GO UP EVERY ROUND PUT THIS STITCH MARKER IN EACH LAST STITCH)
Round 2. Sc in the next 4 stitches. Bobble stitch in the next stitch *1sc in the next 4 stitches, 1 bobble stitch in the next stitch * . Repeat from * to * till the end or the round
Round 3-4. Sc in each chain around. slip stitch to the first sc put a stitch marker
Round 5. Chain 2 and do one dc in the very first stitch. Put your stitch marker again. *Chain one skip one stitch. Do one dc in the next stitch*. Repeat from *to* to the end of the round after your last dc. Chain one skip the last stitch and slip stitch to the first stitch
Round 6-7. Sc in each chain around. slip stitch to the first sc. Put a stitch marker
Round 8. Repeat round 5 (Chain 2 and do one dc in the very first stitch and put your stitch marker again. *Chain one skip one stitch, do one dc in the next stitch* . Repeat from *to* to the end of the round. After your last dc chain one skip the last stitch and slip stitch to the first stitch)
Round 9-10. Sc in each chain around. slip stitch to the first sc put a stitch marker
Round 11. Repeat round 2 (Sc in the next 4 stitches. bobble stitch in the next stitch *1sc in the next 4 stitches, 1 bobble stitch in the next stitch. * Repeat from * to * till the end or the round)
Round 12-13. Sc in each chain around. slip stitch to the first sc put a stitch marker
Round 14. Repeat round 5(Chain 2 and do one dc in the very first stitch and put your stitch marker again. *Chain one skip one stitch, do one dc in the next stitch*. Repeat from *to* to the end of the round after your last dc chain one skip the last stitch. Slip stitch to the first stitch)
Round 15-16. Sc in each chain around. slip stitch to the first sc put a stitch marker
Round 17. Repeat round 5 (Chain 2 and do one dc in the very first stitch and put your stitch marker again. *Chain one skip one stitch, do one dc in the next stitch*. Repeat from *to* to the end of the round after your last dc chain one skip the last stitch. Slip stitch to the first stitch)
Round 18-19. Sc in each chain around. slip stitch to the first sc put a stitch marker
Round 20. Repeat round 2 (Sc in the next 4 stitches. bobble stitch in the next stitch *1sc in the next 4 stitches, 1 bobble stitch in the next stitch * repeat from * to * till the end or the round)
Round 21. Sc in each chain around. slip stitch to the first sc.
Joining the lampshade to the metal ring
Now we are done with the big bulk we have to join it to the metal ring. As shown in the video bellow.
If You have any suggestions regarding how to hang this other than the method I used. leave it down in the comments section bellow.
your last step is to insert your pendant light cord and hang your new lamp shade !
I hope you liked this pattern. If you made one, share it with me on Instagram. I would love to see how you adapted it and what variations you made 🙂
Take care and happy crocheting.
Check other patterns with this yarn:
Crochet Raffia waist Bag- Free pattern and Photo tutorial
Crochet Beach Bag- Free pattern and Photo tutorial
I hope you liked this pattern. If you made one, share it with me on Instagram. I would love to see how you adapted it and what variations you made 🙂